Updated Classic Crochet Cape
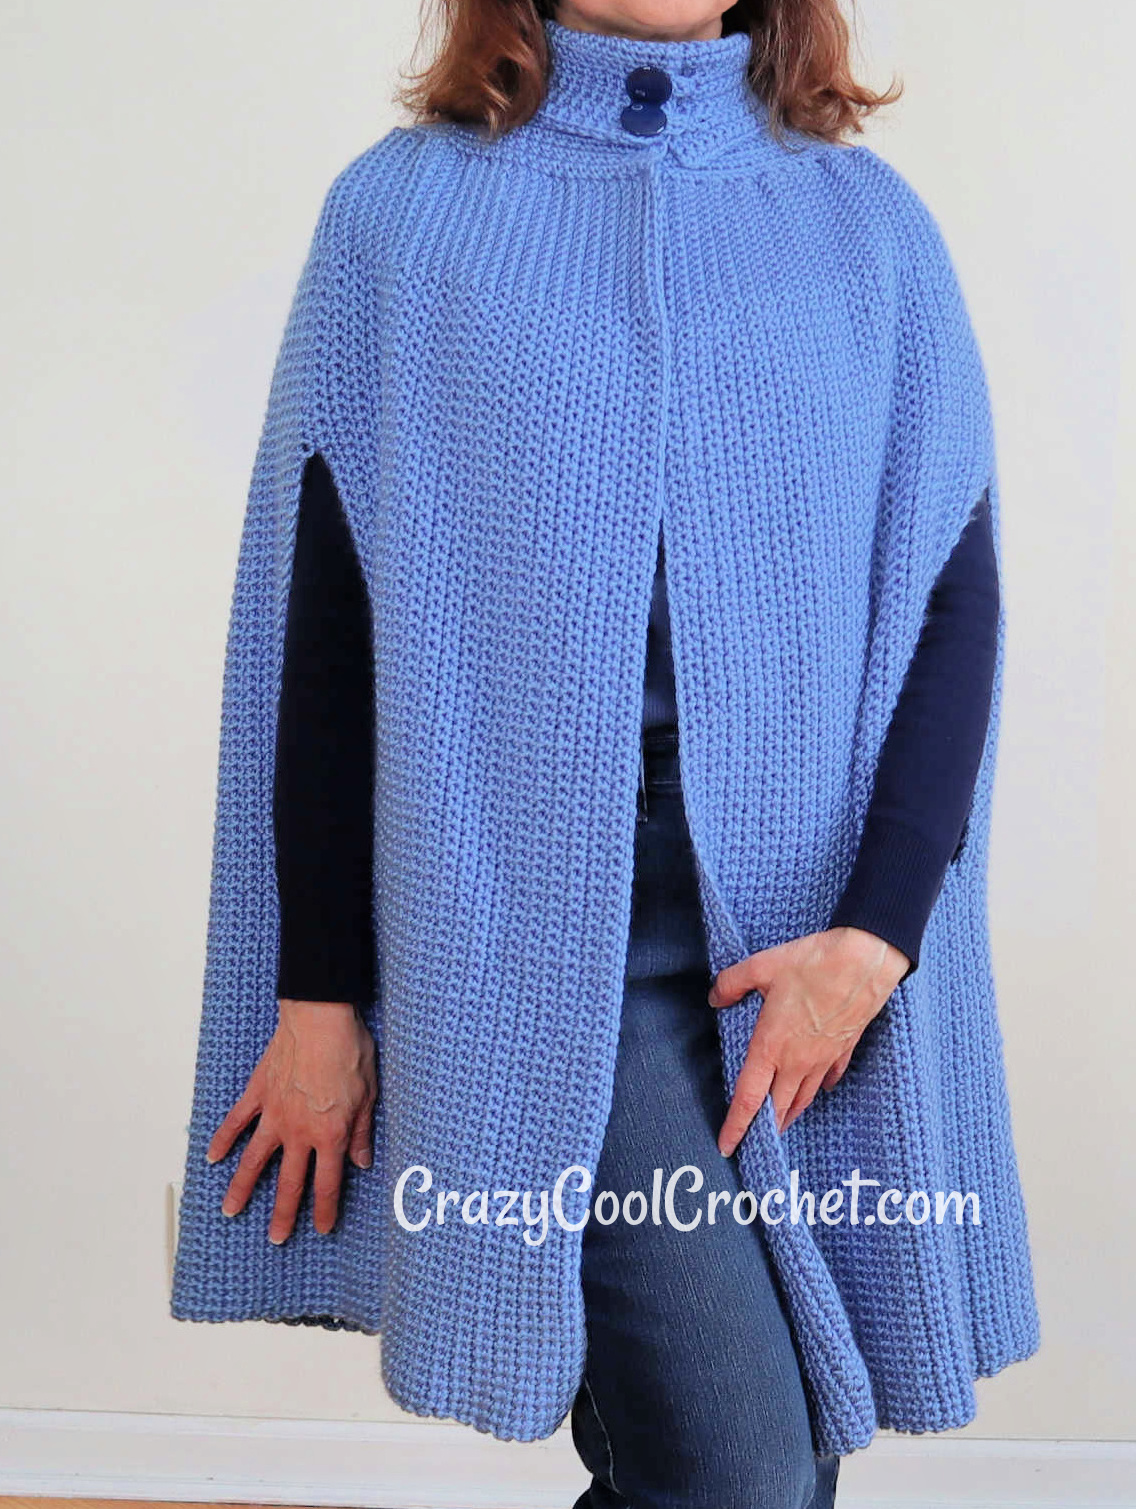
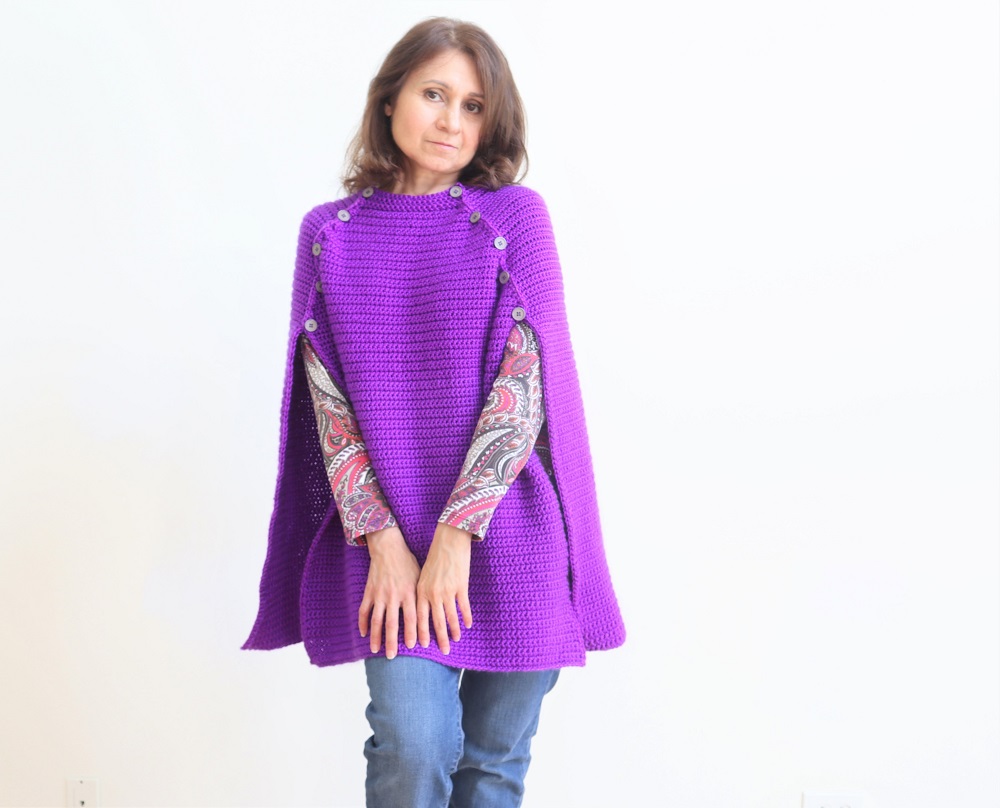
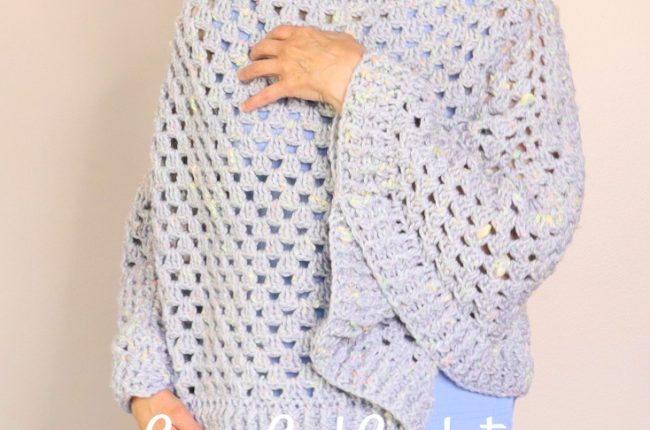
Gorgeous, updated classic crochet CAPE with UPDATED styling. Capes have made a comeback in a big way! So easy to wear. Dress up. Dress down. Show off your crochet talent! This uses the easiest of stitches and readily available medium weight yarn. Enjoy!
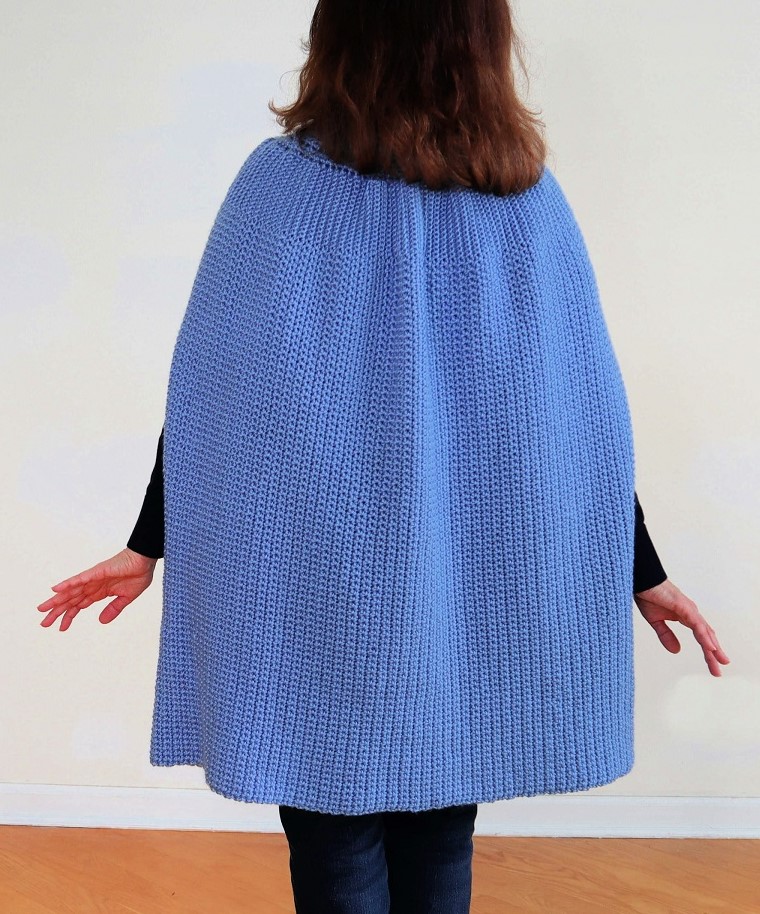
This crochet cape features an open front, optional turtleneck style collar with buttons, and convenient arm slits.
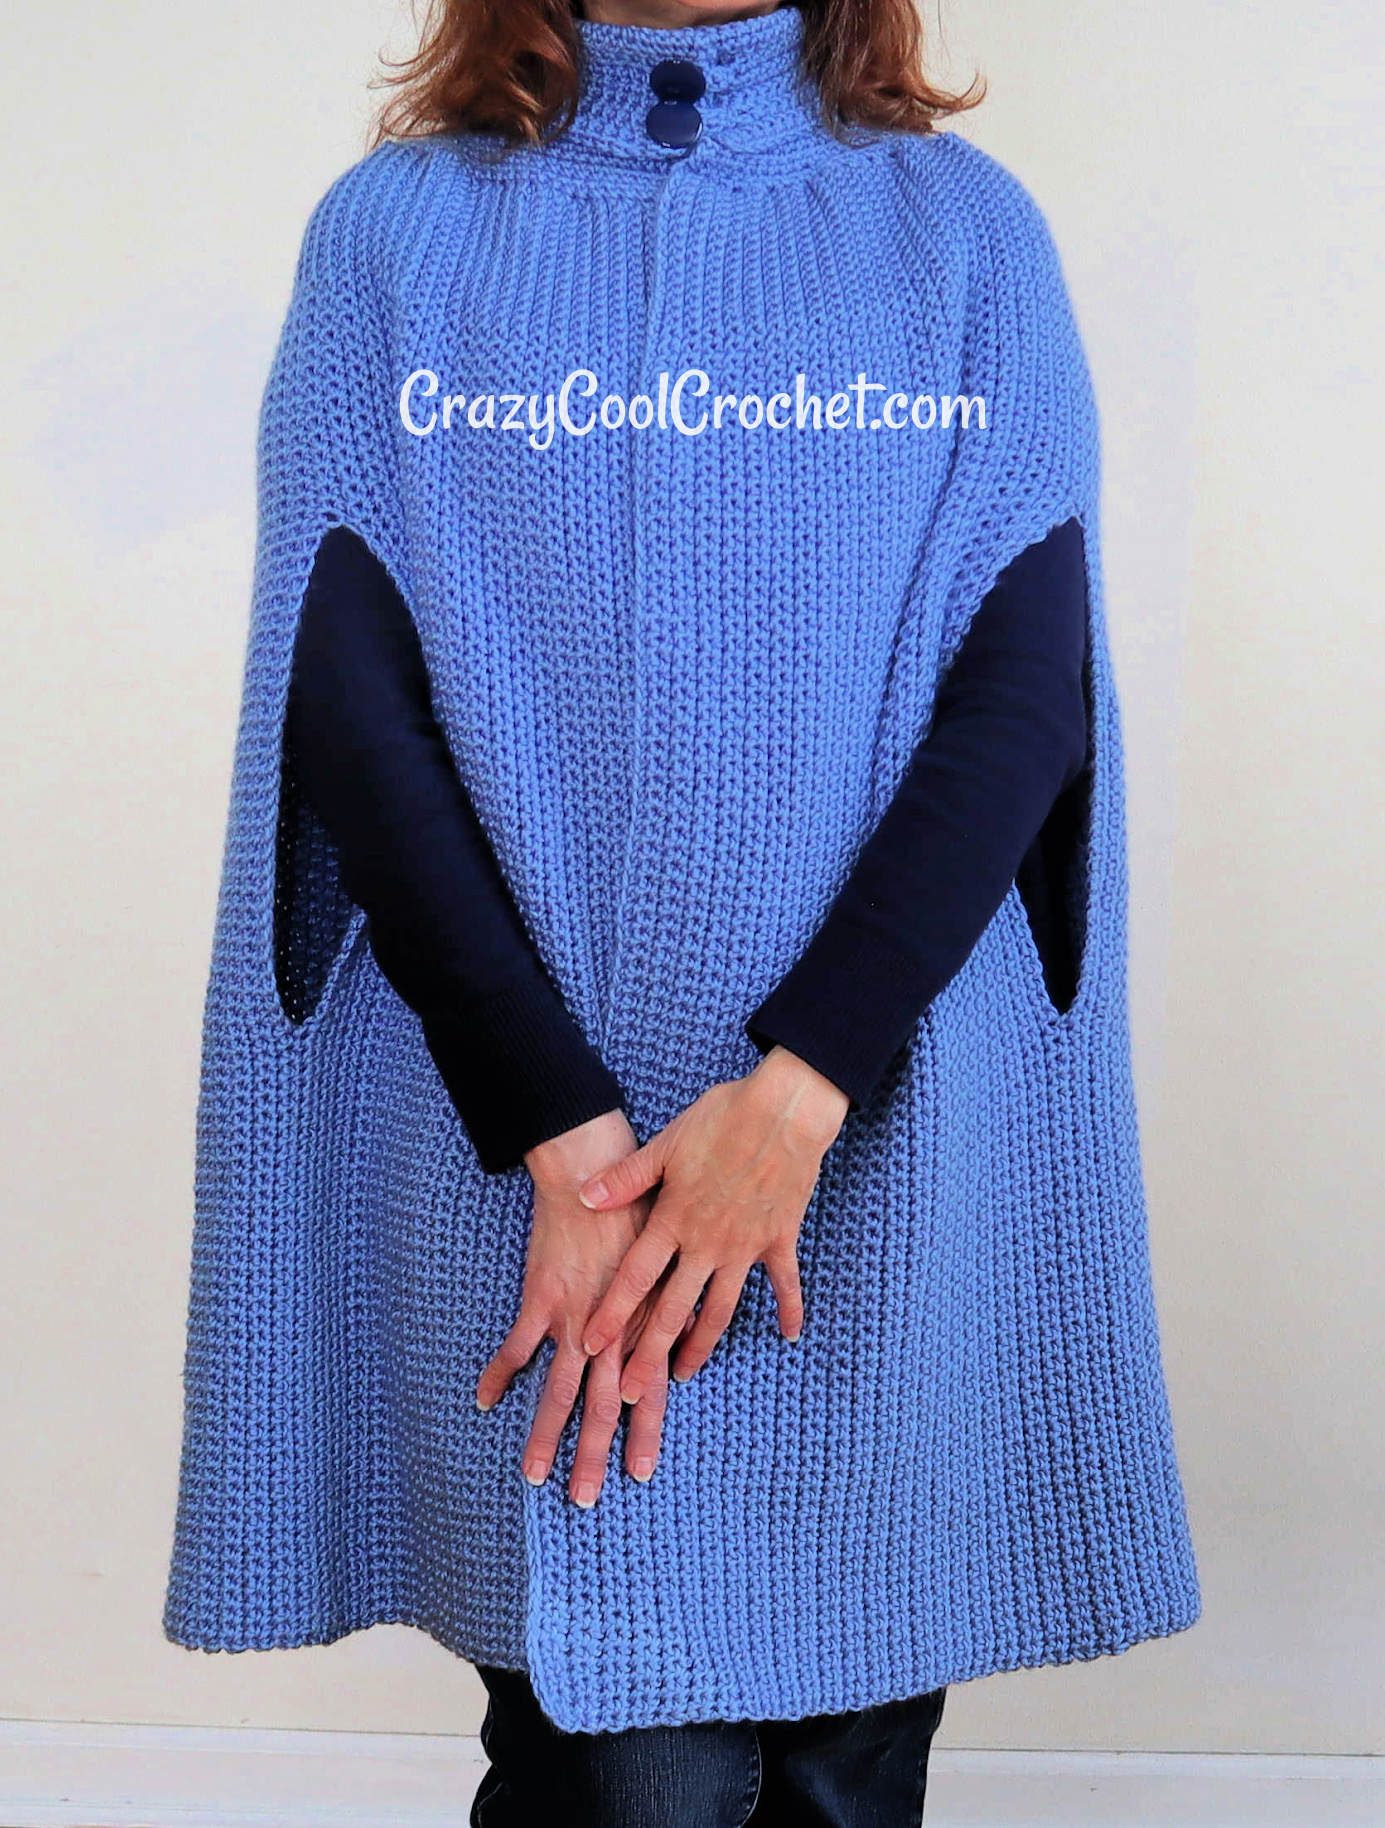
This classic crochet cape is worked in one panel with no increases or decreases. Easy! The pattern below is available for sizes Small through 4X.
Crochet Cape Video Tutorial
Please view the Updated Classic Crochet Cape on the YouTube platform. This way you can give a thumbs up, comment and subscribe. This is the best way that you can support my crochet work (most of which is provided at no cost to you!). These designs, patterns and videos take quite a LOT of time, effort and work to produce. This is still my only source of income (yikes!) so I rely on viewers/readers/buyers, like you, so I can continue to create new designs for YOU. I love what I do so much and I appreciate you all more than I can express!!!
Crochet Cape Etsy Pattern
The printable version of this pattern is available here: CrazyCoolCrochetUS.etsy.com
This post contains affiliate links which means I may earn a small commission from purchases made through these links at no additional cost to you.
CrazyCoolCrochet.com is a participant in the Amazon Services LLC Associates Program, an affiliate advertising program designed to provide a means for sites to earn advertising fees by advertising and linking to Amazon.com
Photos to follow. In the meantime, please view the video tutorial above for visuals.
Size Small
Instructions for larger sizes will be in parenthesis ( ) with sizes separated by commas (Med, Lg/XL, 1X/2/X, 3X/4X). Purchase additional yarn as needed, approximately 1 – 3 extra skeins as sizes increase.
NOTE: Length is determined by foundation chain. Detail will be in instructions below. Width is determined by the number of rows. Detail will be in the instructions below.
NOTE 2: All sizing is approximate. Tension, yarn used and hooks used play a huge factor in the size outcome. Adjust as needed.
Materials:
#4 weight Yarn Bee Soft Secret (Hobby Lobby); 32 ounces/1575 yards/Color Light Denim

Crochet hook size H/5 mm and G/4.25mm
Button(s) (your preference as to what kind)
scissors
Gauge: 15 sc = 4 inches , 18 sc rows = 4 inches
Dimensions Size Small: (1) Front panel width = 11 inches; Back Panel width 31 inches
Top to bottom from neck to bottom (not including collar) = 28 inches
Abbreviations:
Ch = chain
BLO = back loop only
Sc = single crochet
Sk = skip
SL = slip stitch
Sp = space
St = stitch
Scdec = single crochet decrease
YO = yarn over
NOTE: photos appear above the corresponding row.
NOTE 2: Single crochet decrease: Insert hook in sp to begin a sc for 2 loops on hook; insert hook in next sp to begin a sc; 3 loops on hook. YO, pull through all 3 loops. This forms a decrease.
BODY (includes front and back)
Foundation chain determines length from neck (not including collar) to bottom.
101 chains = 28 inches
109 chains = 30 inches
117 chains = 32 inches
125 chains = 34 inches
Ch 101 (109, 117, 125) with H/5mm hook
Row 1: H/5mm hook BLO sc in 2nd ch from hook and ea ch across. 100 sc’s (108, 116, 124). Ch 1 Turn
Row 2: With G/4.25 mm hook BLO sc in 1st 15 (17, 19, 21) st’s; with H/5mm hook sc in remaining st’s. 85 sc’s (91, 97, 103) Ch 1 Turn
NOTE: For this main panel you will always use the larger hook for the regular sc’s and the smaller hook for the BLO sc’s.
Row 3: H/5mm 85 sc’s (91, 97, 103); G/4.25 BLO sc in last 15 (17, 19, 21) st’s; Ch 1. Turn
Row 4: Repeat Row 2
Row 5: Repeat Row 3
Continue in pattern repeating rows 2 and 3 until you complete 48 (56, 72, 96, 120) rows.
NOTE: Sizing is as follows SM (Med; Large/XLarge; 1X/2X; 3X/4X)
Row 49 (57, 73, 97, 121):Armhole opening, Work according to your chosen foundation chain number. If you have been working with…
100 sc’s = sc in 1st 40 st’s; sk next 30 st’s; ch 30; insert hook into next st for a sc; continue for total of 15 sc’s; then work 15 BLO sc’s. Ch 1. Turn
108 sc’s = sc in 1st 44 st’s; sk next 30 st’s; ch 30; insert hook into next st for a sc; continue for total of 17 sc’s; then work 17 BLO sc’s. Ch 1. Turn
116 sc’s = sc in 1st 42 st’s; sk next 36 st’s; ch 36; insert hook into next st for a sc; continue for total of 19 sc’s; then work 19 BLO sc’s. Ch 1. Turn
124 sc’s = sc in 1st 46 st’s; sk next 36 st’s; ch 36; insert hook into next st for a sc; continue for total of 21 sc’s; then work 21 BLO sc’s. Ch 1. Turn
Row 50 (58, 74, 98, 122): Continue working in pattern, entering sc’s under the ch according to the number of st’s skipped in previous row. 30 (30, 36, 36). Then work sc’s in remaining st’s. Total number of st’s worked should be the same as the number of st’s you have been working with. 100 (108, 116, 124)
Continue in pattern until you reach Row 183 (215, 261, 321, 387). On this row work 2nd armhole the same as the 1st armhole.
Continue in pattern until you complete 231 (271, 333, 417, 507) rows in total. Ch 1. Do not turn. Do not cut off yarn. You should have ended with right side facing you and on a BLO row.
COLLAR
Turn panel so the BLO rows are facing you. You are working along the long neck edge (BLO rows).
Row 1: ScDec over the 1st two sp’s (working into the rows of the BLO rows); *ScDec over the next two sp’s*. Repeat from * to * to end of row. Ch 1. Turn
Row 2: Sc in in st. Ch 1. Turn
Row 3: Sc in 1st 15 (17, 21, 27, 33) sp’s; work *ScDec’s over the next 2 sp’s; sc in next sp*. Repeat from * to * until you reach the last 15 (17, 21, 27, 33) sp’s. Sc over those last sp’s. Ch 1. Turn
NOTE: It is ok to work an extra dec or extra sc so that you are able to work the last sc’s of the row in the correct st count.
Row 4: Sc in ea sp. Ch 1. Turn
Row 5: Repeat Row 3.
Row 6 – 10: Sc in ea sp. Ch 1. Turn
Row 11: Sc in 1st 20 (22, 26, 32, 38) sp’s; work *ScDec’s over the next 2 sp’s; sc in next sp*. Repeat from * to * until you reach the last 20 (22, 26, 32, 38) sp’s. Sc over those last sp’s. Ch 1. Turn
Row 12: Sc in ea sp. Ch 1. Turn
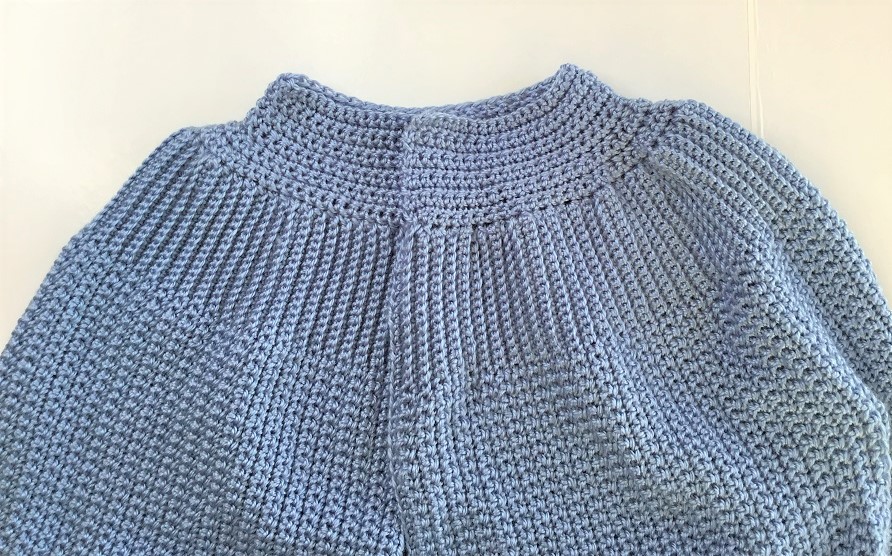
NOTE: If you don’t want to work the full fold over turtleneck collar you may stop with Row 11 (or to your preferred length). Add button(s) following instructions below. If you want to make the full turtleneck collar continue in pattern.
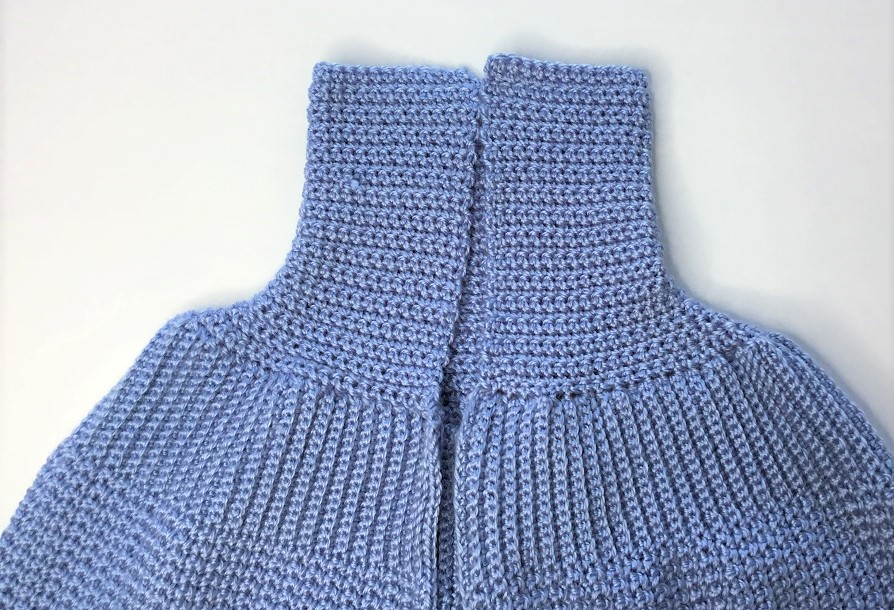
Row 13 – 32: Repeat Row 12. Cut off yarn after the last row.
BUTTONS
Fold collar down and determine placement of button(s). Depending on the type of button you are using, you might want to attach with a regular needle and thread, sewing through both layers. Again, depending on the type of buttons used, you can create loops to loop around the button for closure.
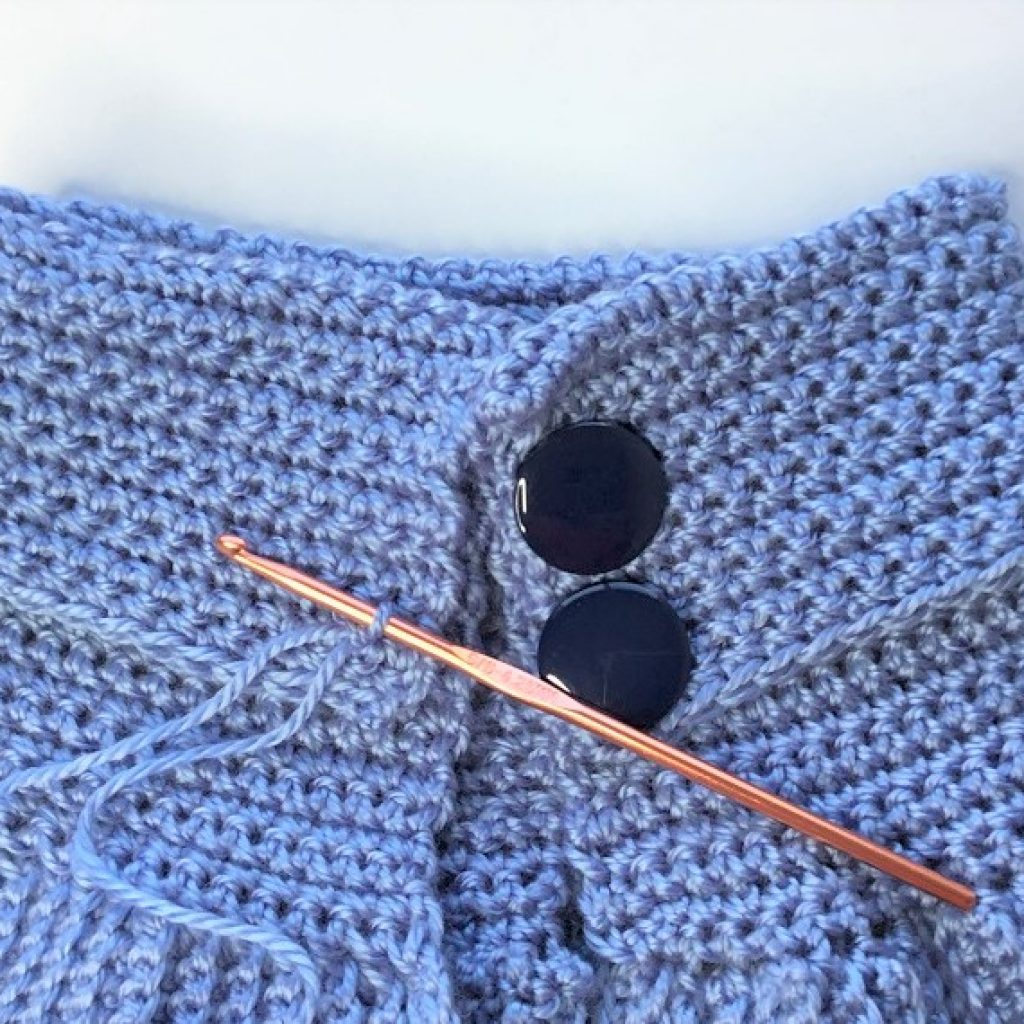
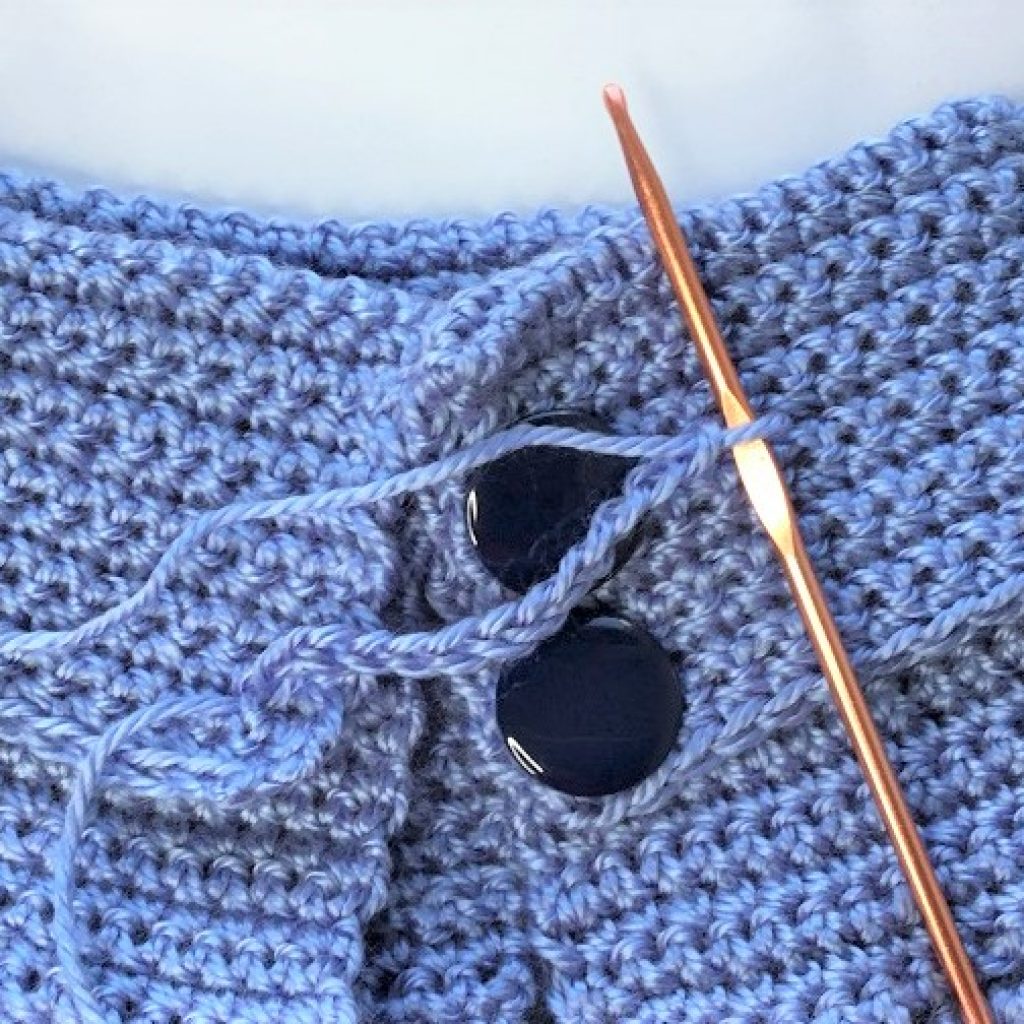
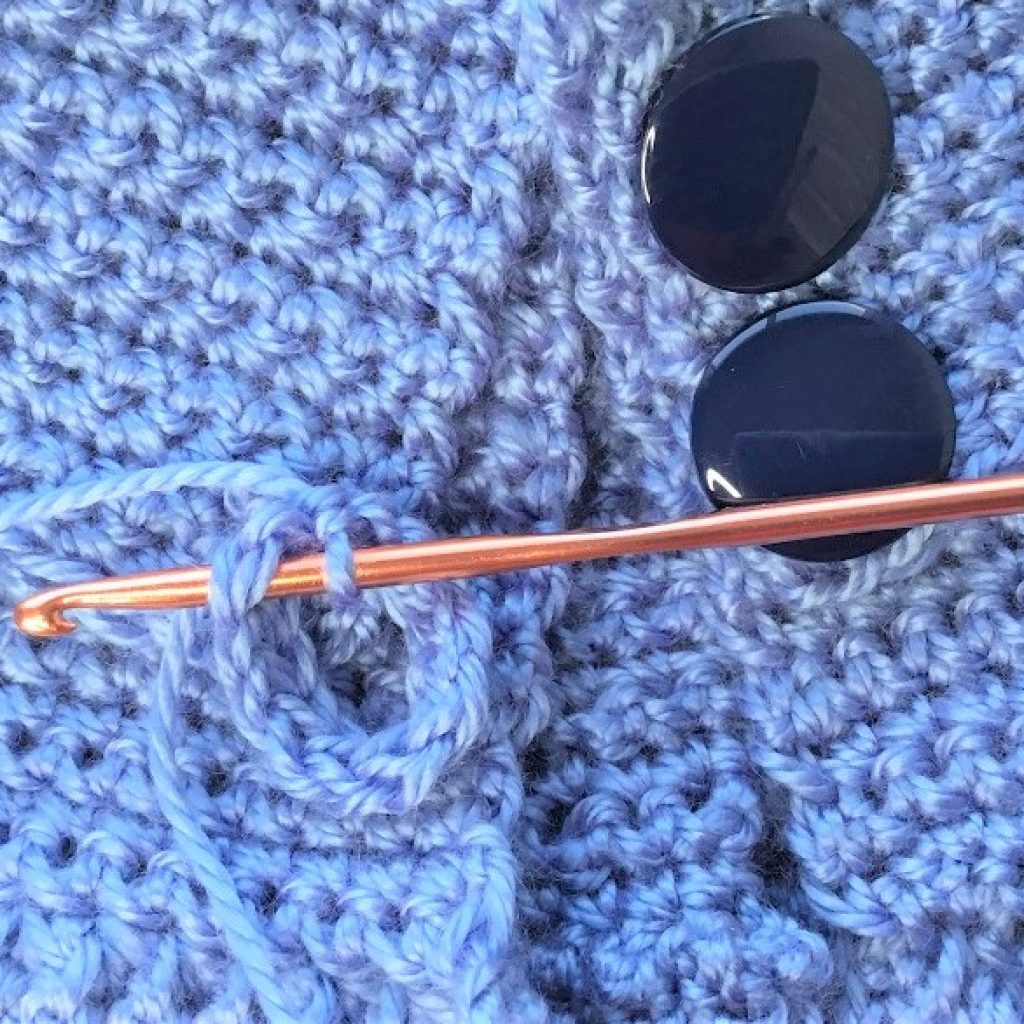
Loop: Attach yarn with a chain on the opposite side of the collar spaced according to the placement of the button. Depending upon the size of the button, chain approximately 13 chains (adjust as needed). Sl st into ea ch. Join the loop to itself with a sl st into the first ch of the loop. Ch 1 to lock it in. Attach with a sl st into the beginning sp of the collar (where you began the chain).
Copyright © 2021 Sylvia Talo You may sell items made from my patterns. Please include a link or reference to my shop CrazyCoolCrochetUS.etsy.com . Pattern and photos are copyright protected; they may not be reproduced, redistributed, or displayed publicly in any way.
You might also enjoy this Crazy Cool Crochet Cape:
Click photo to view pattern.
I want to begin making the Classic Crochet Cape. I want to make it longer, but I don’t want the arm slips to be too low. Should I begin and end the chain where it would be for a medium sized cape and add stitches below?