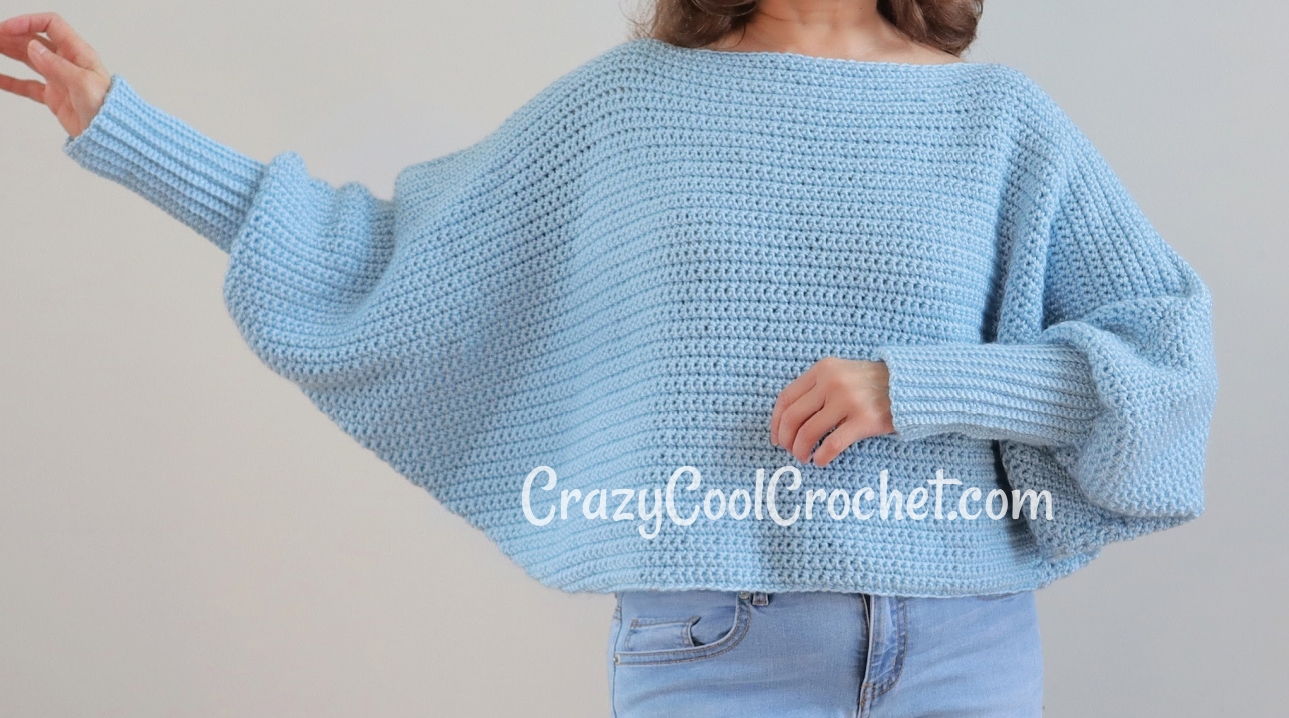
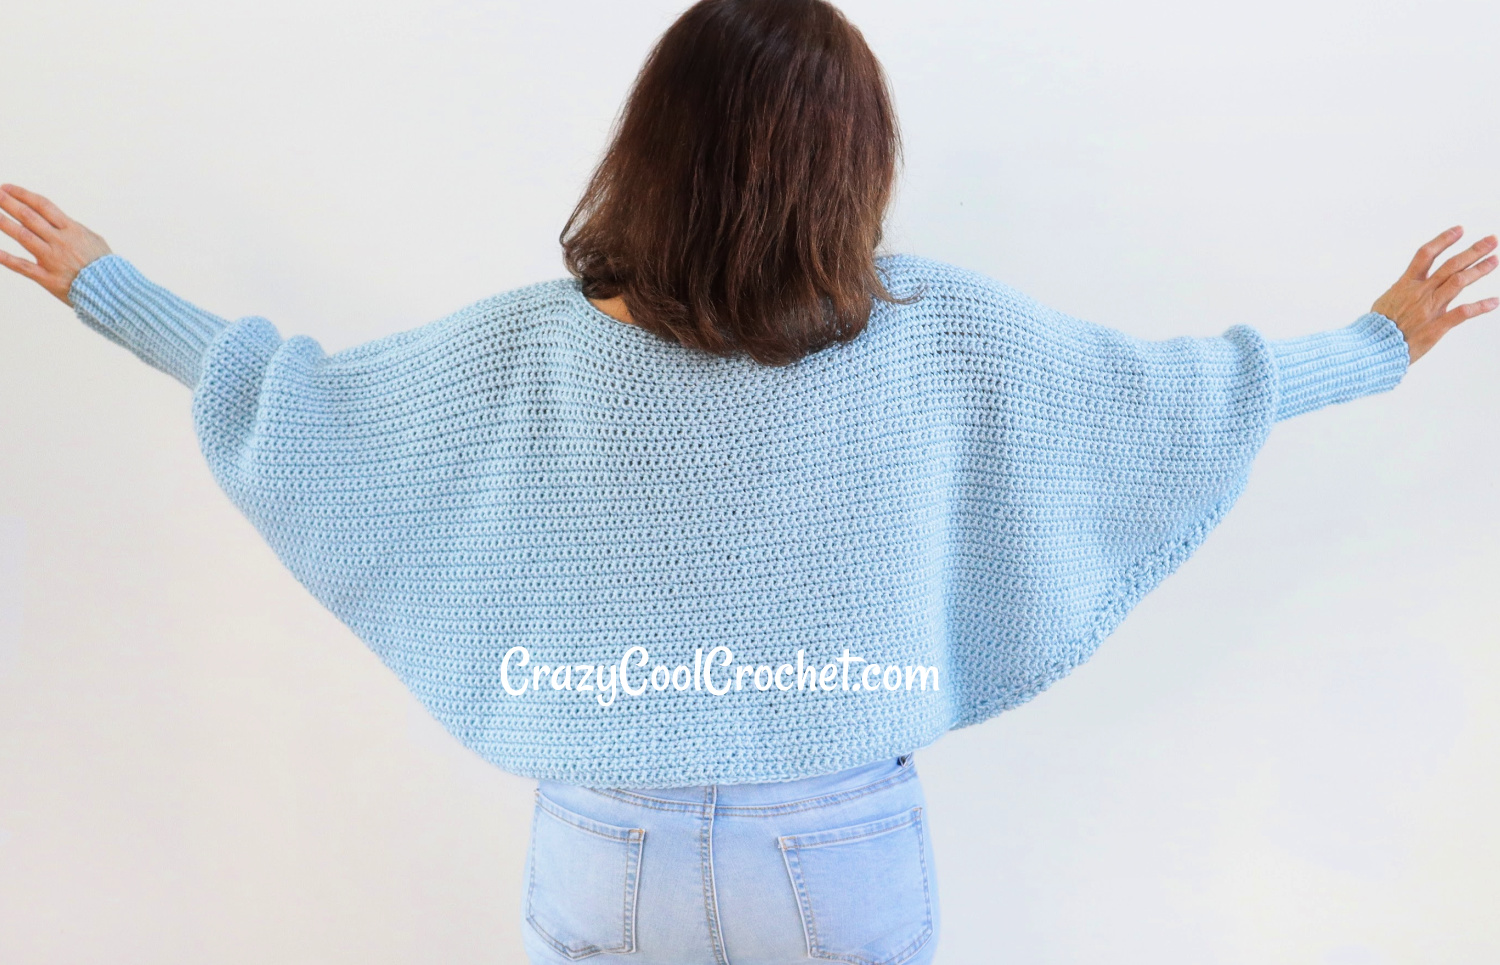
How cute is this Crochet Bat Wing sweater? SUPER CUTE! And so easy! Simple pattern works up fast.
Use the suggested yarn (a link for a comparable yarn is included in the materials list below) for a soft, comfortable drape.

A simple single crochet is used for the entire pattern. This ensures a lovely, sleek silhouette that adds to the stylish design. I did not want the stitch to be the focus. For this particular design, the shape is the focus. This results in a gorgeous crochet bat wing sweater.
PRINTABLE PATTERN :
Pattern for this amazingly EASY Crochet Bat Wing Sweater is HERE.
Crochet Bat Wing Sweater
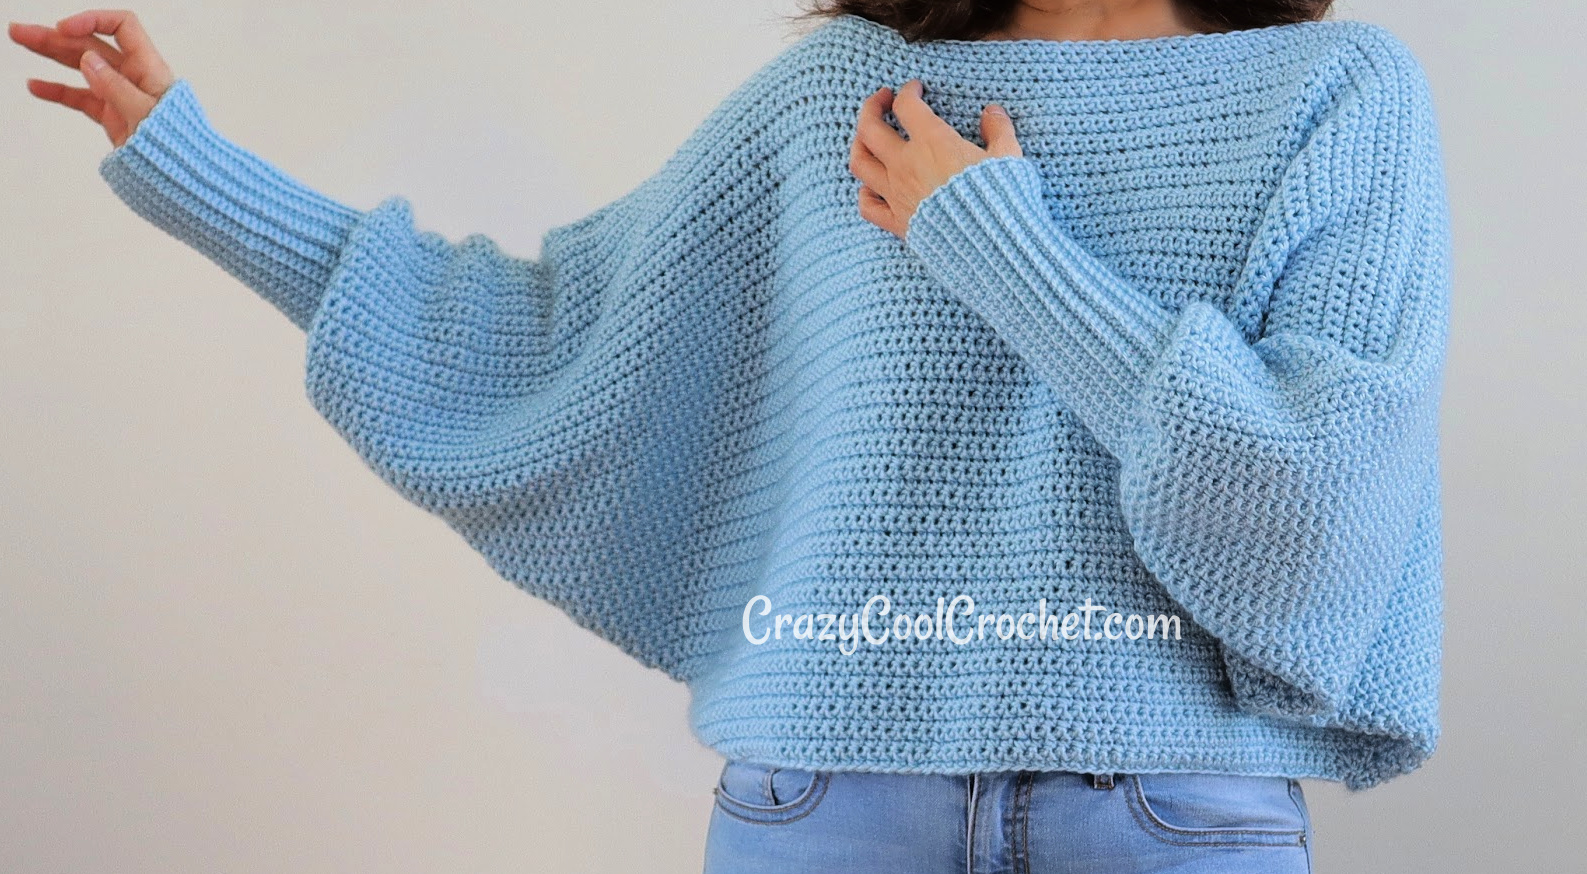
The wide sleeves and long, slim cuffs really complete the look!
Crochet Wing Sweater Video Tutorial
As always, I ask that you watch the video on the YouTube platform so you can interact with me by commenting, giving a Thumbs Up and subscribing. Click the little YouTube button on the bottom of the video below. All of this, the videos and the patterns are happily provided to you at no cost. If you would like to support my work I would very much appreciate the purchase of the printable patterns available at my Etsy shop: CrazyCoolCrochetUS.etsy.com THANK YOU SO MUCH!
Size Small
Instructions for larger sizes will be in parenthesis ( ) with sizes separated by commas (Med, Lg, XL, 1X, 2 X). Some sizes will have custom notes. Purchase additional yarn as needed, approximately 1 – 3 extra skeins as sizes increase.
All sizing is approximate. Tension and yarn used play a huge factor in the size outcome. Adjust as needed.
This post contains affiliate links which means I may earn a small commission for purchases made from these links at no additional cost to you.
Crazy Cool Crochet is a participant in the Amazon Services LLC Associates Program, an affiliate advertising program designed to provide a means for sites to earn advertising fees by advertising and linking to Amazon.com
Materials:
#4 weight Yarn Bee Soft Secret (Hobby Lobby); 24 ounces/1200 yards/Color Sky Blue

Crochet hook size G/ 4.25 mm (optional F/3.75 for cuffs)
Yarn needle
scissors
Measuring tape
Stitch markers (2) or contrasting yarn
Gauge: 10 sc = 2.5 inches , 8 sc rows = 2 inches
Dimensions Size Small: Front panel shoulder to bottom = 17 inches; width cuff to cuff 59 inches; bottom width below waist (one panel) 21 inches
Abbreviations:
Ch = chain
BLO = back loop only
Sc = single crochet
Sk = skip
Sl St = slip stitch
Sp = space
St = stitch
YO = yarn over
Please watch the video tutorial above for visual instruction.
MAIN PANEL (make 2)
Ch 71 (81, 87, 93, 103, 113)
Row 1: Working in BLO, sc in 2nd ch from hook and ea ch across. 70 sc’s (80, 86, 92, 102, 112). Ch 1 Turn
Row 2 – 41 (2 – 49, 2 – 57, 2 – 57, 2 – 65, 2 – 65): 2 sc in 1st sp; sc in ea sp to the last sp; 2 sc in last sp. Ch 1 Turn
You are increasing on ea side of ea row.
Row 42 – 65 (50 – 69, 58 – 73, 58 – 73 , 66 – 77, 66 – 81): Sc in ea sp. Ch 1 Turn
Cut off yarn at end of last row.
ATTACH PANELS
With wrong sides facing up, place panels on top of each other to seam at shoulders.
Determine the width of the neck opening (suggest 8 – 9 inches) and place stitch markers. Using yarn needle and length of yarn, use a whip stitch (or your preferred method) to seam from edge to neck opening. Repeat for opposite side.
Similarly, attach sides from bottom and along the sleeve bottoms.
CUFFS
Working on the right side, attach yarn with a chain at seam of sleeve opening. Then sl st in the 1st sp and in ea sp around. The goal is to slightly tighten up the opening so the opening is an appropriate size for the forearm/wrist width. If needed, sk a space here and there as you are sl stitching. At end of round, sl st into the 1st sl st. Do not remove hook.
Work 33 chains. (This will give you a cuff approx 7 – 7.5 inches long; add or remove chains for preferred length.)
Row 1: Sc in 2nd ch from the hook and ea ch across.
When you reach the “home row” (along the sleeve opening) sl st into the 1st sp (working under the sl stitch on the home row).
Row 2: Turn the row of sc’s toward you. Working in BLO for all sc rows going forward, sc in ea sc. Ch 1. Turn
Row 3: Sc in ea sp. When you reach the “home row” (along the sleeve opening) sl st into the 1st sp (working under the sl stitch on the home row).
Row 4: Repeat Rows 2 and 3 around the sleeve opening.
NOTE: Use your discretion as you are working these rows. You may need to skip a space here and there (Row 3) as you are working sl st’s along the home row to create the required width of the cuff.
Ensure that you work your last row at the home row. Work your last sl st.
Taking care not to lose your loop of yarn, turn sleeve wrong side out to seam the edges.
Use sl st’s to seam closed. Cut off yarn leaving a tail to weave in.
Repeat for opposite side.
Copyright © 2022 Sylvia Talo You may sell items made from my patterns. Please include a link or reference to my shop CrazyCoolCrochetUS.etsy.com . Pattern and photos are copyright protected; they may not be reproduced, redistributed, or displayed publicly in any way.
You May Also Like


Hi, I had asked you previously if I wanted to make this Bat Wing sweater longer, what I should do, and you had said to add 8 increase rows. I am ready to make the next rows where I just do sc in each stitch across, do I increase these rows by adding 8 more rows also?? I’m so confused 😐. Thanks for your help, trying to make for Christmas present.
Kathy M.
Adding more rows to the regular sc rows near the top will make it larger overall rather than just longer on the bottom.
Hope this helps!
Sylvia
Yes, thank you. Hope you have a blessed Thanksgiving 😊
Thank you – just what I’m looking for!
Can I check how much yarn is required for the “M” size?
Hello Mary,
So sorry for the late response.
You would about 1400 yards or 27 ounces.
Sylvia
So if we were wanting to make this sweater longer but keep it a size small, how would we go about doing that?
Hi Emma,
Add 8 increase rows to make this longer.
Sylvia
Thank you! This means for example for small size, that we have to make increase rows from 2nd to 49 (instead from 2nd to 41)?
Thank you ♥️