You will find the Crochet Bucket Hat free pattern below. This is the most unique bucket hat design you will find. You’re welcome. LOL!
70’s Inspired Crochet Bucket Hat
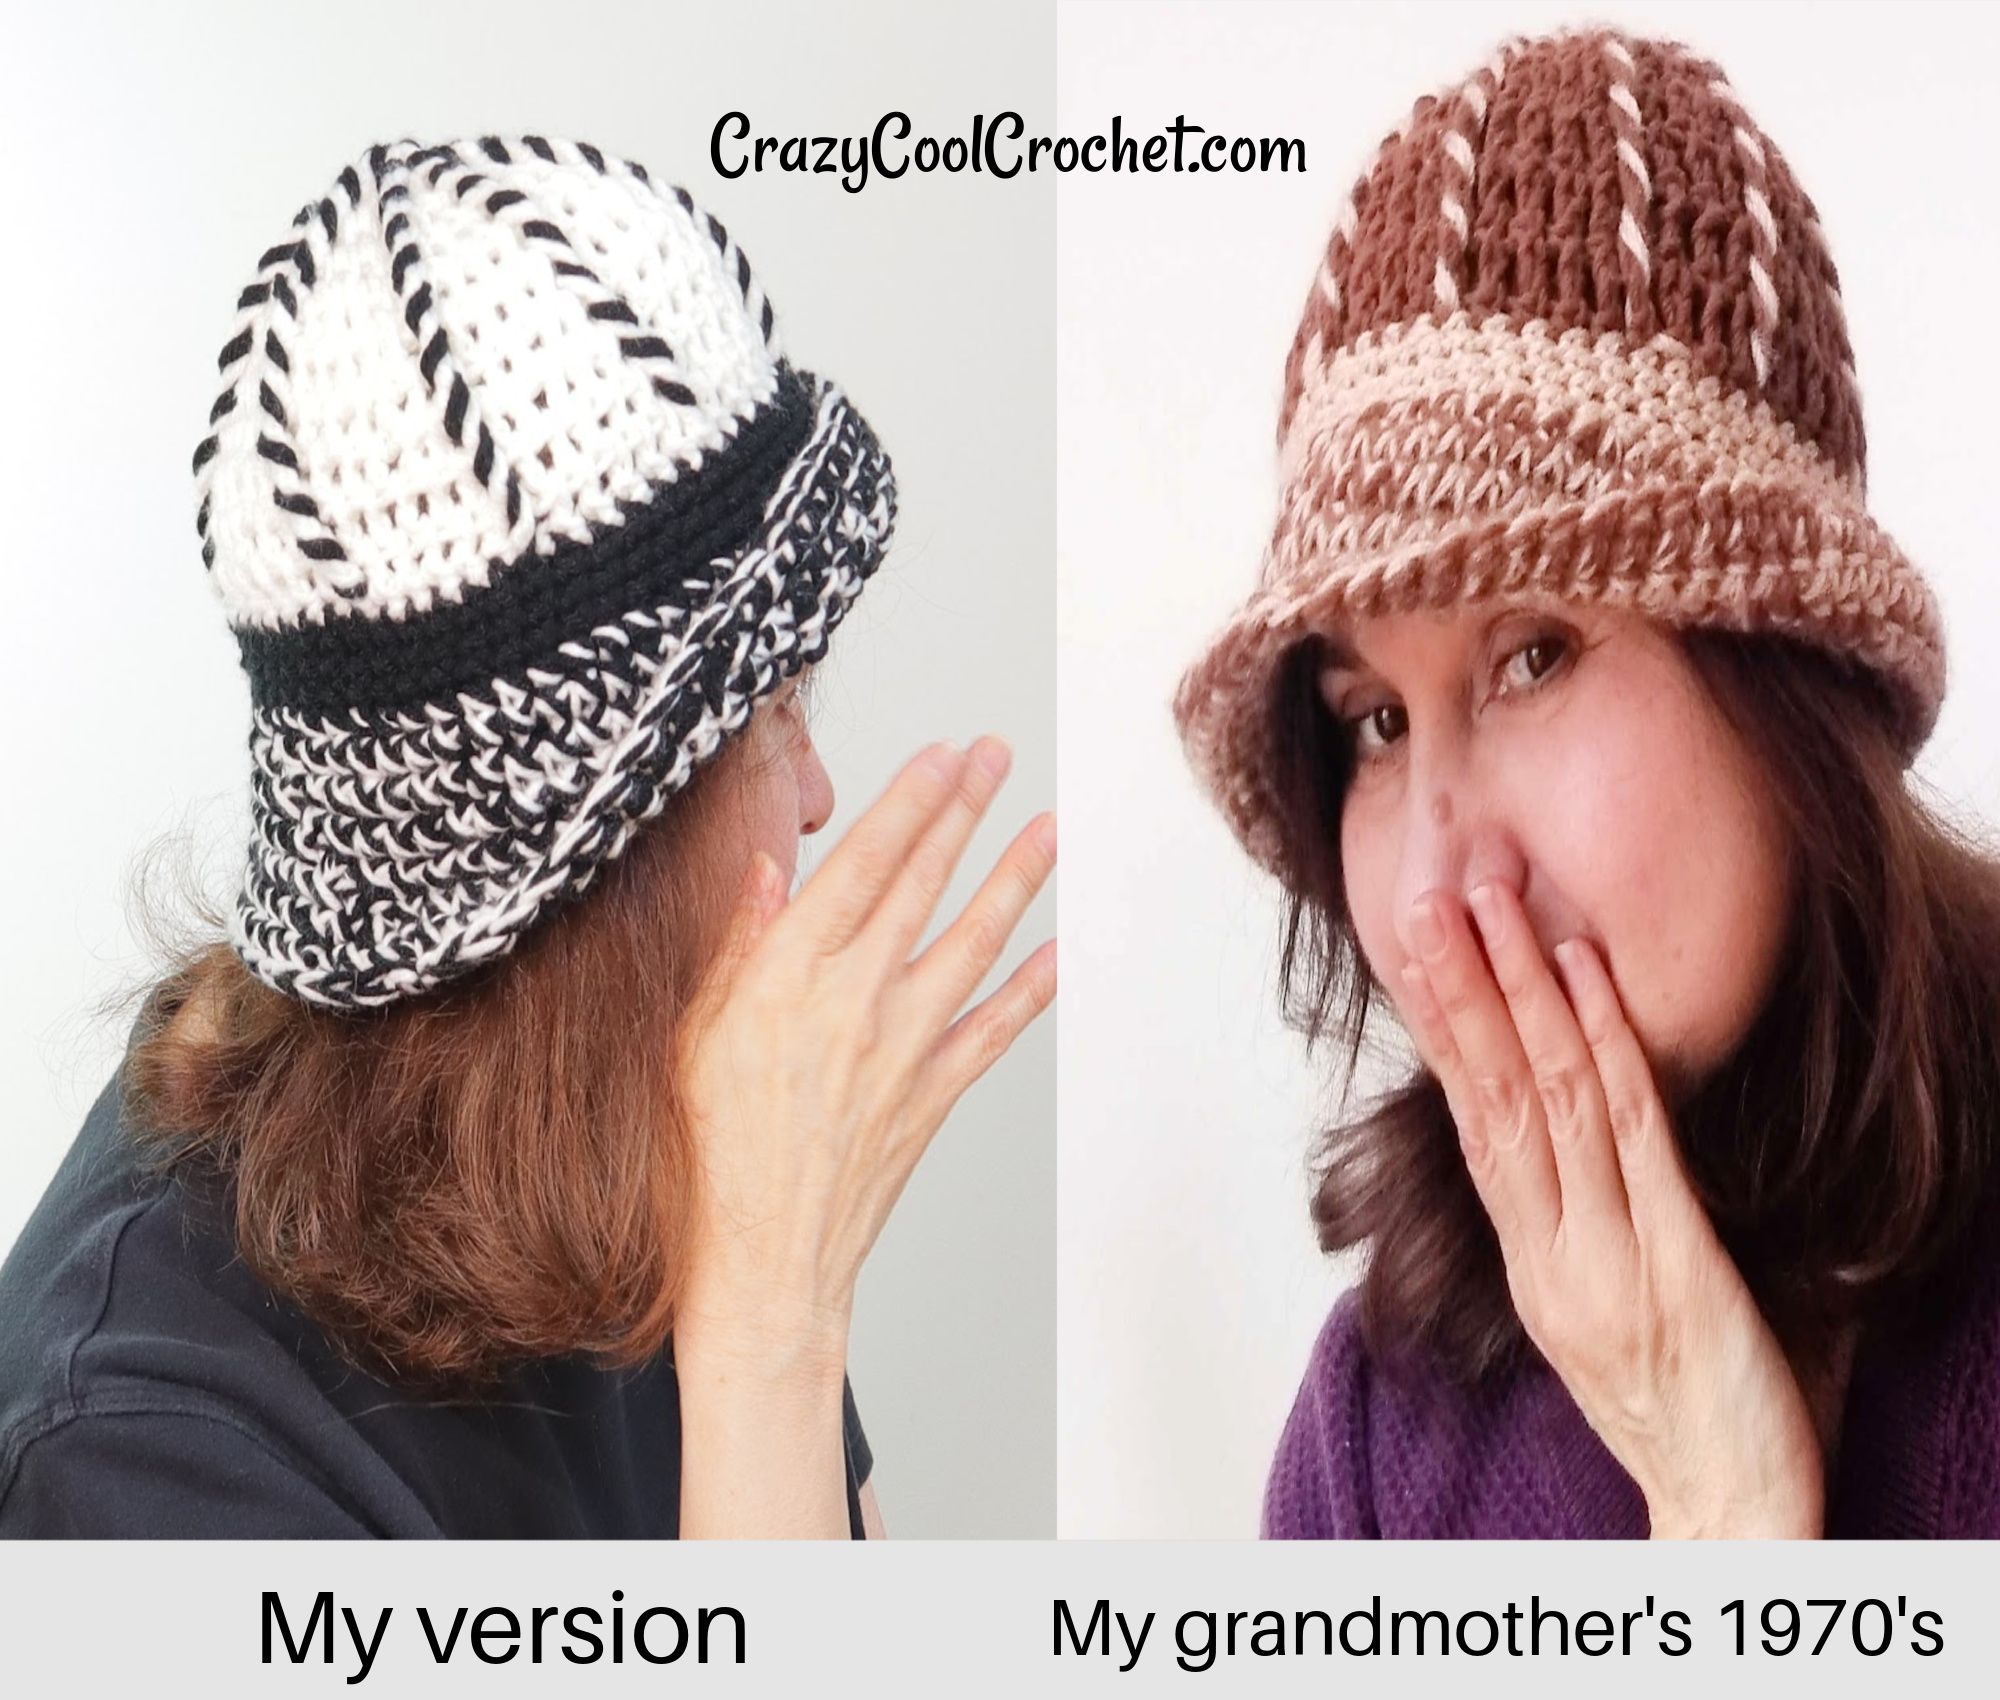
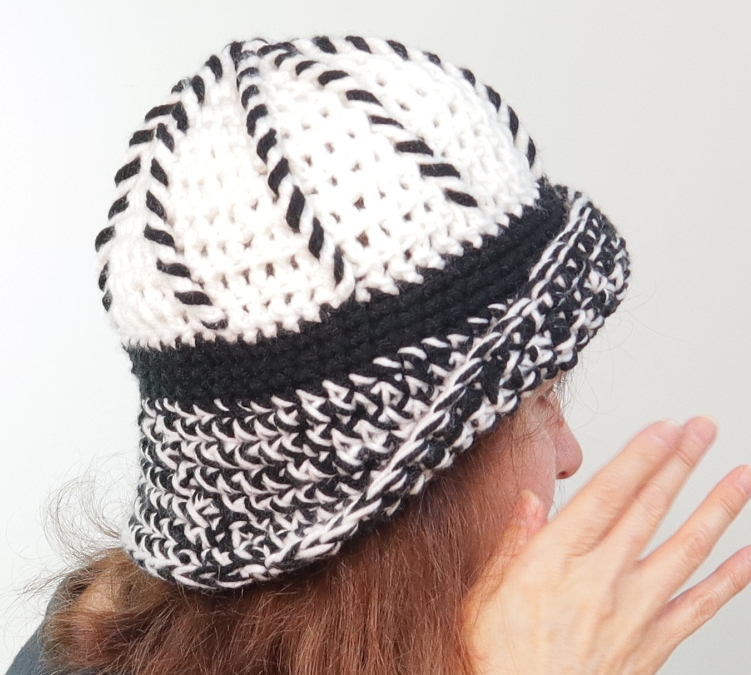
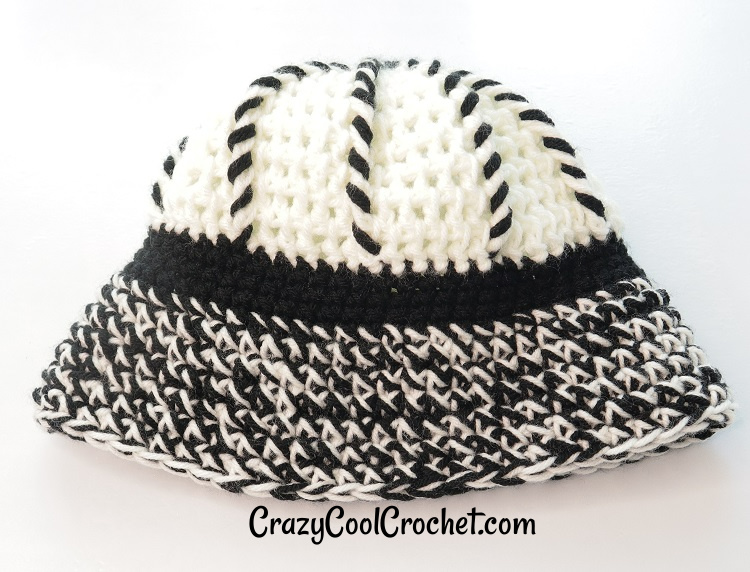
This crochet bucket hat was designed by my grandmother in the 1970’s. My mom recently found it and gave it to me to recreate. This just blows my mind that decades later I am able to work from my guelita’s original hat to make my own version. I actually cried as I working this.
Crochet was my grandmother Conception’s full time profession as it is now mine. She’s been gone 30 years now but her legacy continues.
Crochet Bucket Hat Video Tutorial
You will find the free pattern below the video. Here is the link to the YouTube video. Directing you to YouTube to watch allows you to leave a comment, give a thumbs up, and if you would like to support my work, you can now give a Thanks by way of a “donation”. I like to call it a tip jar. Thankyouverymuch. Crazy Cool Crochet is my only income and contrary to popular belief, YouTubers don’t make a lot of money from their videos. Your support is truly appreciated!
Printable Crochet Bucket Hat Pattern
You may purchase the bucket hat pattern at my Etsy shop: CrazyCoolCrochetUS.etsy.com
Adult Size
This post contains affiliate links which means I may earn a small commission for purchases made from these links at no additional cost to you.
Crazy Cool Crochet is a participant in the Amazon Services LLC Associates Program, an affiliate advertising program designed to provide a means for sites to earn advertising fees by advertising and linking to Amazon.com
Materials:
Yarn: any #4 / approximately 2 ounces white / ½ ounce black
Hook H / 8 / 5 mm
Abbreviations:
Ea = each
Sc = single crochet
Dc = double crochet
Fpdc = front post double crochet
Sp = space
Sk = skip
Ea = each
Ch = chain
Yo = yarn over
NOTE: Photos appear above applicable row. Etsy pattern contains many more photos.
Ch 4
Sl st in 1st ch to form a ring. Ch 3
FPDC INSTRUCTIONS: Front Post Double Crochet = Yo for a dc, insert hook around back of dc post below and to the front again; YO to complete as a dc (yo, pull through 1st two loops; yo pull through last two loops.
Round 1: Work 9 dc’s into the hole of the ring. Join with a sl st to the top of ch 3. Ch 3
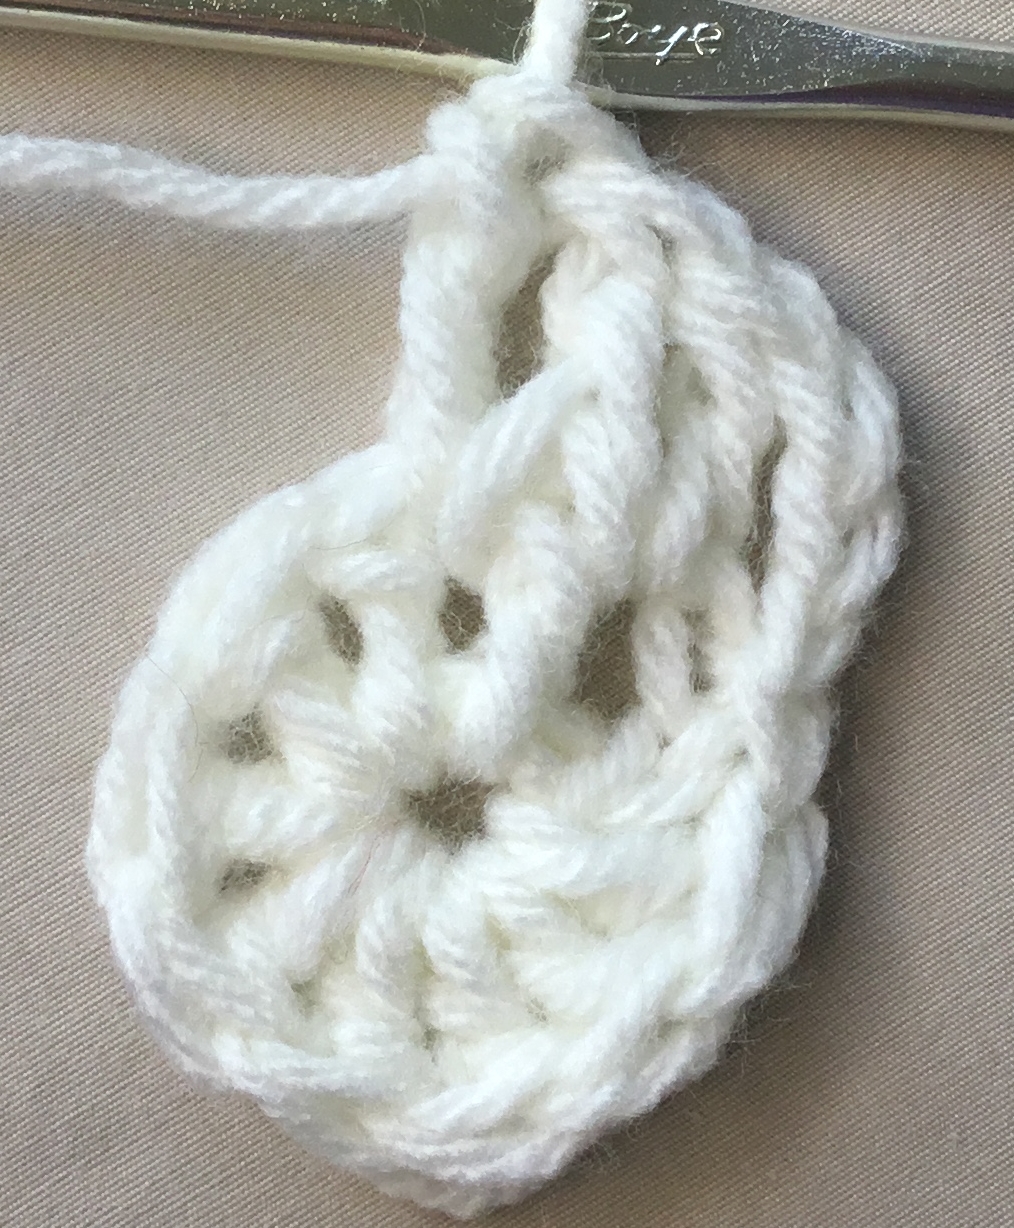
Round 2: Dc in 1st sp; *FPDC around the post of the dc below; dc in the sp immediately next to the fpdc you just worked*. Rpt from * to * working to the last FPDC. Join with a sl st to top of ch 3. Ch 3. 18 total st’s worked (not counting the starting ch).
Round 3: Dc in 1st sp; dc in next sp; *FPDC around the FPDC below; dc in the sp immediately next to the fpdc you just worked; dc in the next sp*. Rpt from * to * working to the last FPDC. Join with a sl st to top of ch 3. Ch 3. 27 total st’s worked
Round 4: Dc in 1st sp; dc in next 2 sp’s; *FPDC around the FPDC below; dc in the sp immediately next to the fpdc you just worked; dc in the next 2 sp’s*. Rpt from * to * working to the last FPDC. Join with a sl st to top of ch 3. Ch 3. 36 st’s worked
Round 5: Dc in 1st sp; dc in next 3 sp’s; *FPDC around the FPDC below; dc in the sp immediately next to the fpdc you just worked; dc in the next 3 sp’s*. Rpt from * to * working to the last FPDC. Join with a sl st to top of ch 3. Ch 3 45 st’s worked
Round 6: Dc in 1st sp; dc in next 4 sp’s; *FPDC around the FPDC below; dc in the sp immediately next to the fpdc you just worked; dc in the next 4 sp’s*. Rpt from * to * working to the last FPDC. Join with a sl st to top of ch 3. Ch 3 54 st’s worked
Round 7: Dc in 1st sp; dc in next 4 sp’s; sk next sp; FPDC around FPDC below; *sk sp immediately next to the FPDC, dc in next 5 sp’s; FPDC around the FPDC below*. Rpt from * to * working to the last FPDC. Join with a sl st to top of ch 3.
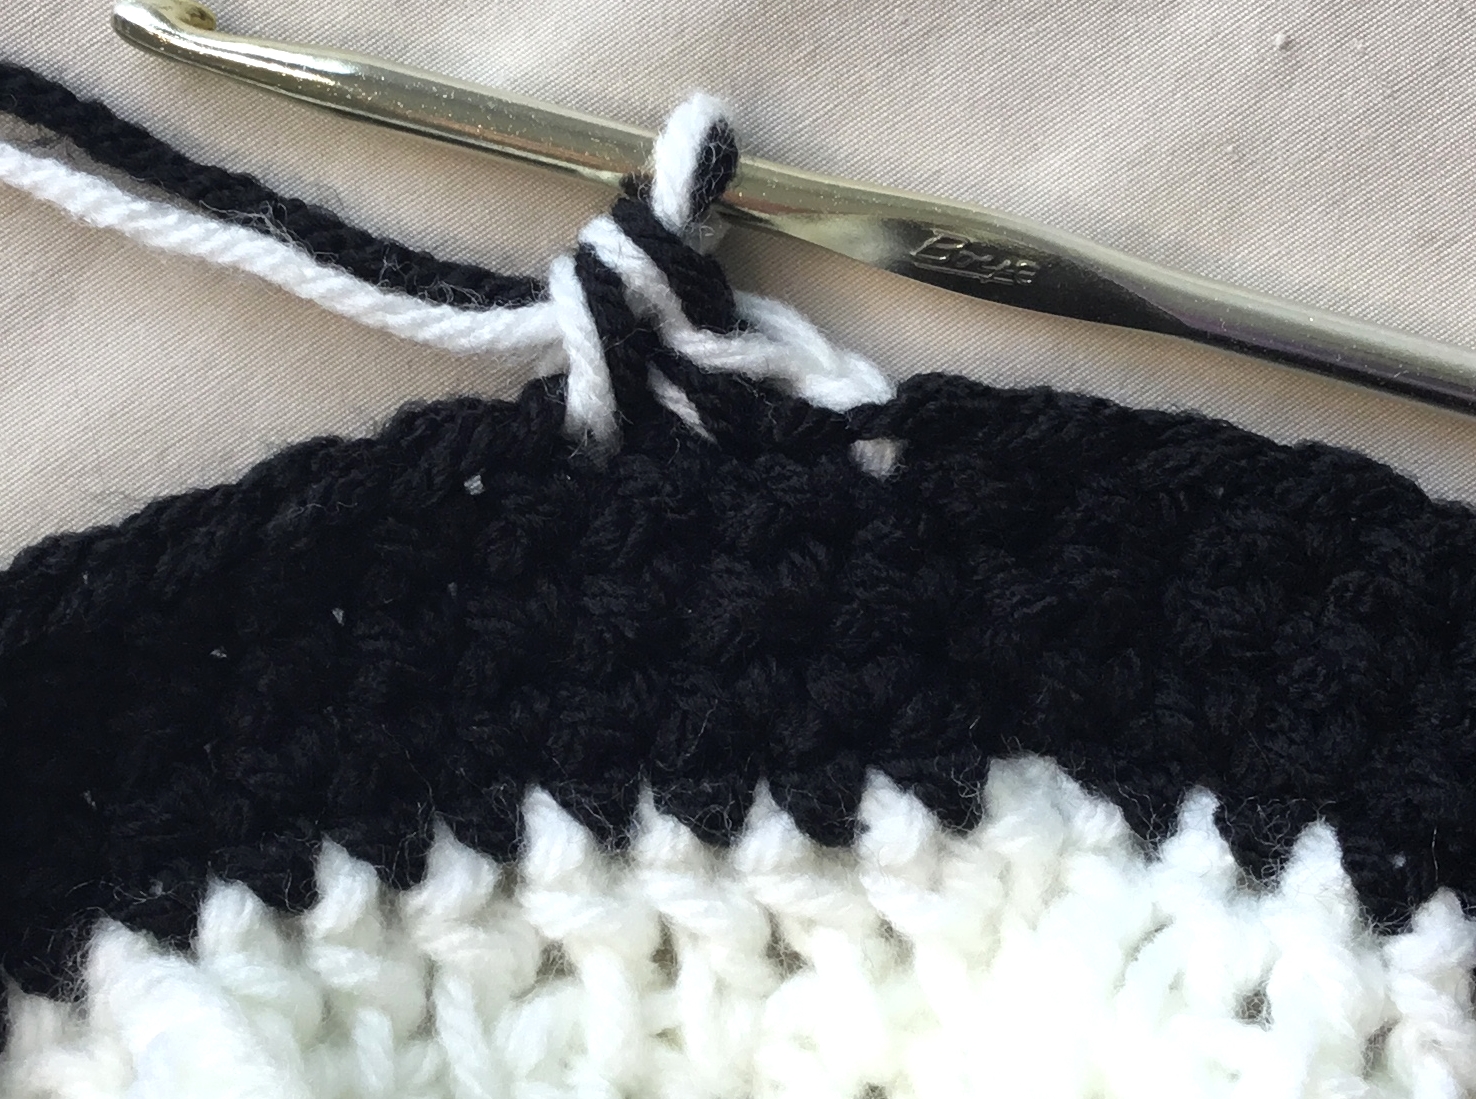
Rounds 8 – 10: repeat row 7. End row 10 working the joining sl st with the black yarn. Ch 1 Cut off the white yarn.
Round 11: For this round only, work sc’s under the two strands that form a ch at the top of the row below. Sc in 1st stitch and in ea st around. At end of row join with a sl st. Ch 1
Rounds 12 – 14: Sc in 1st sp and in ea sp around. Join with a sl st. Ch 1. End row 14 working the joining sl st with the white yarn. Do NOT remove the black yarn.
NOTE: For the remaining 7 rows you will work with both the black and white strands.
Round 15 – 21: Sc in ea sp. Join with a sl st. Ch 1. At the end of the last row, ch 1. Cut off yarn leaving a tail to weave through a few st’s on the wrong side.
Please watch the video tutorial HERE for better visual instruction.
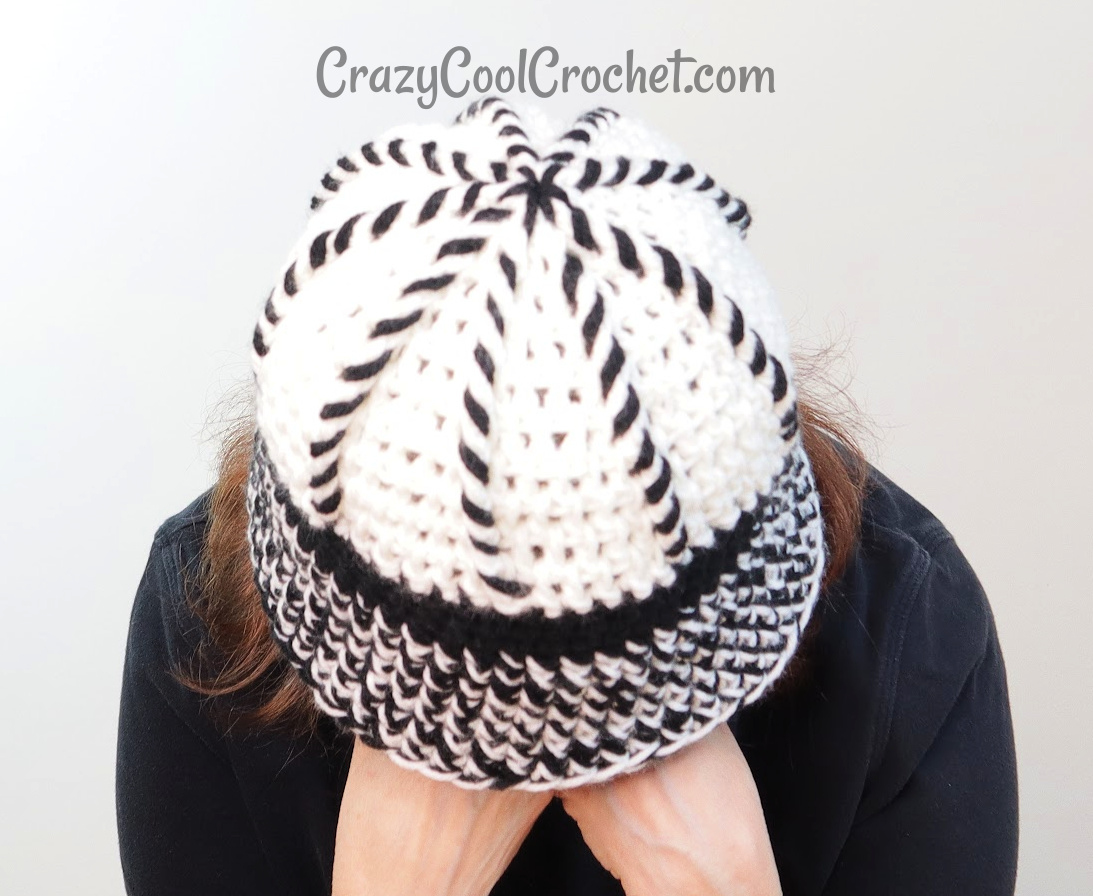
SWIRL
You will be working with two strands of the black yarn. I suggest you work one strand from the center of the skein and 1 strand from the outside of the skein.
Cut off the two strands from the skein for about a 5 foot length. (This should be enough to cover about 3/4ths of the FPDC columns. You will need to tie two more strands when you run out of the 5 ft strands.)
From the outside of the hat, insert the hook into the hole of the ring to pull up the two strands. Insert the two strands into the nearest sp between the FPDC’s. The strands should now be hanging in the inside of the hat.
Next pull up the two strands with the hook from the inside to the outside into the sp next to the FPDC.
Place the two strands so they cross over the FPDC.
Insert the hook behind the FPDC nearest the two strands; pull the strands under the FPDC through to the front as shown in photo above.
Place the strands across the next FPDC below.
Repeat the process working into ea FPDC of the “column”.
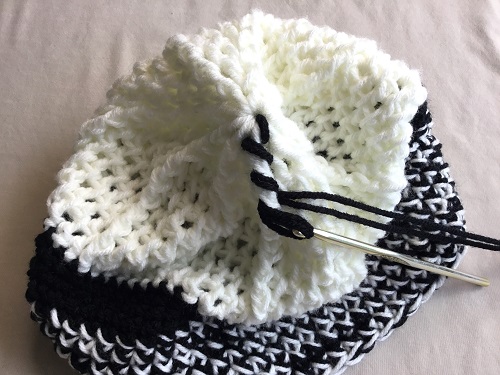
When you reach the black sc row insert the black strands into the sp nearest the black row so the strands are now on the inside of the hat.
You will then pull the two strands through a few black sc strands as shown in the photo above. The red yarn needle is just to point to where you should be working.
You are positioning the black strands beneath the next column of FPDC’s.
Pull the two strands to the front of the hat next to the FPDC. Work the swirls as you have been, working up toward the center hole.
When you complete the last swirl, insert the two strands into the center hole.
Repeat the process working all of the FPDC columns.
End with the two strands on the inside of the hat.
Tie off the yarn.
Copyright © 2022 Sylvia Talo You may sell items made from my patterns. Please include a link or reference to my shop CrazyCoolCrochetUS.etsy.com . Pattern and photos are copyright protected; they may not be reproduced, redistributed, or displayed publicly in any way.
You May Also Like


