
This richly textured, gorgeous Crochet Cable Scarf pattern (free!) features the EASIEST CROCHET CABLE STITCH EVER! Yes! EVER!
Easy Crochet Cable Stitch
I very deliberately chose this crochet cable stitch to make the pattern more doable for more crocheters.
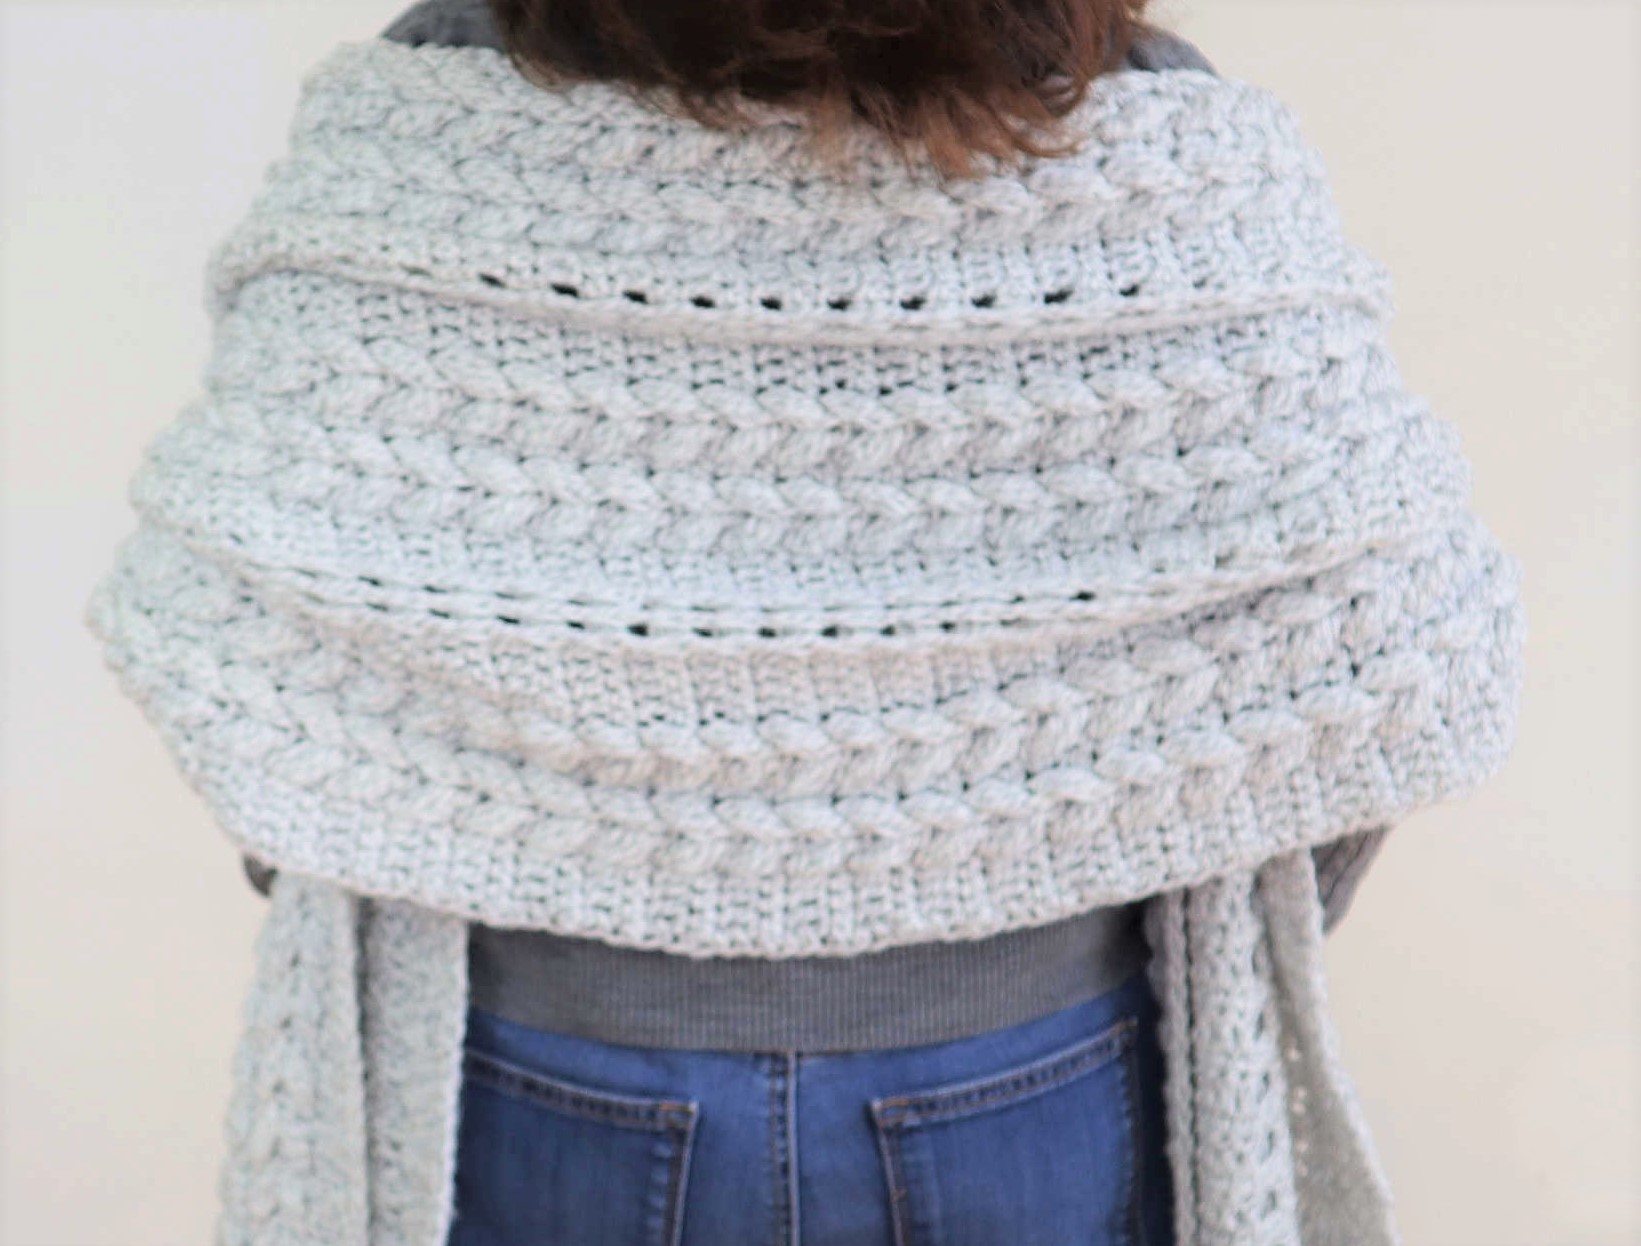
If you have been intimidated by complicated crochet cable stitches you will LOVE the crochet cable stitch I use here. There are no contortionist moves (LOL!) involved. This cable stitch is simplified and easy to work. If you can work a double crochet you can create this cable stitch.
Crochet Long Scarf
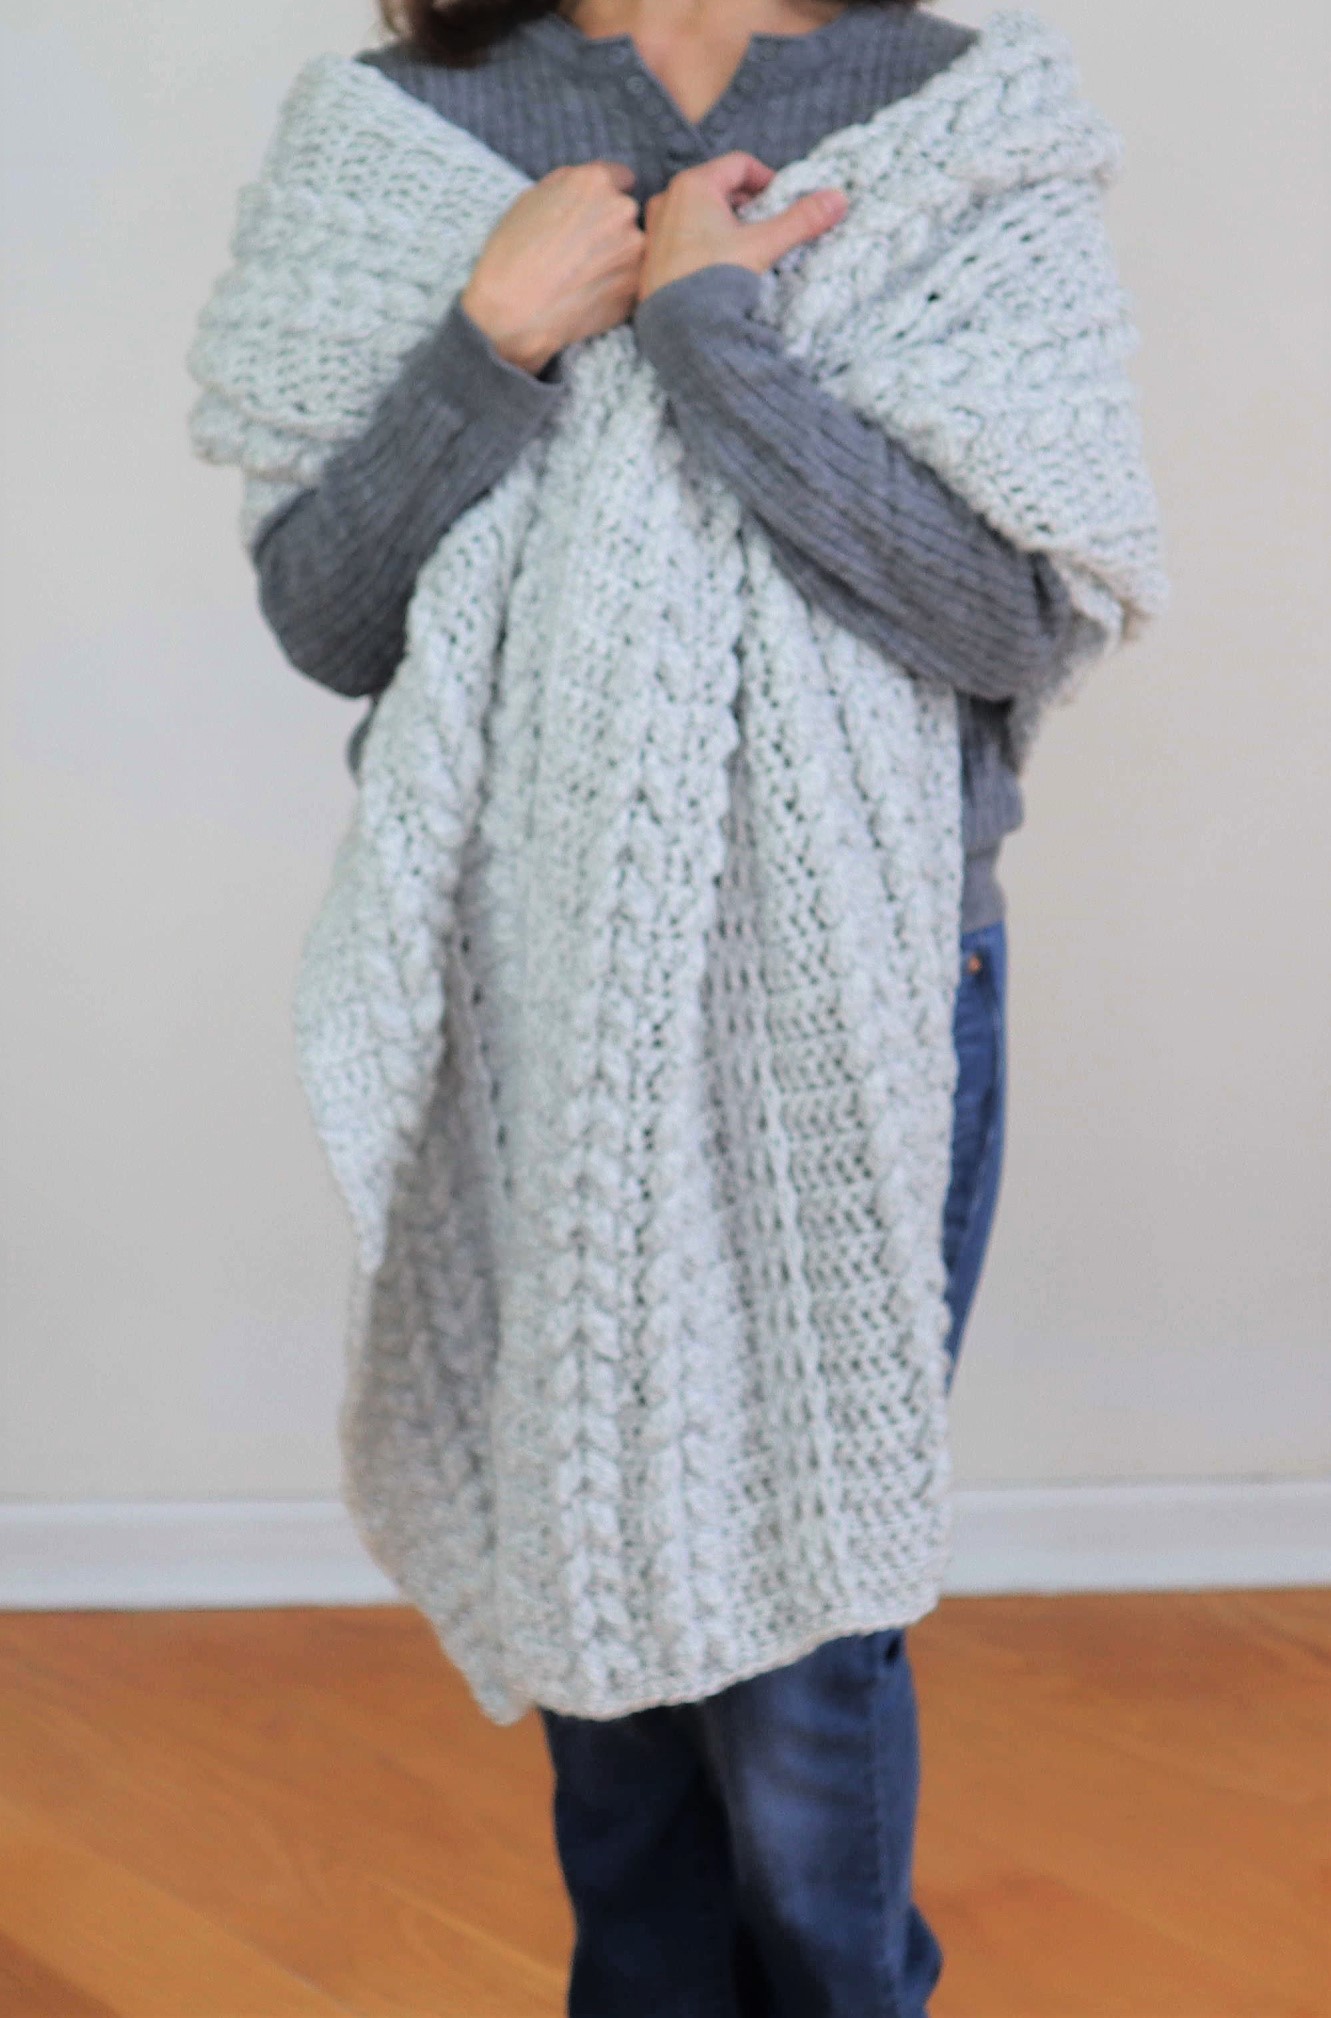
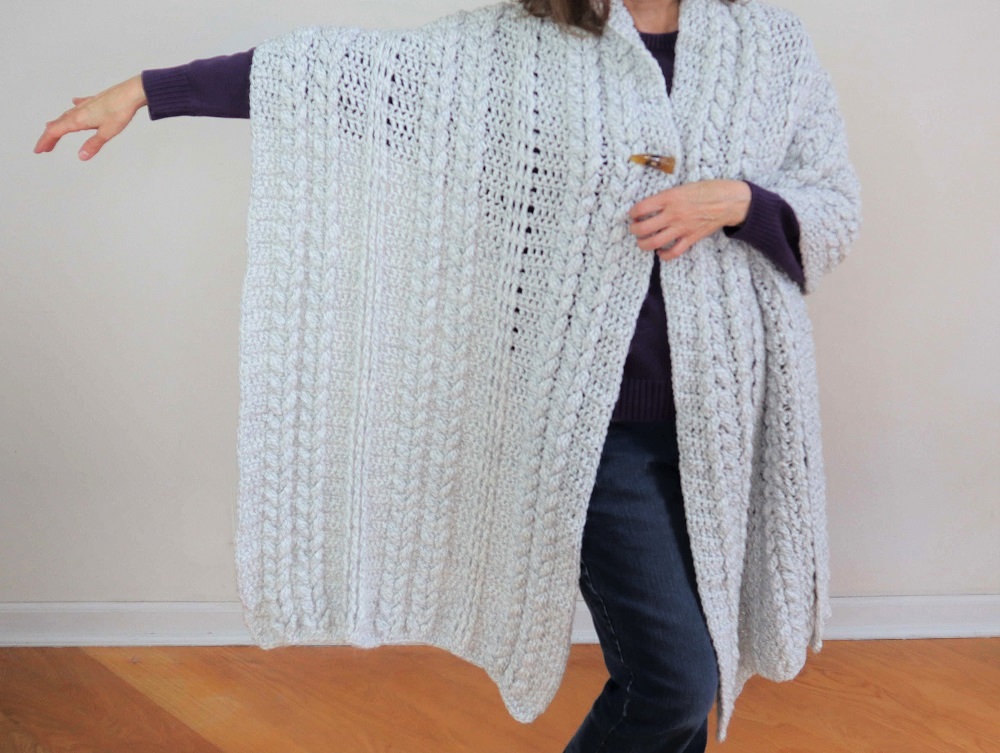
This crochet scarf was designed as a WRAP AROUND SCARF. It is an extra long scarf and a wider scarf by design.
This can be worn over a jacket or coat or worn on its own to provide extra coverage and warmth. And it makes for an awesome STATEMENT piece much like the super long, wider crochet scarf worn here by the musical artist Lenny Kravits.

How cool does he look?
Of course if you’re not looking to make a statement and you just want a beautiful crochet cable scarf…you can make this crochet scarf any length you prefer!
Crochet Cable Scarf Video Tutorial
Be sure to watch the video tutorial below for a great visual to see how easy it is to create this crochet cable stitch. Please watch on YouTube so you can subscribe, comment and give a thumbs up. This is the best way you can support my work so I can continue to provide FREE CROCHET PATTERNS and video tutorials! Thank you so much!!
The printable version of the pattern with detailed photos will be available at my Etsy shop: CrazyCoolCrochetUS.etsy.com
Crochet Cable Scarf Pattern
Size One Size Fits Most
Materials :
Any #4 medium weight yarn
Used here: Bernat Super Value/ color Gray Ragg
22.75 ounces / 1430 yards
Crochet Hook I / 5.5 mm
Button
Gauge: 4 dc = 1.5 inches , 9 dc/sc rows = 4 inches , 1 complete cable = 1.5 inches
Dimensions: 19 inches wide; 82 inches long
Abbreviations:
Ch = chain
FPDC = front post double crochet
Sc = single crochet
Sk = skip
Sl st = slip stitch
Sp = space
St = stitch
YO = yarn over
NOTE: Photos are shown above corresponding rows.
NOTE 2: FPDC Please view video for detailed instruction.
Ch 59
Row 1: DC in 4th ch from hook and ea ch across. 56 dc’s. Ch 1. Turn
Row 2: Sc in ea st. 56 sc’s. Ch 2. Turn
Row 3: Sk sp next to turning ch. Dc in 1st sc and next two sc’s.
CABLE #1 of 6
Work first half of cable around the 4th DC (do not count turning ch) of Row 1 as follows:, *YO; insert hook from front to back, around the back of the dc and back through the front; hook yarn and pull up a long loop; pull yarn through first two loops on hook*; in same sp repeat from * to * 2x . You will have 4 loops on the hook. Pull yarn through all 4 loops.
Sk next sc (behind the cable); dc in ea of next two sc’s.
Work second half of cable around the next dc of Row 1 (next to the 1st half of cable) as for the first half of cable above.
Dc in next sc.
CABLE #2 of 6
Sk 3 dc’s of Row 1 (next to the cable). Work first half of cable around the next dc of Row 1.
Sk sc behind the cable; dc in ea of next two sc’s. Work second half of cable in dc next to the first half.
DC in next 4 sc’s.
Sk 6 dc’s on Row 1 next to the cable. Work a FPDC around the next 3 dc’s of Row 1.
Sk 3 sc’s behind the 3 FPDC’s; work 4 dc’s in next 4 sc’s.
CABLE #3 of 6
Sk next 5 dc’s of Row 1. Work first half of cable in next dc of Row 1.
Sk next sc (behind the cable); dc in ea of next two sc’s.
Work second half of cable in dc next to the 1st half.
Sk sc behind cable; dc in next sc.
CABLE #4 of 6
Sk 3 dc’s of Row 1 (next to the cable). Work first half of cable around the next DC of Row 1.
Sk sc behind cable; dc in ea of next two sc’s.
Work second half of cable around the dc next to 1st half.
Sk sc behind cable; dc in next 4 sc’s.
Sk 6 DC’s on Row 1 next to the cable. Work a FPDC around the next 3 dc’s of Row 1.
Sk 3sc’s behind the 3 FPDC’s; work 4 dc’s in next 4 sc’s.
CABLE #5 of 6
Sk next 5 dc of Row 1 (after the FPDC’s). Work first half of cable in next dc of Row 1.
Sk sc (behind cable); dc in ea of next two sc’s. Work second half of cable around dc next to 1st half.
Sk next sc; dc in next sc.
CABLE #6 of 6
Sk 3 dc’s of Row 1 (next to the cable). Work first half of cable around the next dc of Row 1.
Sk next sc; dc in ea of next two sc’s. Work second half of cable around DC next to 1st half.
Dc in last 4 st’s.
Ch 1. Turn
Row 4: Sc in ea st beginning with the 1st st; do NOT work into the turning ch at the end of the row. 56 sc’s. Ch 2. Turn
Row 5: Sk sp next to turning ch. Dc in 1st sc and next two sc’s.
Cable #1 *Work 1st half of cable around the 1st DC in the cable below. Sk st behind the cable; dc in next 2 sc’s. Work 2nd half of cable around the 2nd DC of cable below*.
Dc in next sc.
Repeat from * to * for cable #2.
Sk st behind cable, work 4 dc’s in next 4 sc’s.
Work 3 FPDC’s around the 3 FPDC’s below.
Sk 3 st’s behind the FPDC’s; work 4 dc’s in next 4 sc’s.
Repeat from * to * for cable #3.
Sk st behind cable, dc in next sc.
Repeat from * to * for cable #4.
Sk st behind cable, work 4 dc’s in next 4 sc’s.
Work 3 FPDC’s around the 3 FPDC’s below.
Sk 3 st’s behind the FPDC’s, work 4 dc’s in next 4 sc’s.
Repeat from * to * for cable #5.
Sk st behind cable, dc in next sc.
Repeat from * to * for cable #6.
Dc in last 4 st’s. Ch 1. Turn
PRIOR TO COMPLETING THE PANEL determine if you will need a buttonhole. See instructions below.
Repeat Rows 4 and 5 for 179 rows or to preferred length. End on a cable row. Do NOT cut off yarn.
BUTTONHOLE: Determine the placement of the button, then determine the placement of the buttonhole. Ensure they are on corresponding rows. Depending on the size of the button, you will simply leave one or two DC’s unworked on the first 3 DC’s of a cable row. It is best to leave the 3rd DC unworked for this purpose.
BORDER
Working from the last st of the last row worked (a cable row), ch 1 and begin working sc’s along the long edge (beginning on the left edge as the work faces you).
You may work 1 sc per row (sc in dc rows; sc in sc rows) OR, depending on your tension, work 1 sc into sc rows and 2 sc’s into dc rows. Take care not to enter so many sc’s that the work begins to buckle or gather along the edge.
Continue the sc’s along the bottom edge and up along the opposite long edge and along the top edge. Sl st into the first sc to tie off.
Copyright © 2021 Sylvia Talo You may sell items made from my patterns. Please include a link or reference to my shop CrazyCoolCrochetUS.etsy.com . Pattern and photos are copyright protected; they may not be reproduced, redistributed, or displayed publicly in any way.
You May Also Like


[…] COORDINATES WITH THE MATCHING CROCHET CABLE SCARF: […]