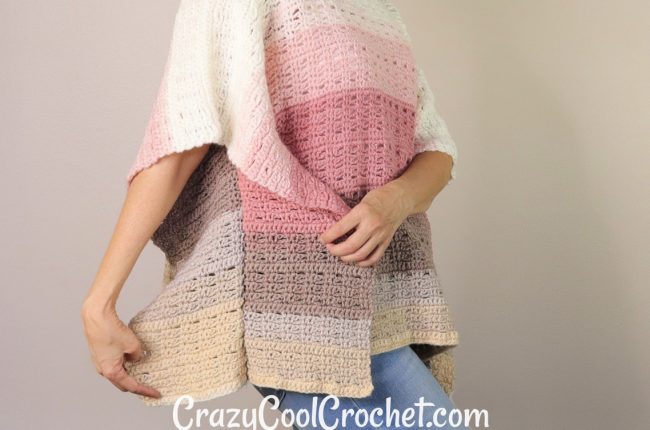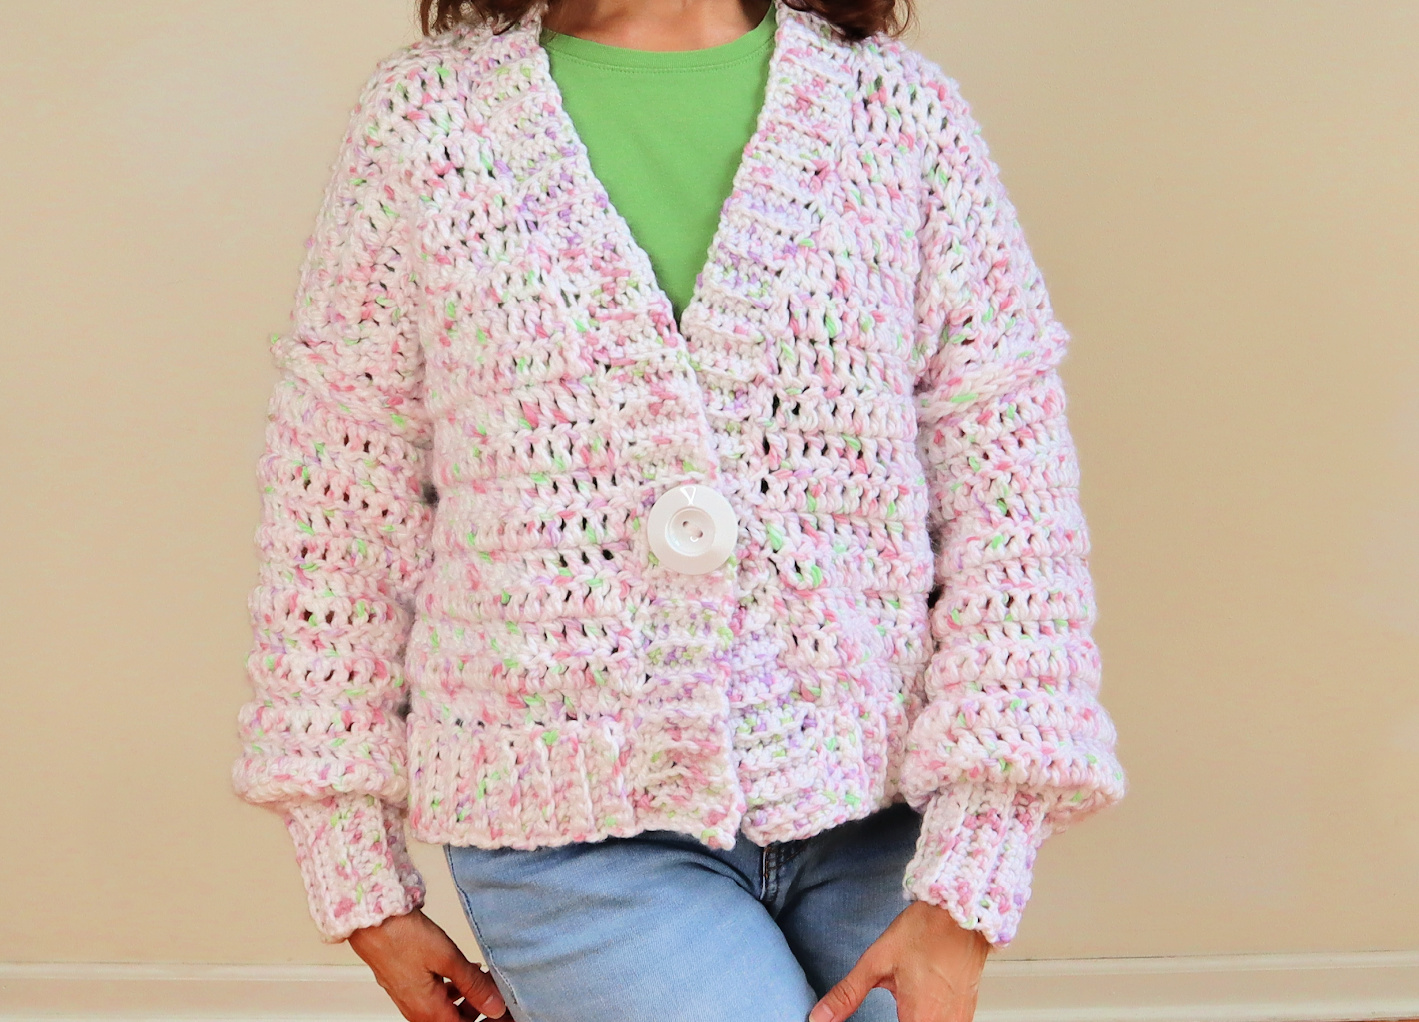
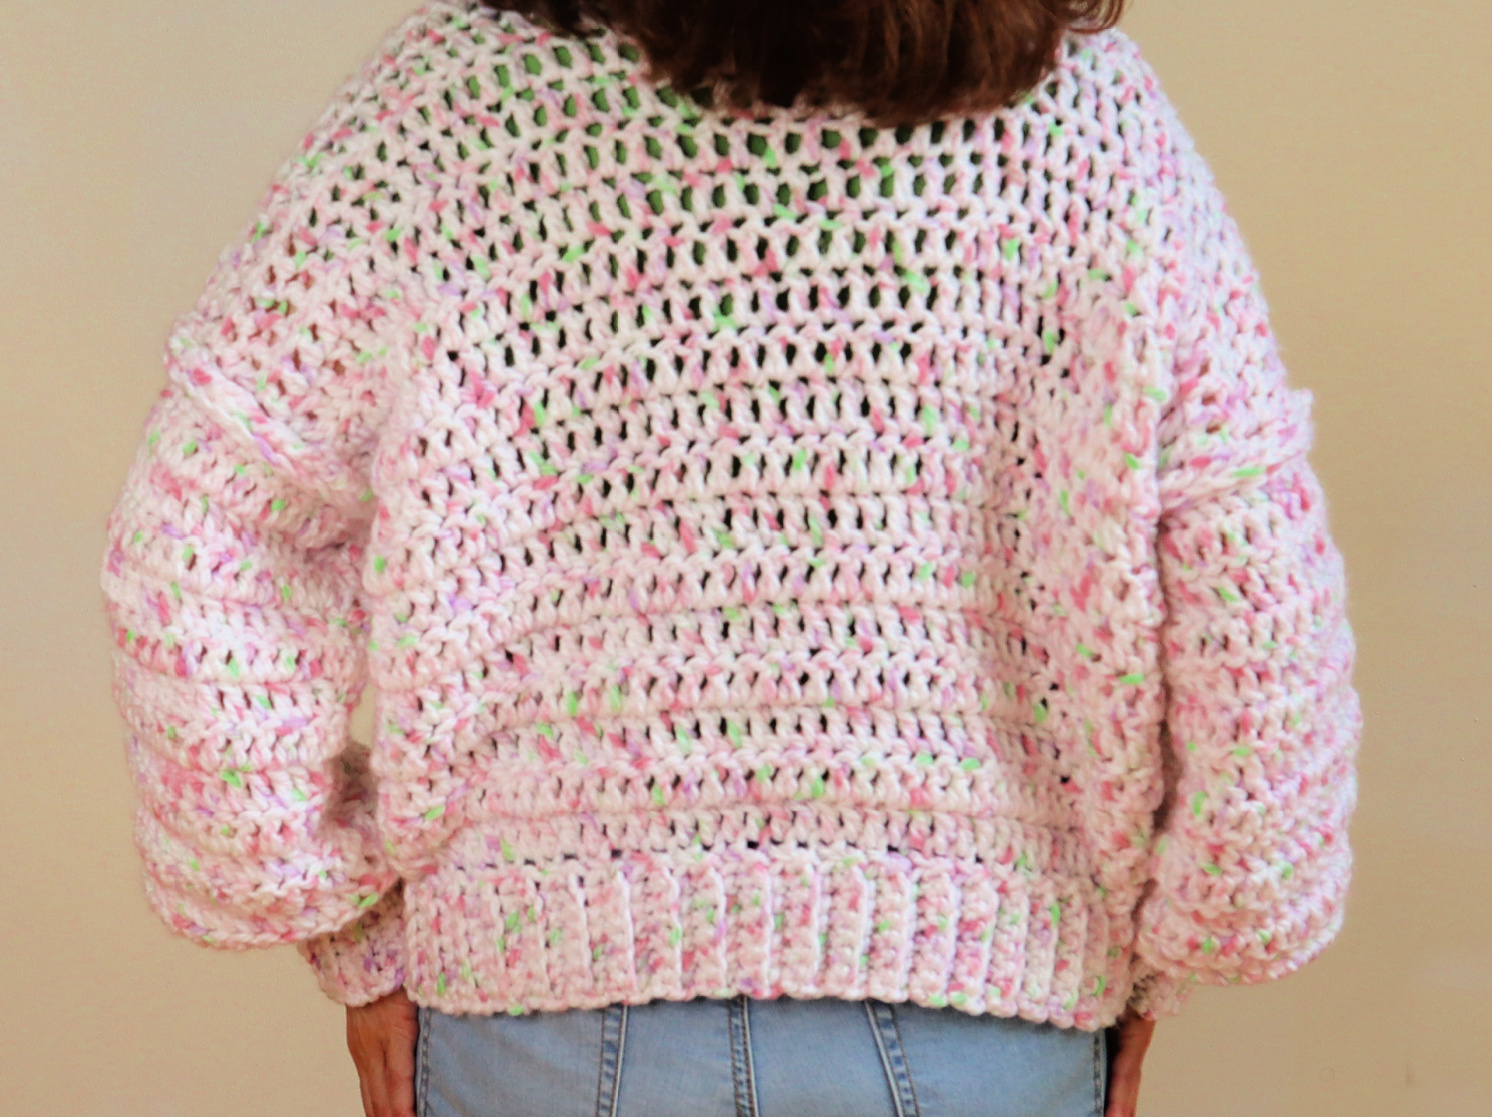
Crochet this chunky crochet cardigan free pattern with the suggested yarn (or equivalent) and wrap yourself in cushy comfy softness you have to feel to believe. This will become your go-to crochet cardigan. Designed to be boxy and roomy for even greater comfort.
Not Your Grandma’s Crochet Cardigan!
This updated, dare I say COOL, crochet cardigan, is shorter (but of course can be made longer), with a pop of interest in the chunky, visible, drop shoulder seams. C’mon. This is Crazy Cool Crochet after all. I had to add a little twist for the cool factor.
The ribbing at the bottom, wrists and front contribute to the coziness of this classic beauty.
Crazy Soft Crochet Cardigan
Use the yarn suggested for the ultimate in cushy, comfy, squishy (enough?) softness. Of course, you can substitute an equivalent #5, bulky yarn. Yes, bulky! This soft, thick yarn only adds to the gorgeousness.
Crochet Chunky Cardigan Video Tutorial
The video tutorial, as always, is provided for your convenience. Please watch on YouTube (click the button at bottom of video) so you can comment and leave a thumbs up (if you are so inclined).
The printable Etsy pattern, with additional detail, is available here. Your support, by purchasing the pattern, is
GREATLY APPRECIATED!
Free pattern is below. Photos coming soon!
Materials:
Hobby Lobby’s Baby Bee Sweet Delight Chunky/ color Charming/ used 21 ounces / 654 yards Crochet hooks N / 10 mm and L / 8 mm
Yarn needle
Scissors
Measuring tape
Gauge: 9 dc’s = 4 inches , 5 dc rows = 4 inches
Abbreviations:
Ch = chain
BLO = back loop only
DC = double crochet
Ea = each
Sk = skip
SL = slip stitch
Sp = space
St = stitch
NOTE: Photos are shown above corresponding rows.
BACK PANEL
Ch 47 (53, 59, 65, 77 ) using N hook
Row 1: Dc in 4th ch from hook and ea ch across. 44 (50, 56, 62, 74) dc’s Ch 3 .Turn
Row 2 – 18 (20, 22, 24, 28): dc in 2nd sp and ea sp across entering last dc in turning ch. 44 (50, 56, 62, 74) dc ‘s. Ch 3 and turn at the end of ea row. First photo above shows 1st sp that should be skipped.
NOTE: This is designed to be shorter and boxy. Add rows to your preferred length allowing for an additional 3 – 5 inches for the bottom border ribbing. You will need to adjust front panels to match the revised length of the back panel.
BACK BOTTOM RIBBING
Row 1: Using crochet hook L, attach yarn at the bottom right corner of back panel (see NOTE below). You will be working into the original foundation chain. Work 8 (12, 12, 14, 18) chains. Sc in 2nd ch from hook and in remaining ch’s. 7 (11, 11, 13, 17) sc’s total.
Row 2: Working in the foundation row, sk 1st sp, sl st in next sp. Do NOT ch. Turn your work toward you to work a sc in BLO of the 7 (11, 11, 13, 17) sc’s. At end of that row, ch 1. Turn.
Row 3: Working in BLO, sc in ea sc. 7 (11, 11, 13, 17) sc’s.
Repeat Rows 2 and 3 until you reach the end of the foundation row, ending with a sl st into the last sp. Cut off yarn leaving a 5 inch tail to weave in.
FRONT PANEL (make 2) use N hook
Ch 25 (27, 31, 33, 39)
Row 1: Dc in 4th ch from hook and ea ch across. 22 (24, 28, 30, 36) dc’s Ch 3 .Turn
Row 2 – 10 (12, 14, 16, 20): dc in 2nd sp and ea sp across. 22 (24, 28, 30, 36) dc ‘s. Ch 3 and turn at the end of ea row.
Row 11 (13, 15, 17, 21): Continue in pattern for 21 (23, 27, 29, 35) dc’s. Sk last dc. Do NOT ch. Turn
Row 12 (14, 16, 18, 22): sk 1st sp, sl st in next sp; dc in next sp and ea sp across, working the last dc into the turning ch. 20 (22, 26, 28, 34) dc’s. Ch 3. Turn
Row 13 (15, 17, 19, 23): Continue in pattern for 19 (21, 25, 27, 33) dc’s. Sk last dc. Do NOT ch. Turn
Row 14 (16, 18, 20, 24): sk 1st sp, sl st in next sp; dc in next sp and ea sp across, working the last dc into the turning ch. 18 (20, 24, 26, 32) dc’s. Ch 3. Turn
Row 15 (17, 19, 21, 25): Continue in pattern for 17 (19, 23, 25, 31) dc’s. Ch 3. Turn
Row 16 – 18 (18-20, 20-22, 22-24, 26-28): Repeat Row 15. At end of last row, cut off yarn. Leave tail to weave in.
Opposite Side
Work as for the first front panel through Row 10 (12, 14, 16, 20) . At end of Row 10 (12, 14, 16, 20), do NOT ch. Turn
Row 11 (13, 15, 17, 21): sk 1st sp, sl st in next sp; dc in next sp and ea sp across, working the last dc into the turning ch. 21 (23, 27, 29, 35) dc’s. Ch 3. Turn
Row 12 (14, 16, 18, 22): Continue in pattern for 20 (22, 26, 28, 34) dc’s. Sk last dc. Do NOT ch. Turn
Row 13 (15, 17, 19, 23): sk 1st sp, sl st in next sp; dc in next sp and ea sp across, working the last dc into the turning ch. 19 (21, 25, 27, 33) dc’s. Ch 3. Turn
Row 14 (16, 18, 20, 24): Continue in pattern for 18 (20, 24, 26, 32) dc’s. Sk last dc. Do NOT ch. Turn
Row 15 (17, 19, 21, 25): sk 1st sp, sl st in next sp; dc in next sp and ea sp across, working the last dc into the turning ch. 17 (19, 23, 25, 31) dc’s. Ch 3. Turn
Row 16 – 18 (18-20, 20-22, 22-24, 26-28): Continue in pattern for 17 (19, 23, 25, 31) dc’s. Ch 3. Turn. At end of last row, cut off yarn. Leave tail to weave in.
FRONT RIBBING (Both Panels)
Work the same as the Back Bottom Ribbing. Be sure to attach yarn to front side of work.
SLEEVES (make 2)
Ch 34 (36, 36, 38, 42)
Work the same as for the back panel for 31 (33, 33, 35, 39) dc’s and 15 (17, 19, 19, 25) total rows.
SLEEVE RIBBING
Work ribbing the same as for the front and back panels with these CHANGES:
- When attaching yarn, sk 1st sp, attach yarn in next sp. Ch 12 (16, 16, 18, 20) for 11 (15, 15, 17, 19) sc’s.
- When sl st’ing in foundation row, do not sk sp’s. You will instead sl into next 3 sp’s, then turn work to work sc’s.
SEAM SHOULDERS
Position front and back panels with wrong sides out. Use yarn needle and length of yarn to seam at shoulder with a whip st. Repeat for opposite side.
SEAM SLEEVES to shoulders
Position the body of the garment fully opened with RIGHT sides up. Position the top edge of sleeve (RIGHT side up) centered at the shoulder edge seam. The seam will be showing on the right side of cardigan (by design). Use N hook to sl st beginning at edge and working to end of sleeve. You are working for a chunky seam.
SEAM FRONT AND BACK PANELS
With wrong side up, using yarn needle and length of yarn, whip stitch, beginning at bottom of panels, seam up to the underarm and down the sleeve and ribbing.
FRONT RIBBING / BUTTON HOLES
Determine number, size, and placement of buttons. I used one large button. You may use as many or few buttons as you prefer. Suggest from 1 – 3 depending on the size of the buttons.
You will work the front ribbing the same as for front/back ribbing beginning with 7 (9, 9, 11, 13) ch’s for 6 (8, 8, 10, 12) sc’s. With right side of garment facing you, attach yarn right bottom ribbing.
Work for ribbing pattern up to the point where you will need a button hole.
If working ribbing with the 6 (8, 8, 10, 12) sc’s, working on the 2nd side of sc’s (where you are working back toward the “home”row which would have been the foundation row in the previous sections), work 1 (2, 2, 2, 3) sc; ch 4 (4, 4, 6, 6): insert hook in 6th (7th, 7th, 9th, 9th) sc to work 1 (2, 2, 2, 3) sc. Continue in pattern over the “home row”, turn and work a sc into the sc, sc into ea ch, sc into sc. 6 (8, 8, 10, 12) sc’s total. Ch 1. Turn
Continue in ribbing pattern.
Work in this manner for as many button holes as you require.
NOTE: As you work the ribbing ensure that the ribbing is not too full and begins to buckle. Skip spaces as needed on the “home” row as you work around the front, neck and opposite front side. The pattern calls for skipping one space to enter the sl st’s; however, you may sk additional sp’s as needed.
BUTTONS
Attach buttons with yarn or thread and yarn needle.
Copyright © 2021 Sylvia Talo You may sell items made from my patterns. Please include a link or reference to my shop CrazyCoolCrochetUS.etsy.com . Pattern and photos are copyright protected; they may not be reproduced, redistributed, or displayed publicly in any way.
You May Also Like