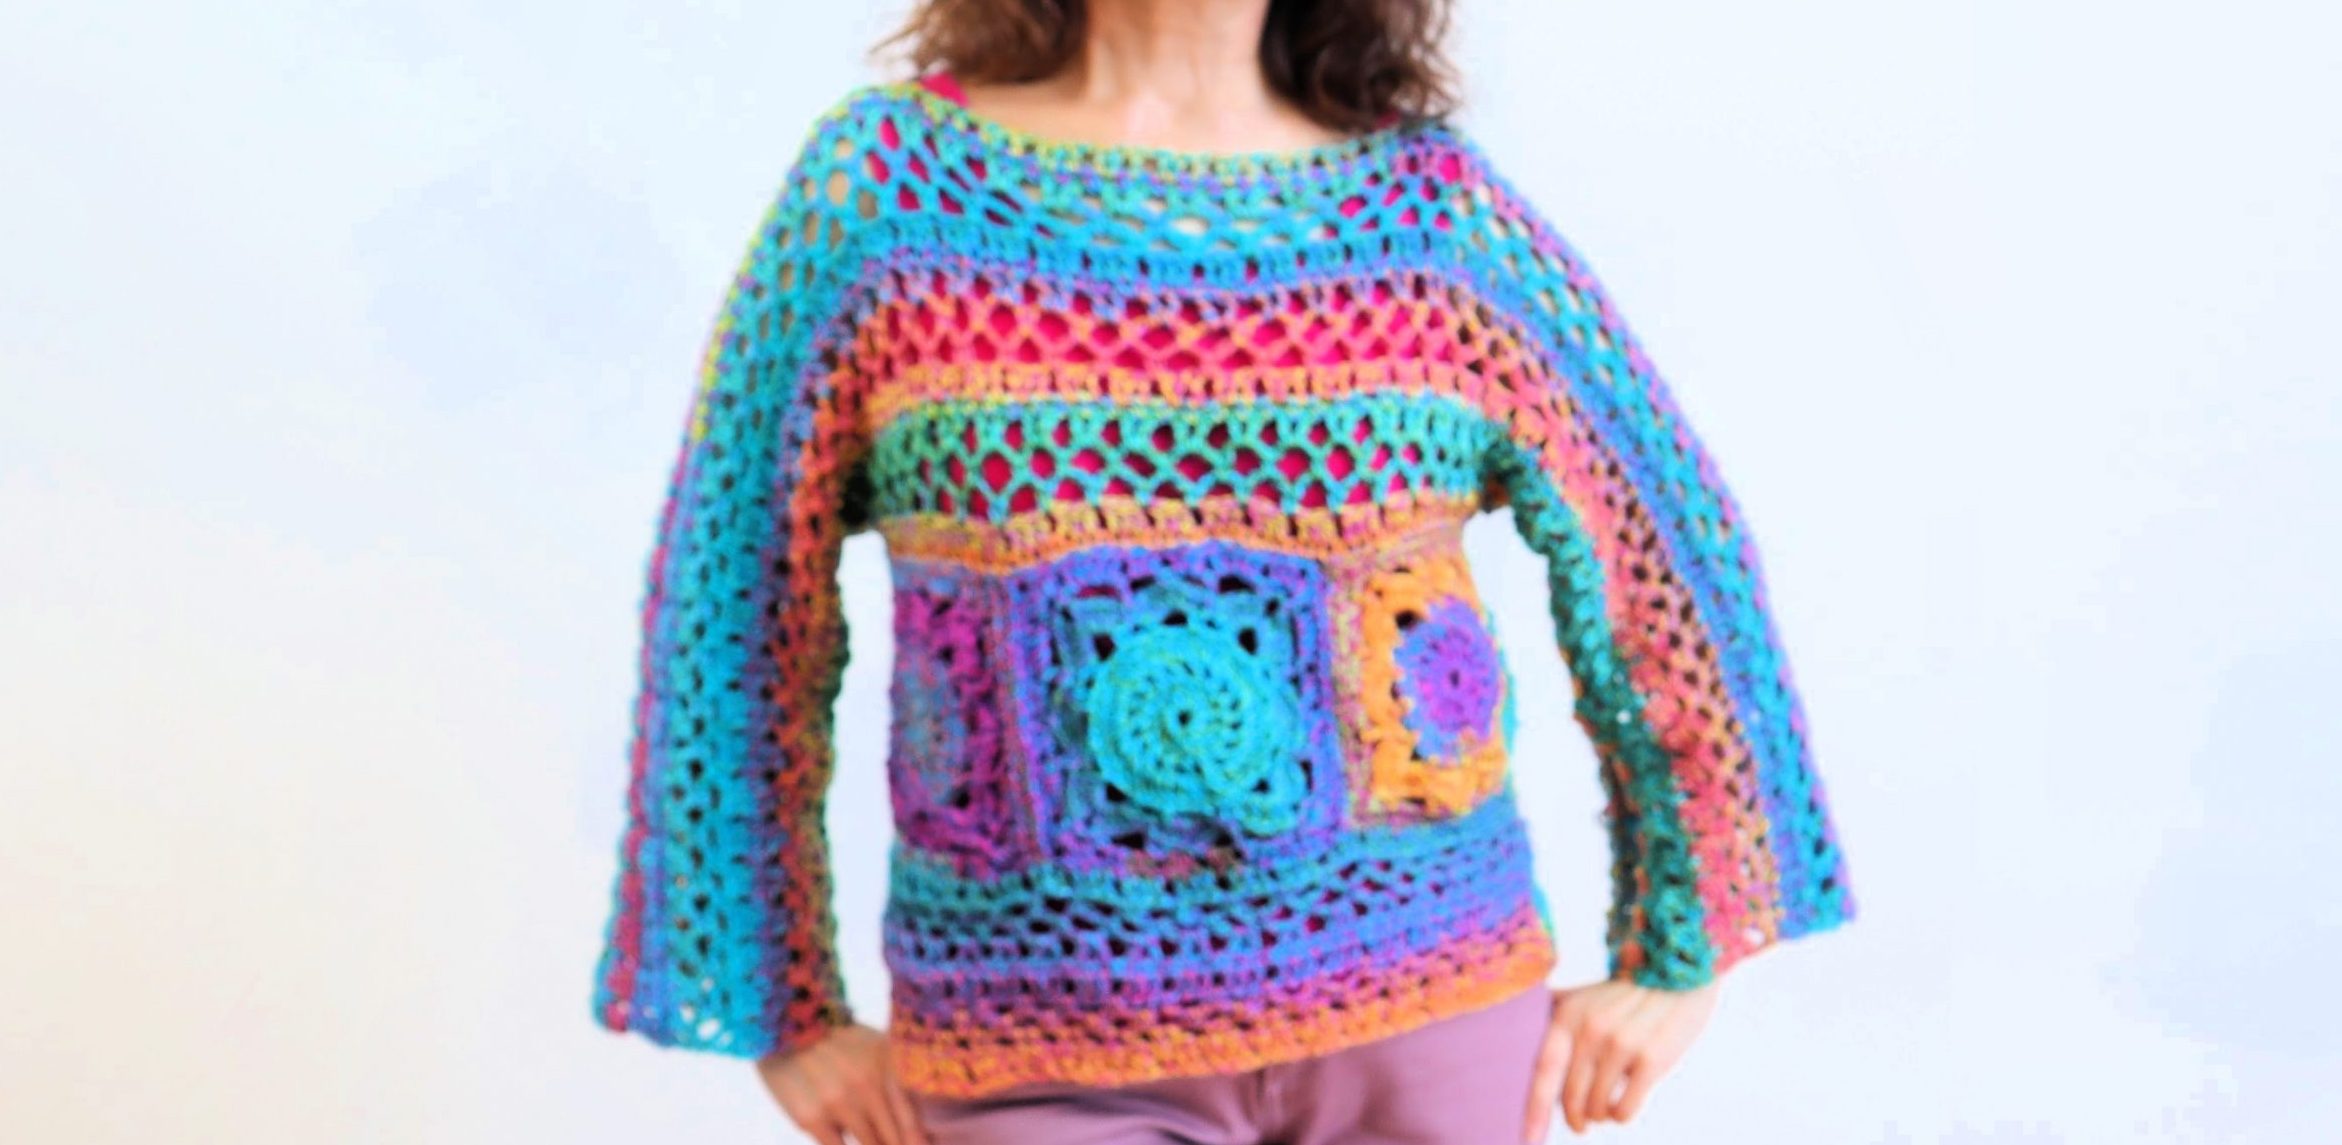
Crochet easy granny square top is fun to make and easy to wear! Uses the beautiful Willow granny square in lightweight, summery yarn.
The video tutorial is below. Written pattern is below. Etsy printable pattern available soon! Please be sure to subscribe to this blog and my YouTube channel if you would like to “support” my work. This is my only source of income and your help is greatly appreciated!
Etsy printable pattern: CrazyCoolCrochetUS.etsy.com
Tutorial is for a size small. Use multiple of 4 plus 5 for larger sizes. Crochet hook size changes per size. Detail is below.
Materials:
Yarn Yarn Bee Caterina/ Color Saturday Siesta/ 3 skeins size Small (10.5 ounces; 885 yards)
Crochet Hook size G size Small (view video for change in hook sizes per garment size)
NOTE: Photos appear above the corresponding row.
Willow Square Granny Square
Size Small: Crochet hook size G; make 6 squares
Size Medium: Crochet Hook size H; make 6 squares
Size Large: Crochet hook size G; make 8 squares
Size XLarge/1X: Crochet hook size H; make 8 squares
Ch 5; sl st in first chain to form ring.
Row 1: Ch 3; work 15 dc in the ring; sl st to top of beg ch 3 to join.
Row 2: ch 4; *dc into the next ch (not under the starting ch); ch 1*. Repeat from * to * to the last ch; enter dc in last ch. Sl st to 3rd ch of beg ch 4.
Row 3: ch 3; 2 dc in 1st sp; *1 dc into the top of dc below; 2 dc in ch 1 sp*. Repeat from * to * to last sp. 2 dc in last sp. 47 dc total. Sl st in top of beg ch.
Row 4: ch 5; *sk 2 ch’s; sc in 3rd ch below; ch 3; sk 2 ch; sc in 3rd ch; ch 4; sk 2, sc in 3rd ch; ch 3; sk 2 ch, sc in 3rd ch; ch 5*. Repeat from * to * two times. Then sk 2 ch’s; sc in 3rd ch below; ch 3; sk 2 ch; sc in 3rd ch; ch 4; sk 2, sc in 3rd ch; ch 3; sk 2 ch. Join the round with sl st into the base of the beg ch 5.
NOTE: the ch 5’s form the 4 corners
Row 5: *5 dc in next sp; ch 3; 5 dc in same sp. Sc in next sp; 7 dc in next sp; sc in next sp*. Repeat from * to * to last edge entering the last sc into the last sp. Join the round with sl st into the base of the beg st of the row.
Row 6: Ch 7; *sc into the corner sp; ch 3; sc in same sp. Ch 4; dc into sc below; ch 3; sk 3 ch’s of 7 dc cluster below, sc into 4th ch; ch 3; dc into sc below; ch 4*. Repeat from * to * to last edge, ending with ch 3 after entering the sc in the 4th ch of last cluster. Join into ch 3 of beg ch 7.
Row 7: sl st into next sp; ch 3; 4 dc in same sp. *3 dc in corner sp; ch 3; 3 dc in same sp. Work 5 dc in next sp; 3 dc in next sp; 3 dc in next sp; 5 dc in next sp*. Repeat from * to * to last edge. End row with 3 dc in last sp. Join with sl st into top of beg ch. Cut off yarn leaving 5 inch tail to weave through top ch’s.
JOIN SQUARES
Place squares front facing up. With yarn needle and length of yarn use whip stitch to join, inserting needle into one strand of ea square. Depending on size, join either 3 or 4 squares. One set for the front, one set for the back.
BOTTOM SECTION OF JOINED SQUARES
(Repeat for front and back joined squares panels.)
Row 1: Front facing you, attach yarn at center ch of left corner of square with a chain 3. 1 dc in ea of next 2 ch’s; *sk next ch; dc in ea of next 3 ch’s*. Repeat from * to * to last 4 ch’s. sk next ch, dc in next 2 ch’s; dc in corner ch. You should have 20 sets of 3 dc’s for size small. [see note 2 below] Ch 5. Turn
NOTE: Enter dc’s in seams as needed. At end of row, you may sk a ch if necessary to be able to create the last 3 dc set.
NOTE 2: For any other size, create as many dc sets as will fit across the row with one ch sp between sets as instructed above. You will then follow the remainder of the pattern as written.
Row 2: sc into 1st ch 1 sp; *ch 4; sc in next ch 1 sp*. Repeat from * to * to last ch 1 sp. Enter sc in last ch 1 sp; ch 4. Enter sc into turning ch. Ch 5. Turn
Row 3: sc into 1st sp; *ch 4. sc in next sp*. Repeat from * to * across entering last sc into top of turning ch. Do not enter a sc into the last sp. Ch 3. Turn
Row 4: dc into 1st sp; ch 1; *dc in next sp; ch 1; dc in same sp; ch 1*. Repeat across from * to * to last sp. Dc in last sp; ch 1; dc into top of turning ch. Ch 2. Turn
Row 5: Working loosely for this row, sc in 1st sp; ch 1; *sc in next sp; ch 1*. Repeat from * to * across to last sp. Sc in last sp; ch 1; sc into top of turning ch. Ch 3. Turn
Row 6: dc in 1st ch 1 sp; dc into sc below; ch 1; sk next ch 1 sp. *Dc in next sc; dc in next ch 1 sp, dc in next sc; ch 1; sk next ch 1 sp*. Repeat from * to * to last sc. Dc in last sc, dc in last sp, dc into turning ch. Ch 5. Turn
NOTE: You should have the same number of sets of 3 dc’s for Row 6 as you had in Row 1.
Rows 7 – 11: Repeat Rows 2 – 6. At end of last row cut off yarn.
Size Medium and Large: work another set of Rows 2 – 6.
Size X Large: work a 4th set of Rows 2 – 6.
Size 1X: work a 5th set of Rows 2 – 6.
Sizing instructions are suggestions. Yarn used, tension and personal preference can change the outcome of finished product. Adjust as necessary.
Sleeve and Body Panels
(make 2; one for front and one for back)
Ch 205 (size Small)
This chain determines width; measuring from wrist across chest to wrist. This affects the sleeve length.
Use multiple of 4, plus 5, for larger sizes.
Suggested:
Medium: Ch 217
Large: Ch 229
XL: 241
1X: 253
Row 1: dc in 4th ch from hook; dc in next ch; *ch 1; sk next ch; dc in ea of next 3 ch’s*. Repeat from * to * across row. 51 sets of 3 dc’s for size Small. Ch 5. Turn
Row 2 – 6: Repeat Rows 2 – 6 of Bottom Section of Joined Squares above, 2 x. Cut off Yarn.
Size Medium: work another set of Rows 2 – 6.
Size Large: work a 4th set of Rows 2 – 6.
Size X Large: work a 5th set of Rows 2 – 6.
Size 1X: work a 6th set of Rows 2 – 6.
Adjust these sets as needed to your preference.
NOTE: This yarn stretches (in length) about 3 inches once it is on the body.
Seam Shoulders/Sleeves
Determine neck opening by finding center of long panels. For size small mark a 9 inch opening. See white stitch markers in photo above.
With wrong sides facing you, using a yarn needle and length of yarn, use a whip stitch to seam from bottom of sleeve to neck opening. Cut off yarn and repeat for opposite side.
Seam Body and Bottom of Sleeves
With right sides facing you, determine center of body panel and the granny squares panel. Seam using the same technique used to join the squares. See yellow arrow above. Repeat for opposite panels. (Front and back are the same.)
Wrong sides facing you, seam body and bottom of sleeve as shown in arrow above using a whip stitch. Repeat for opposite side. See white arrow above.
Copyright © 2021 Sylvia Talo You may sell items made from my patterns. Please include a link or reference to my shop CrazyCoolCrochetUS.etsy.com . Pattern and photos are copyright protected; may not be reproduced, redistributed, or displayed publicly in any way.
You May Also Like


