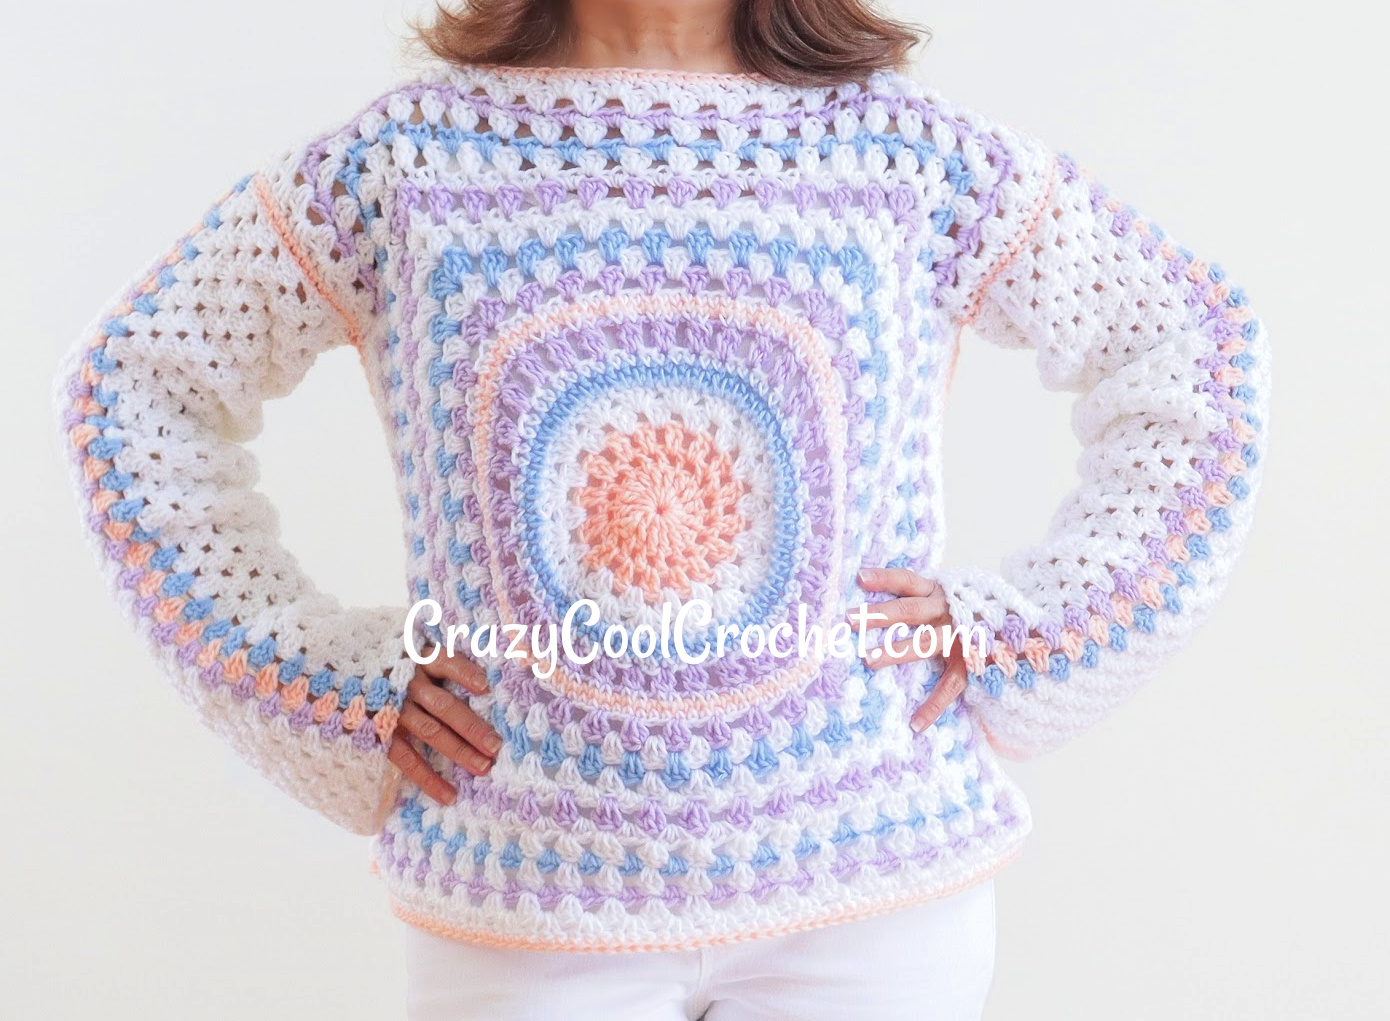
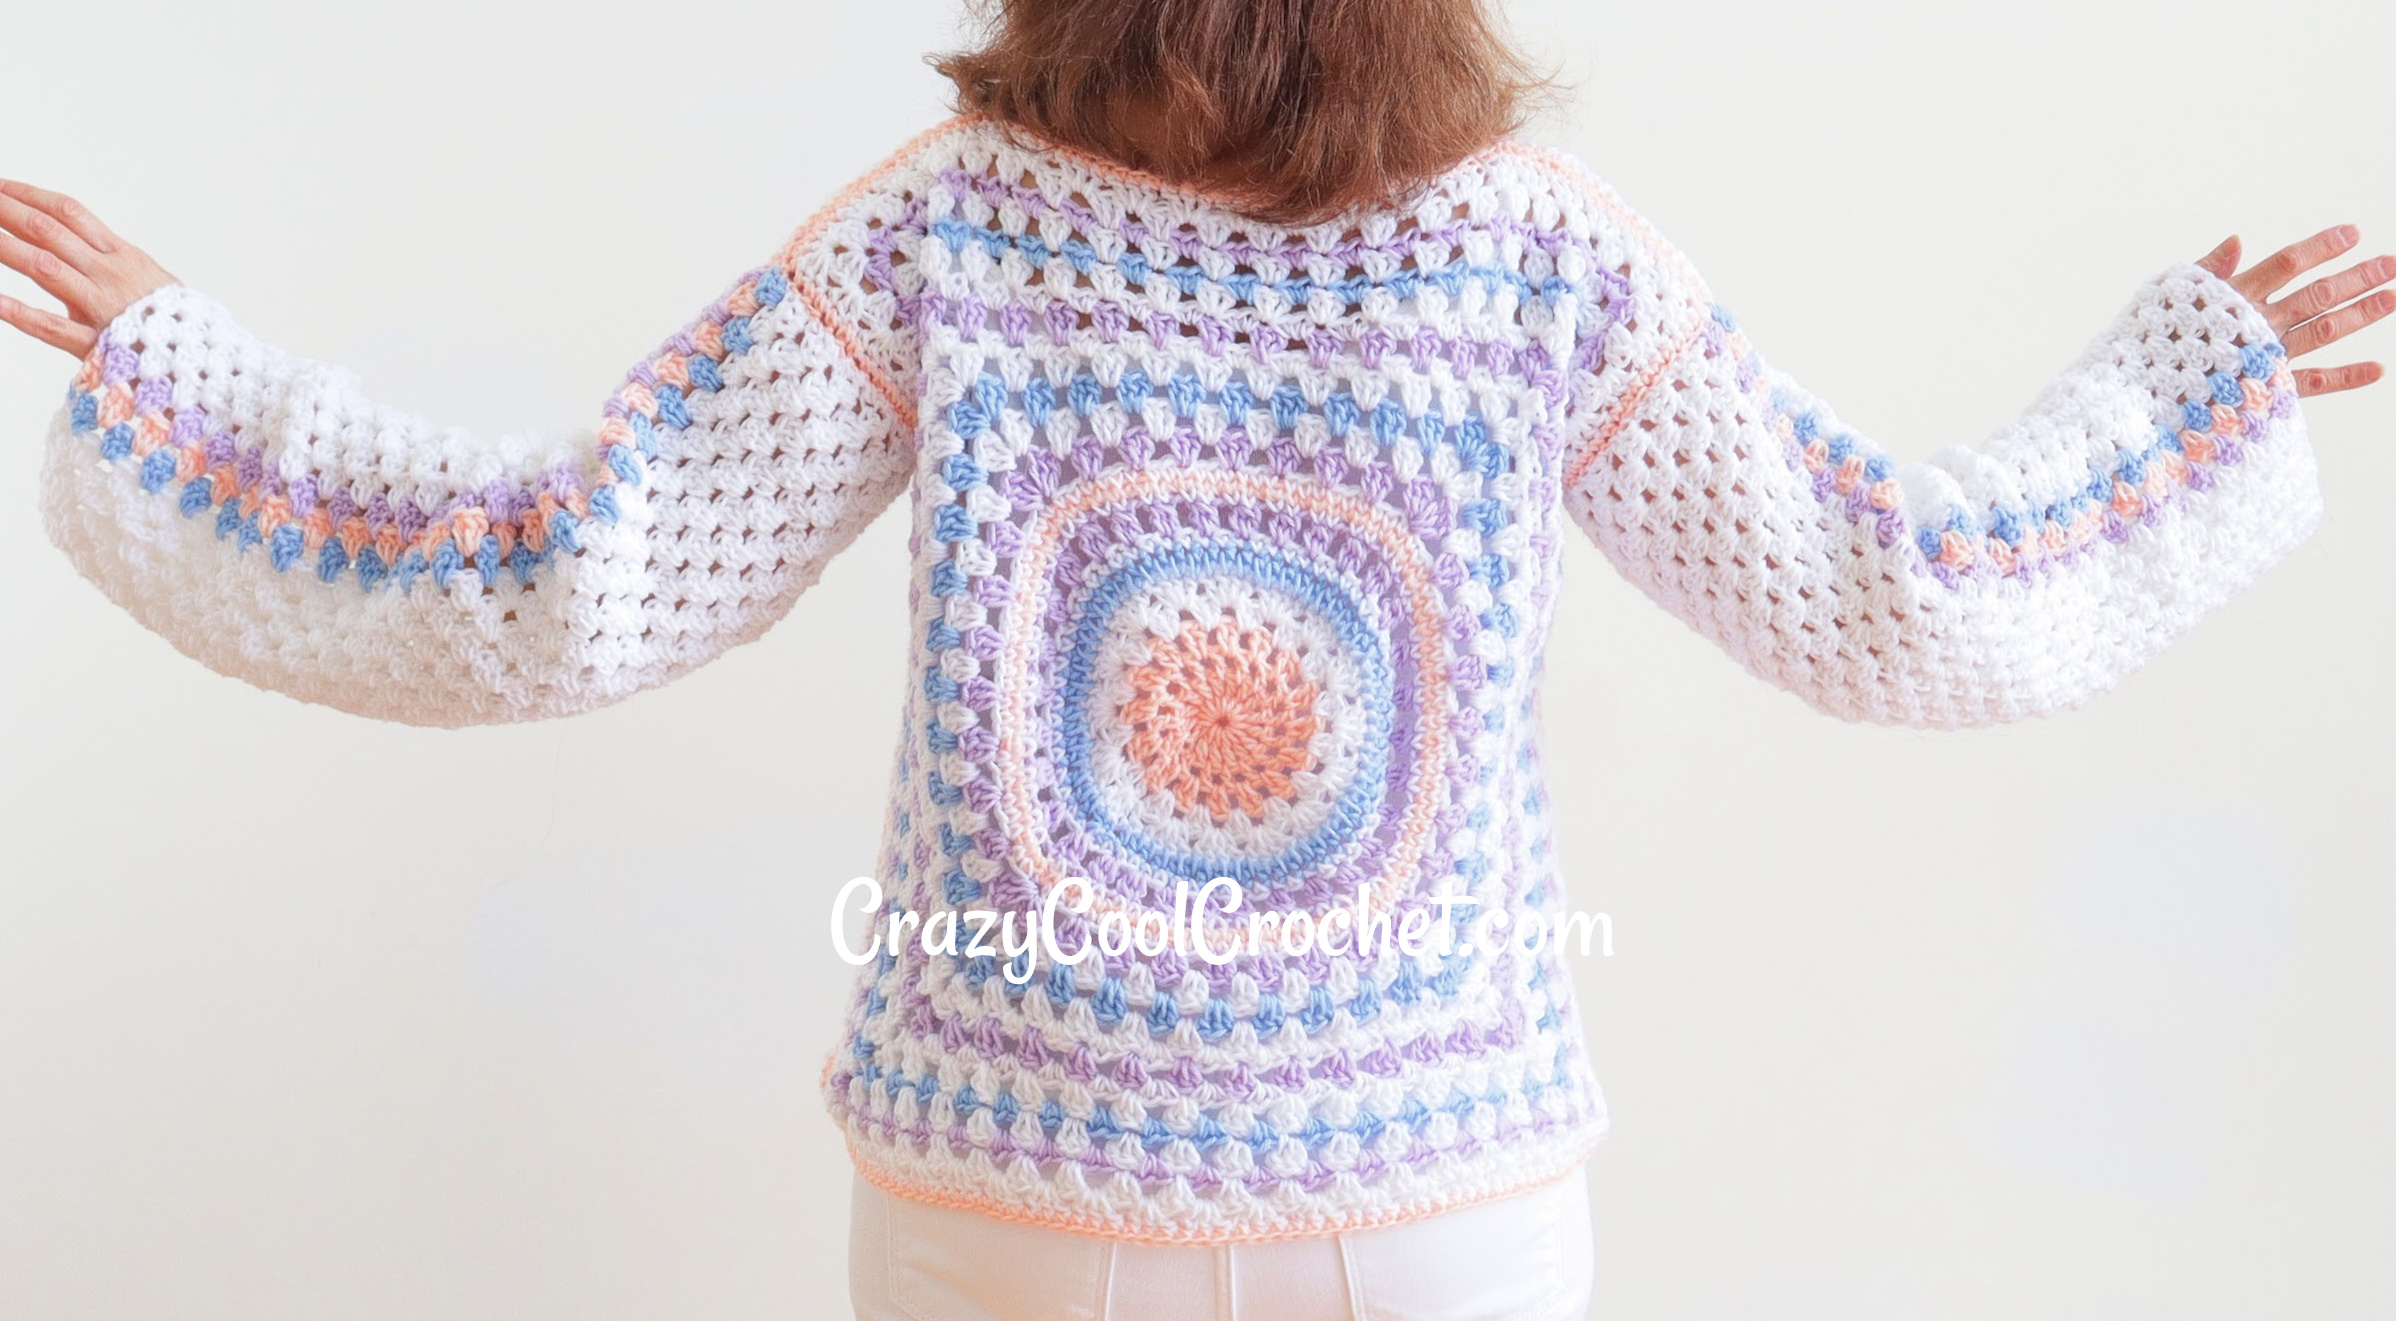
How adorable is this Crochet Granny Square Top for women in pastels? This is the perfect granny square top for spring or summer. The pastels make it the top to make and wear for Easter! And better still? This granny square top is crochet beginner friendly!
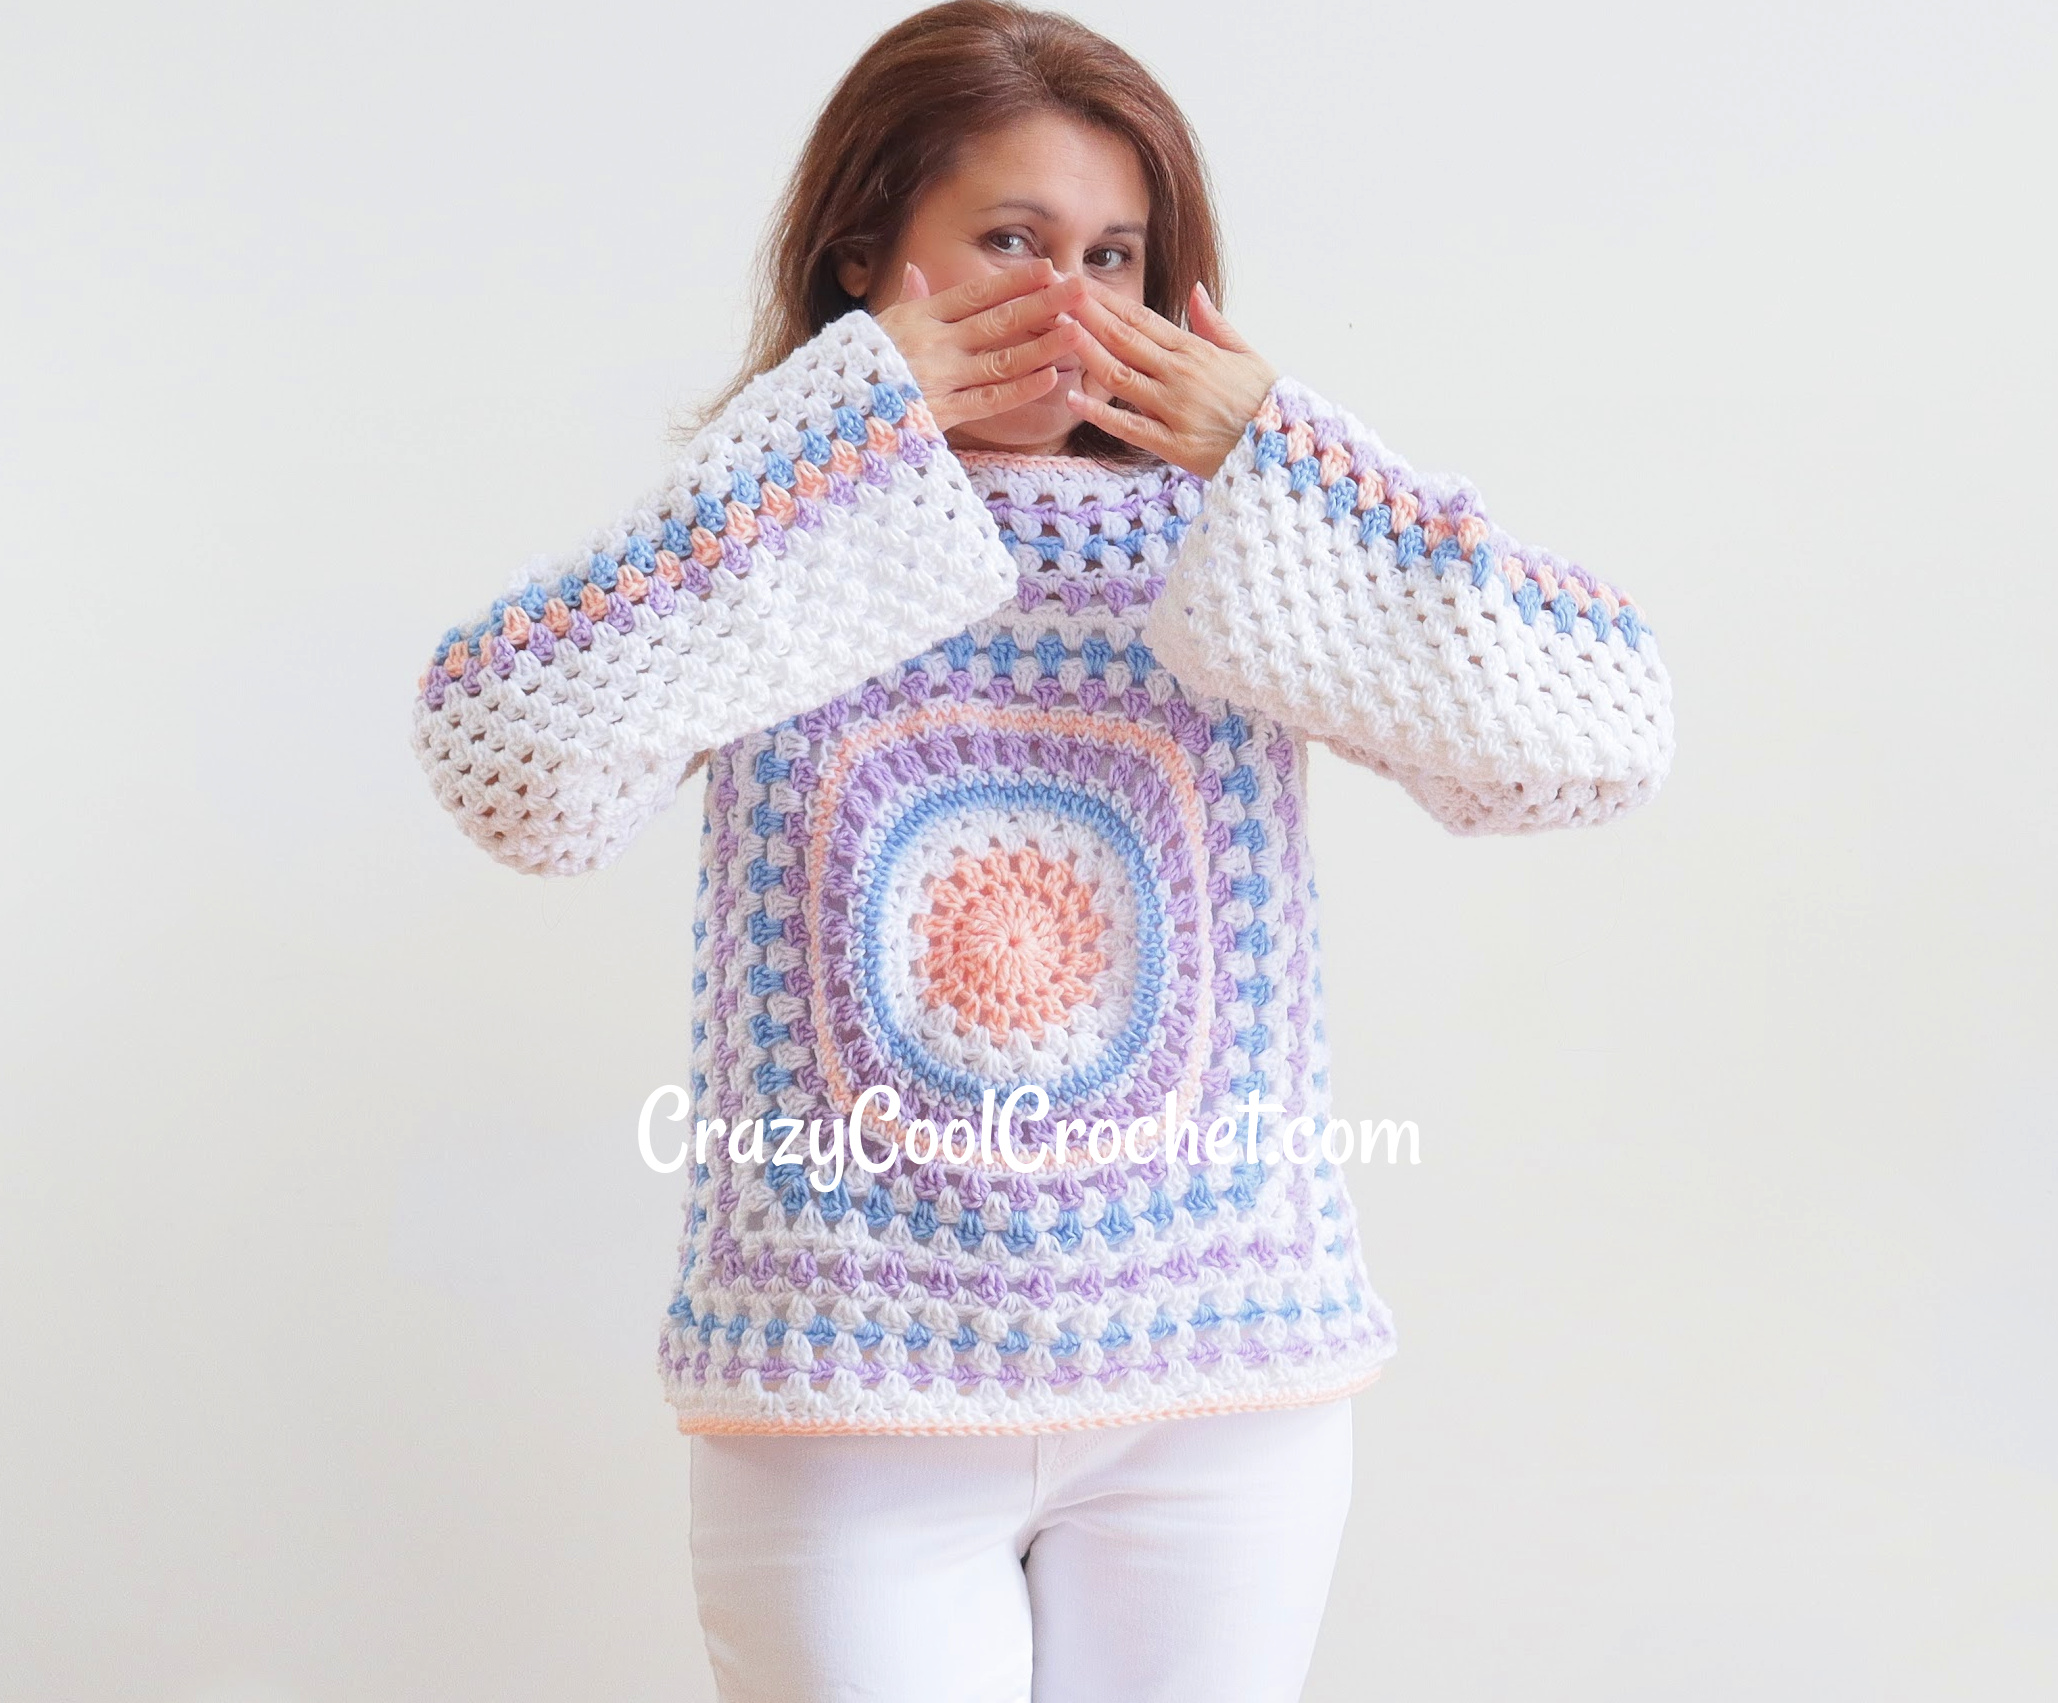
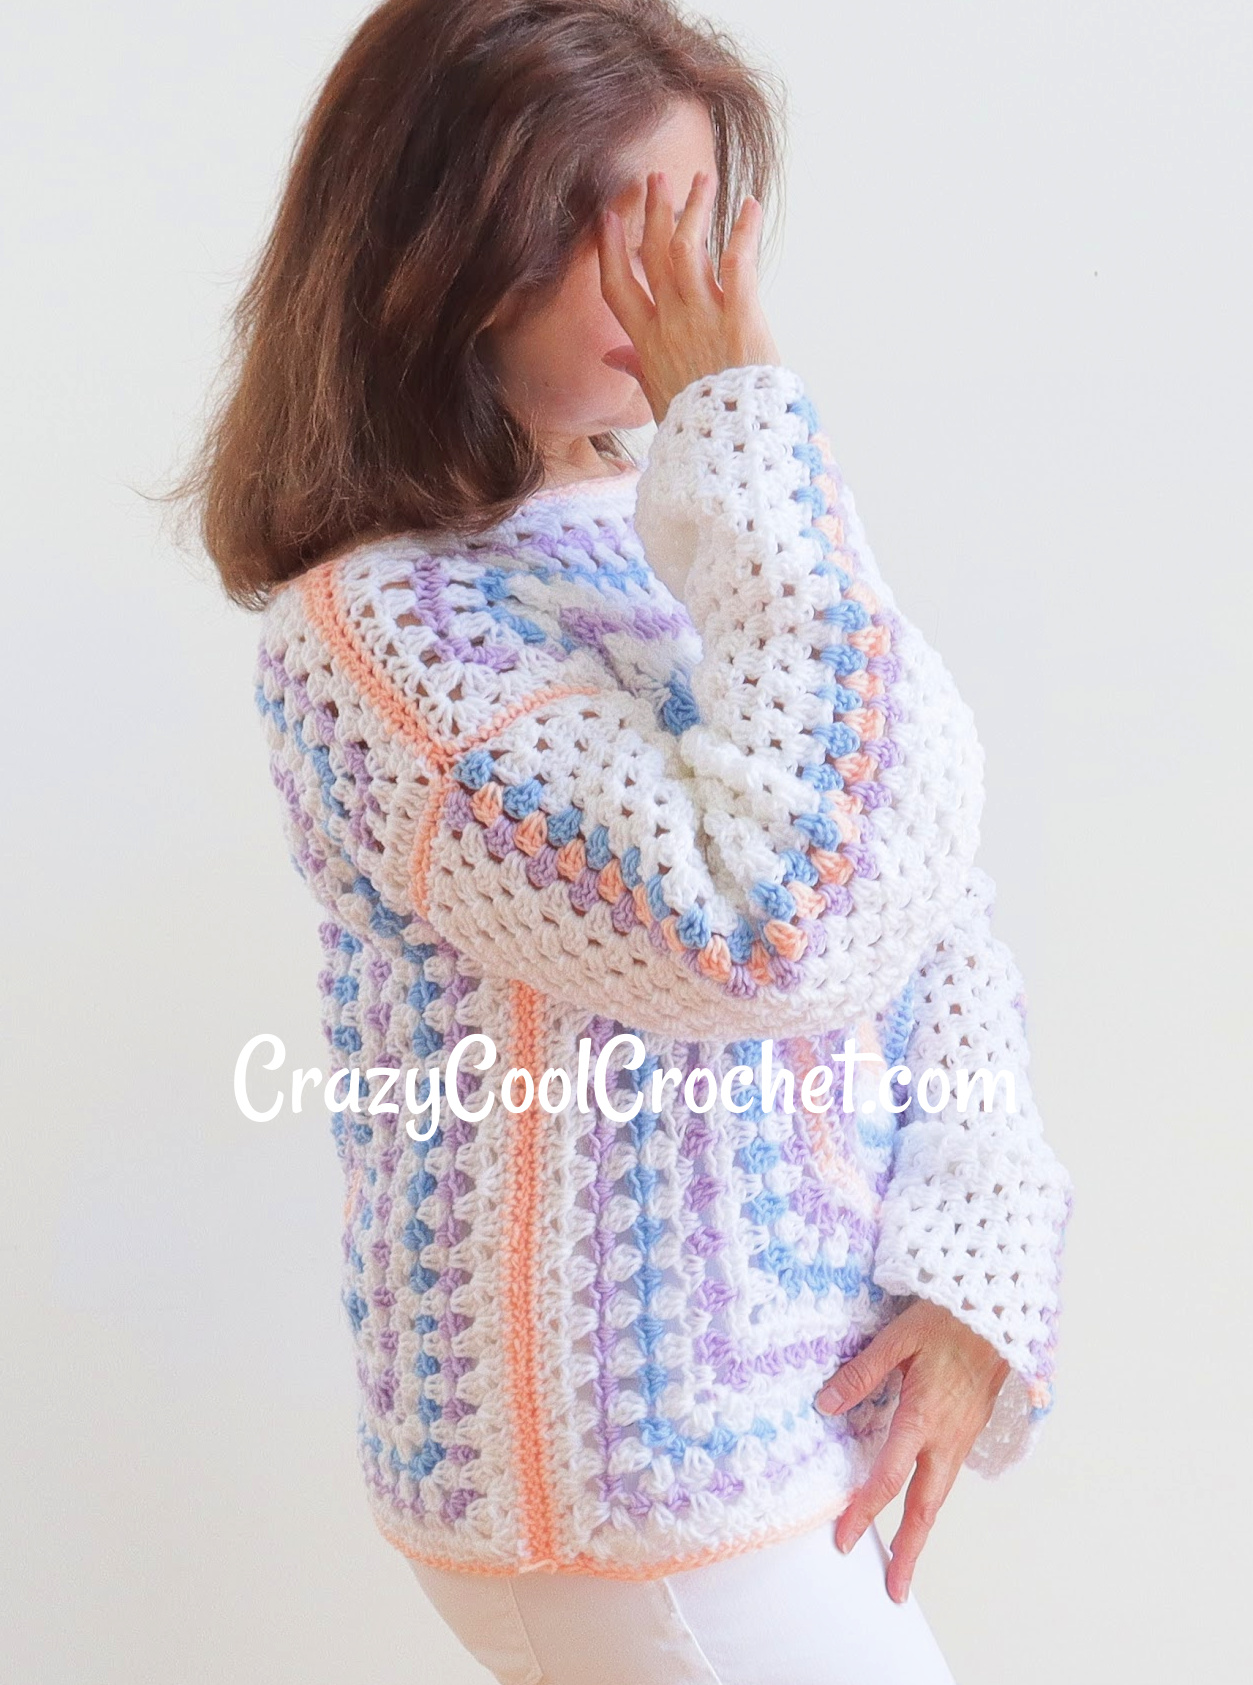
The long sleeves are optional, however, they do add an updated look to the typical crochet granny square top. And of course they add a little bit of warmth for chilly spring days or summer nights. We use a lightweight, sport weight, number 3 yarn to keep it comfortable for spring/summer.
And of course you can change out the colors to make it more appropriate for fall/autumn!
Crochet Granny Square Video Tutorial
Be sure to watch the video on YouTube by clicking on the little YouTube button at the bottom of the video below. You will be able to interact with me in the comments section and give me a big ole Thumbs Up. Thankyouverymuch.
Printable Pattern
Be sure to go to my Etsy shop for the PRINTABLE version of this pattern: CrazyCoolCrochetUS.etsy.com
Size Small
Instructions for larger sizes are given in the pattern details below.
This post contains affiliate links which means I may earn a small commission for purchases made from these links at no additional cost to you.
Crazy Cool Crochet is a participant in the Amazon Services LLC Associates Program, an affiliate advertising program designed to provide a means for sites to earn advertising fees by advertising and linking to Amazon.com
Materials:
Purchase comparable yarn here:
Yarn Used: Baby Bee Sweet Delight/ #3 Lightweight
Angel (white)/ 12 ounces / 1131 yards
Bashful (peach) / 1 ounce / 94 yards
Sugarplum (lavender) / 4 ounces / 377 yards
Baby’s Blue / 1 ounce / 94 yards
Crochet hook size G/ 4.25 mm
Yarn needle
2 stitch markers or contrasting yarn
Gauge: 5 dc sets = 4.5 inches , 4 rows dc sets = 2 inches
Abbreviations:
Ch = chain
Sl st = slip stitch
Sc = single crochet
Hdc = half double crochet
Dc = double crochet
Rpt = repeat
Trc = triple crochet
YO = yarn over
Dimensions size Small: 20 inches wide (one panel); 19 inches shoulder to bottom
NOTE: Photos appear above the corresponding row.
NOTE 2: Cut off previous color yarn (leaving 5 inch tail to weave in) at each change in color.
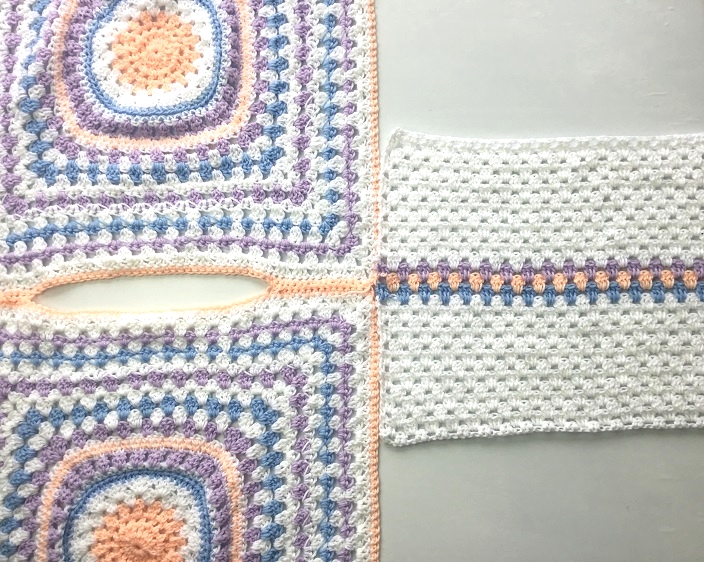
Make 2 identical panels.
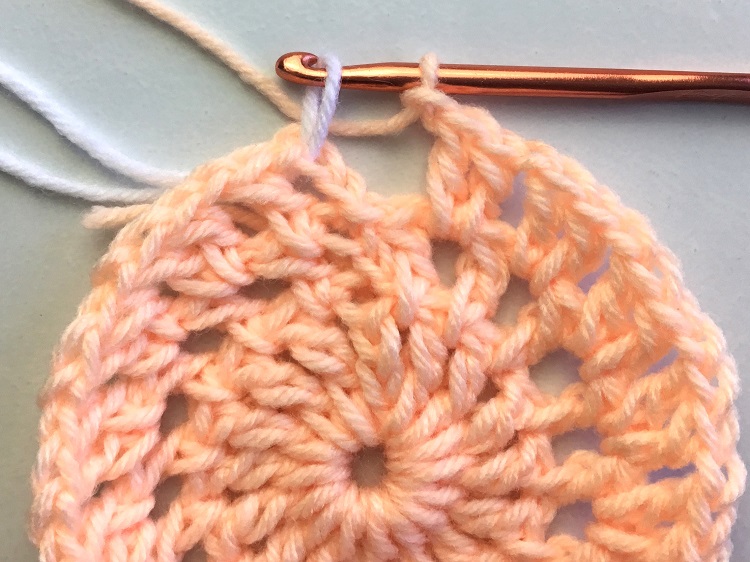
Ch 4 with peach; sl st in first chain to form ring.
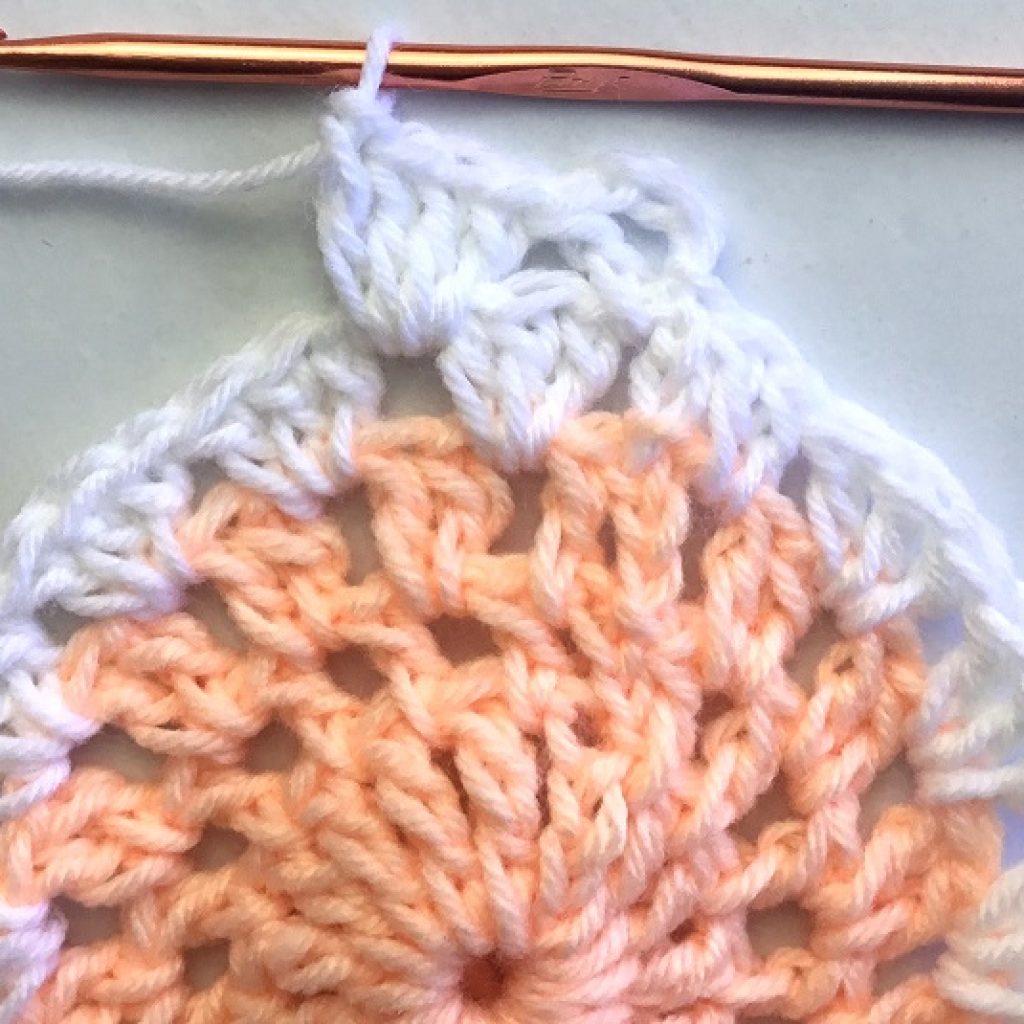
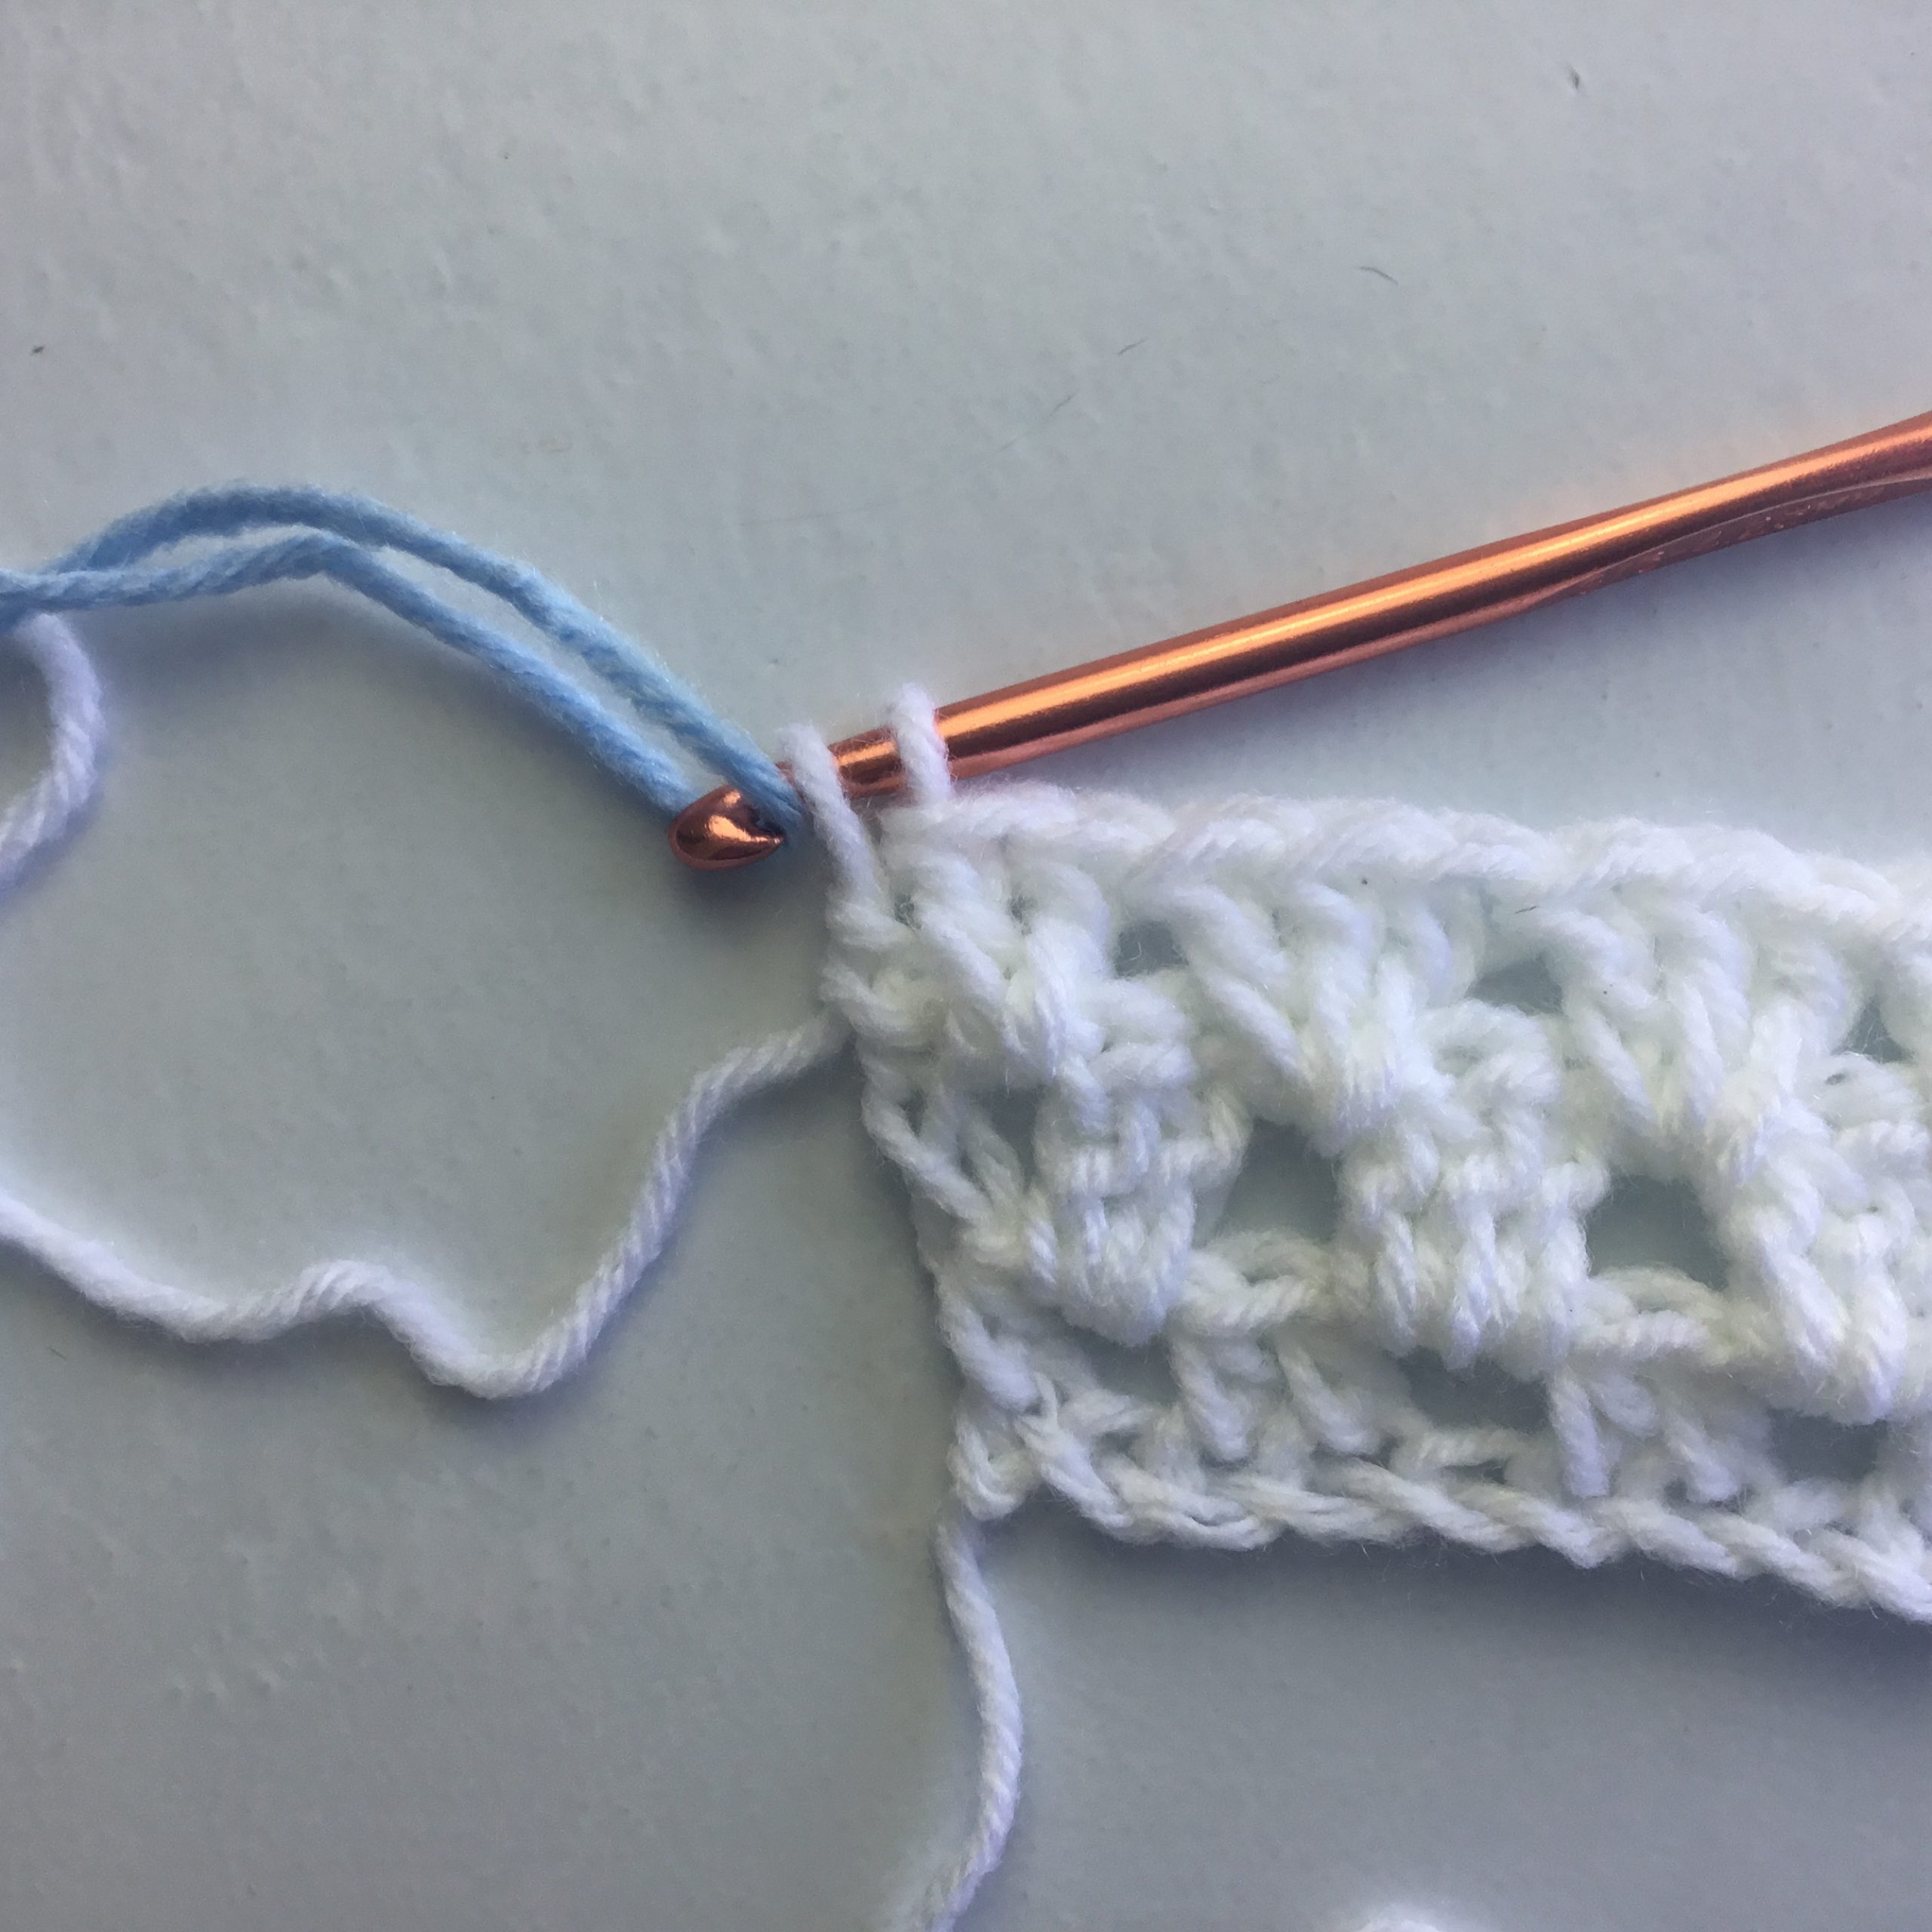
Row 1: Ch 4. Work 15 Trc into the center hole. Sl st into top of beginning ch to join.
Row 2: Ch 3; Dc in 1st sp; *ch 1; dc in next sp*. Rpt from * to * to complete 16 dc’s (do not count beginning ch). Sl st to join.
Row 3: Ch 3; dc in 1st ch 1 sp; *ch 1; 2 dc in next sp*. Rpt from * to * to complete 31 dc’s (do not count beginning ch). Join with sl st with the next color (white).
Row 4: Ch 3; 3 dc in 1st ch 1 sp; ch 1; 3 dc in next sp*. Rpt from * to * to last ch 1 sp. Work 2 dc in last sp. 47 dc total (do not count beginning ch). Join with sl st.
Row 5: Ch 3. 1 dc in sp under the beginning ch. Work 4 dc in ea sp between the dc sets in previous row. In last sp work 2 dc. Join with sl st with the next color (blue).
Row 6: Ch 3. Working under the 2 strand ch’s that form at the top of previous row, Hdc into the 1st st (the 1st dc in previous row); hdc in ea st to complete 63 hdc’s. Join with sl st with the next color (white).
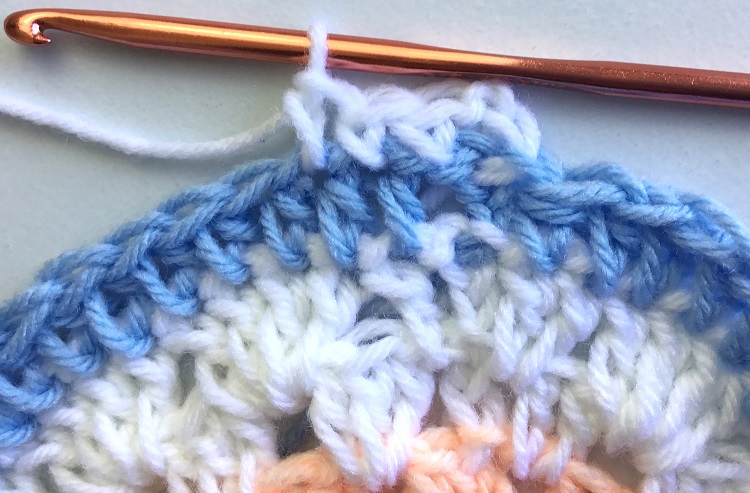
Row 7: Ch 2. Working under the 2 strand ch’s that form at the top of previous row, Sc into the 1st st; Sc in ea st to complete 63 sc’s. Join with sl st with the next color (lavender).
Please view the video tutorial above for better visual instruction.
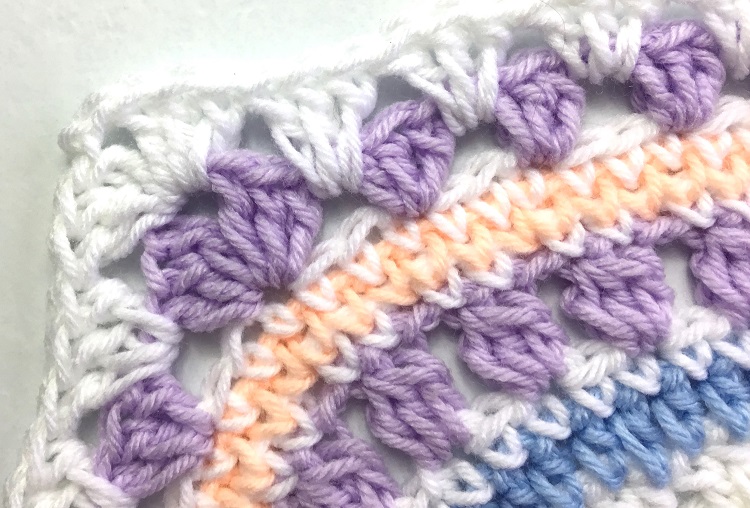
Row 8: Ch 3. In same sp begin a dc for 3 loops on hook; pull through 1st 2 loops; YO for 4 loops on hook; pull through 1st 2 loops; pull through last 3 loops; *ch 2; sk next sp; in next sp, YO to begin a dc, pull through 2 loops; YO, pull through 2 loops; YO pull through 2; pull through all 4 loops*. Rpt from * to * to complete 32 dc “clusters” (including the 1st “cluster”). Join with sl st with the next color (white).
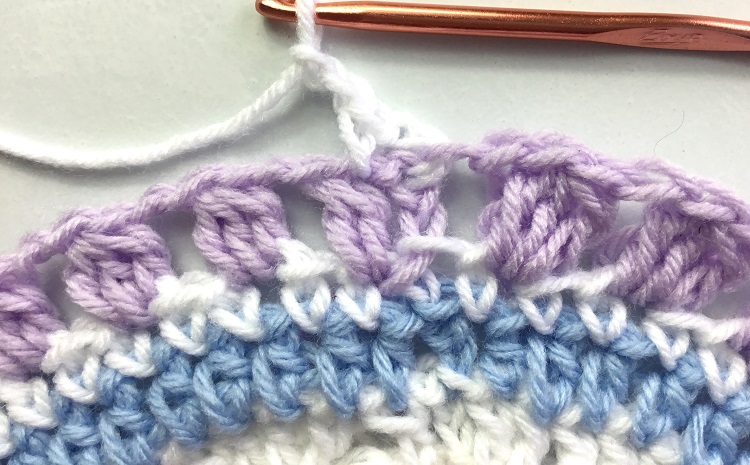
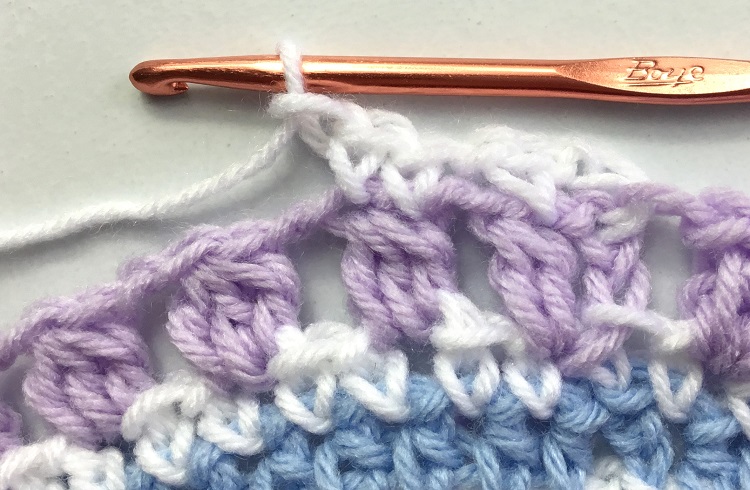
Row 9: Ch 2. Sc in st on top of the middle post below (the 1st dc below); *ch 1; sk 2 ch sp; 1 sc in ea of 2 st’s above the dc cluster*. Rpt from * to * completing 63 sc’s. Join with sl st with the next color (peach).
Row 10: Ch 2. Sc in 1st sc below; *sc in ch sp; sc into ea of next 2 sc’s below (you are working INTO the center, or heart, of the sc below)*. Rpt from * to * for 96 sc’s. Join with sl st with the next color (white).
Row 11: Ch 1. Sc into ea sc below (you are working INTO the center, or heart, of the sc below) to complete 96 sc’s. Join with sl st with the next color (lavender).
Row 12: Ch 3. In same sp work 2 dc’s. *Sk next 2 sp’s; 3 dc in next sp*. Rpt from * to * to complete 7 sets of dc’s (not counting the beginning set). Sk next 2 sp’s; 3 dc in next sp, ch 2, 3 dc in same sp (corner completed). Rpt from * to * to complete 7 sets of dc’s. Sk 2 sp’s. Work a corner into the next sp. Rpt all for 3 total corners. Then Rpt from * to * to complete the last 7 sets of dc’s. Sk next sp; 3 dc’s into the 1st sp; ch 2; join with next color (white) to complete the corner.
Row 13: Ch 3. Work 2 dc’s ’in same sp. *Work 3 dc’s in the sp between the dc sets below for 8 sets of dc’s. Work a corner into the 2 ch sp of the corner below*. Rpt from * to * to the beginning sp. Work 3 dc’s in beginning sp; ch 2. Join with next color (blue) to complete the corner.
Row 14: Rpt Row 13 for 9 sets of dc’s. Join with next color (white) to complete the corner.
Row 15: Rpt Row 13 for 10 sets of dc’s. Join with white to complete the corner.
Row 16: Continue in pattern working in SC’s (not DC’s) for 11 sets of sc’s. Join with next color (lavender) to complete the corner.
Row 17: Continue in pattern working in DC’s for 12 sets of dc’s. Join with next color (white) to complete the corner.
Row 18: Rpt Row 16 for 13 sets of sc’s.
Row 19: Rpt Row 16 for 14 sets of Dc’s (in white). Join with next color (blue).
Row 20: Rpt Row 16 for 15 sets of Sc’s. Join with next color (white).
Row 21: Rpt Row 16 for 16 sets of Dc’s (in white). Join with next color (lavender).
Row 22: Rpt Row 16 for 17 sets of Sc’s. Join with next color (white)
Rows 23 – 24: Rpt Row 16 Dc’s (in white). Join with next color (peach)
Row 25: Ch 1; Working under the 2 strand ch’s, sc in ea st around perimeter of square. Work slightly loosely in the corner st’s. At end of row, join and cut off yarn.
Larger sizes instructions
Work in pattern as follows:
Medium: Row 25 sc’s in lavender. Row 26 dc’s in white. Row 27 dc’s in white. End with the peach sc border.
LG/XL: Row 25 sc’s in lavender. Row 26 dc’s in white. Row 27 dc’s in white. Row 28 dc’s in blue. Row 29 dc’s in lavender. Row 30 sc’s in white. Row 31 sc’s in blue. Row 32 sc in lavender. Row 33 dc in white. End with the peach sc border.
1X/2X: Row 25 sc’s in lavender. Row 26 dc’s in white. Row 27 dc’s in white. Row 28 dc’s in blue. Row 29 dc’s in lavender. Row 30 sc’s in white. Row 31 sc’s in blue. Row 32 sc in lavender. Row 33 dc in white. Row 34 dc in white. Row 35 dc’s in blue. Row 36 dc’s in white. Row 37 dc’s in white. Row 38 dc’s in lavender. Rows 39 and 40 dc’s in white. End with two rows of the peach sc border.
Weave in tails on the wrong side as needed.
SLEEVES (make 2)
Ch 71 with white.
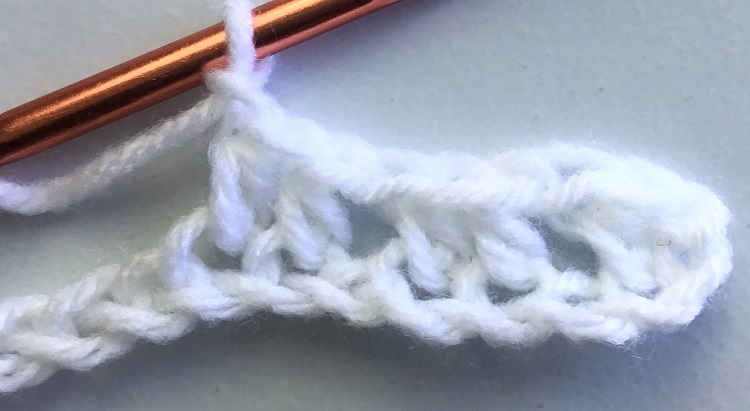
Row 1: Hdc in 3rd ch from hook (do not count loop on hook); *ch 1; sk next ch. Hdc in ea of next 2 ch’s*. Rpt from * to * to last 2 ch’s. Ch 1; sk 1 ch; hdc in last ch. Ch 3. Turn
Row 2: 2 dc’s in 1st ch 1 sp; 3 dc’s in ea ch 1 sp to the last ch 1 sp. 2 dc’s in the last ch 1 sp; 1 dc in turning ch. Ch 3. Turn
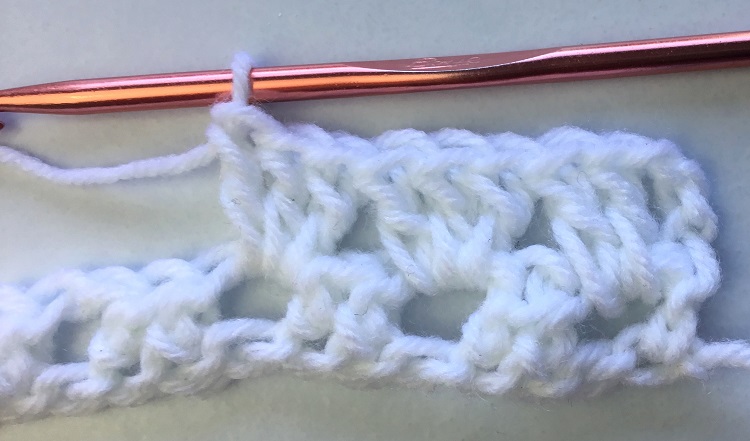
Row 3: 3 dc’s in ea sp between the dc sets in previous row to the last sp. 2 dc’s in last sp; dc in turning ch. Ch 3. Turn
Rows 4 – 13: Rpt Row 3. End Row 13 changing color to blue to complete the last dc in the turning ch. Ch 3. Turn
Lg/XL rpt Row 3 for one additional row.
1X/2/x rpt Row 3 for two additional rows.
Row 14: Continue in pattern changing color to peach to complete the last dc in the turning ch. Ch 3. Turn
Row 15: Continue in pattern changing color to lavender to complete the last dc in the turning ch. Ch 3. Turn
Row 16: Continue in pattern changing color to white to complete the last dc in the turning ch. Ch 3. Turn
Rows 17 – 28: Continue in pattern with white. At the end of Row 28 ch 2. Turn
Lg/XL rpt Row 3 for one additional row.
1X/2/x rpt Row 3 for two additional rows.
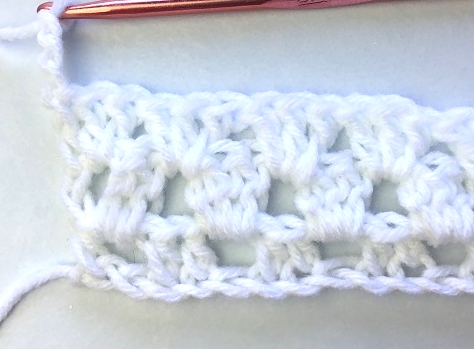
Row 29: Hdc into the top of the middle post (dc) below; *ch 1; sk 1 sp; hdc in ea of next 2 st’s*. Rpt from * to * to last 3 st’s. Hdc in last 2 st’s; hdc in turning ch. Cut off yarn. (ignore blue in center pic)
Attach Panels at Shoulders
Place panels right sides together, wrong side facing you. Determine your preferred width for the neck opening. Suggest 8 – 9 inch opening. Add stitch markers to mark start and end of opening. With yarn needle and length of yarn, insert hook under two strands of each panel, use whip stitch to seam at shoulders.
SEAM SLEEVES to SHOULDERS
With main panels wrong side up and splayed open, position sleeve (wrong side up) so the peach row is centered at the shoulder seam. Use whip st to seam sleeve to body.
SEAM SIDES and BOTTOM OF SLEEVES
With wrong side facing you, using whip st and length of yarn, seam from bottom to the underarm using peach yarn. Change yarn to white to seam the bottom of sleeves.
Copyright © 2022 Sylvia Talo You may sell items made from my patterns. Please include a link or reference to my shop CrazyCoolCrochetUS.etsy.com . Pattern and photos are copyright protected and may not be reproduced, redistributed, or displayed publicly in any way.
You May Also Like


I Can’t wait to start this sweater. I’ll attach a picture when I done
That’s great! I’m happy you are working this pattern.
Sylvia