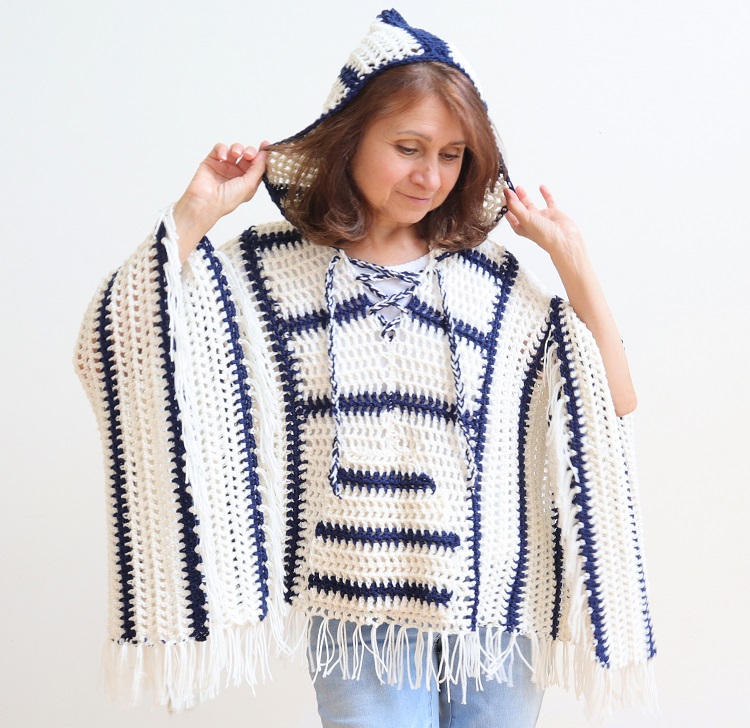
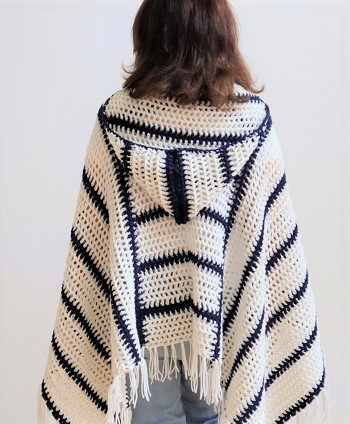
Free crochet patterns and video tutorial below for this GORGEOUS crochet poncho with HOOD! Made with lightweight number 3 yarn, sport weight yarn, for a very light, flowy poncho. This design has the lovely soft hood, front pocket, tie and fun fringe.
As I explain in the video below, this design is actually a replica of a store bought version I saw online. The original costs $298! I made some slight changes, used $11 worth of yarn and took about 4 days to complete. Viola!
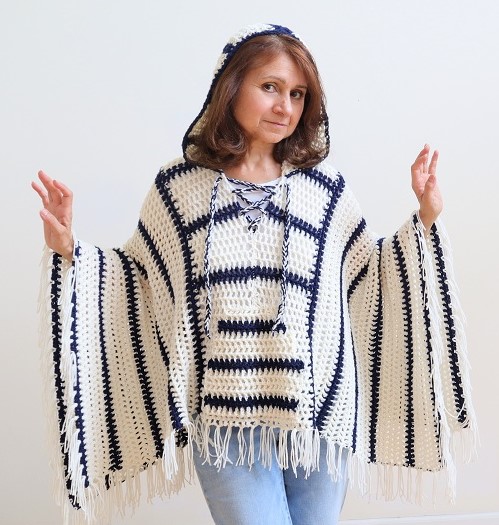
This is actually a fairly simple pattern using just double crochets and half double crochets. And a quick single crochet border along the decorative hood. The instructions look a bit daunting because there are so many “moving parts”; meaning there are a few extra steps like the pocket, hood, etc. It’s still rather easy. And isn’t it just beautiful?
Please be sure to watch the video on YouTube so you can subscribe, give a thumbs up and comment. Also, if you would like to support my little crochet business (thankyouverymuch) please watch the entire video. This is extremely helpful to my YouTube channel.
CROCHET PONCHO WITH HOOD PRINTABLE PATTERN
Printable Etsy pattern : CrazyCoolCrochetUS.etsy.com
Pattern is for a size Small. Instructions for Medium, Large, XLarge, 1X are in parentheses (x).
Sizing instructions should be considered recommendations only. Personal tension used, yarn used, hook used, all affect the final outcome.
Materials
Yarn: #3, lightweight, sport weight /I Love This Yarn from Hobby Lobby/ Color Ivory/ 15 ounces / approximately 1380 yards and Navy /3.75 ounces or 345 yards

Crochet hook G / 4.25 mm and I / 5.5 mm for the tie
Yarn needle
Scissors
Measuring Tape
NOTE: Photos appear above corresponding row.
NOTE 2: Do not count the turning chains at beginning of rows as part of the stitch counts.
NOTE 3: The bottom of the poncho should fit (length) near the hip bones (not including the fringe).
NOTE 4: Carry the previous color yarn up the edge of row for the front and side panels. View the YouTube video tutorial at Crazy Cool Crochet for visual instruction.
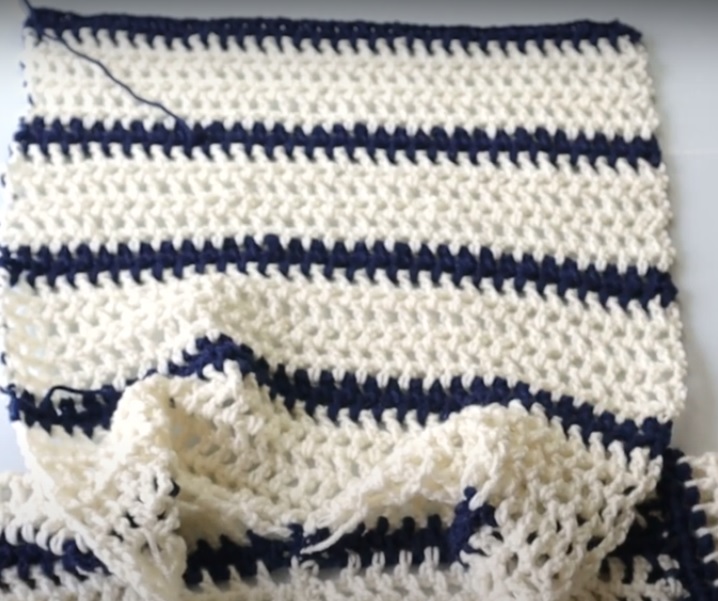
MAIN PANEL (make 2; note adjustments for 2nd panel below)
Ch 24 (28, 32, 38, 48) with Ivory (white)
Row 1: dc in 4th ch from hook; ch 1; *sk.next ch; dc in next ch; ch 1*. Repeat from * to * to last two ch’s. Sk 2nd to last ch; sc in last ch. 11 (13, 15, 18, 23) dc total. Ch 4. Turn
Row 2 – 19 (23, 25, 29, 37): dc in 1st ch 1 sp below; ch 1; *dc in next ch 1 sp; ch 1*. Repeat from * to * to last sp. Do not enter a dc in last sp. Dc into the turning ch. 11 dc total. Ch 4. Turn
End these white rows to just under the bust or around the bust line. Adjust for length to your preference. Example: if you have a larger bust or longer torso you may require additional length.Adjust as needed, adding or subtracting from these white rows. These adjustments will not change the remainder of the pattern instructions. Continue working the pattern as written.
NOTE: To help visualize the final length, the completed panel is folded half with the center being the shoulder.
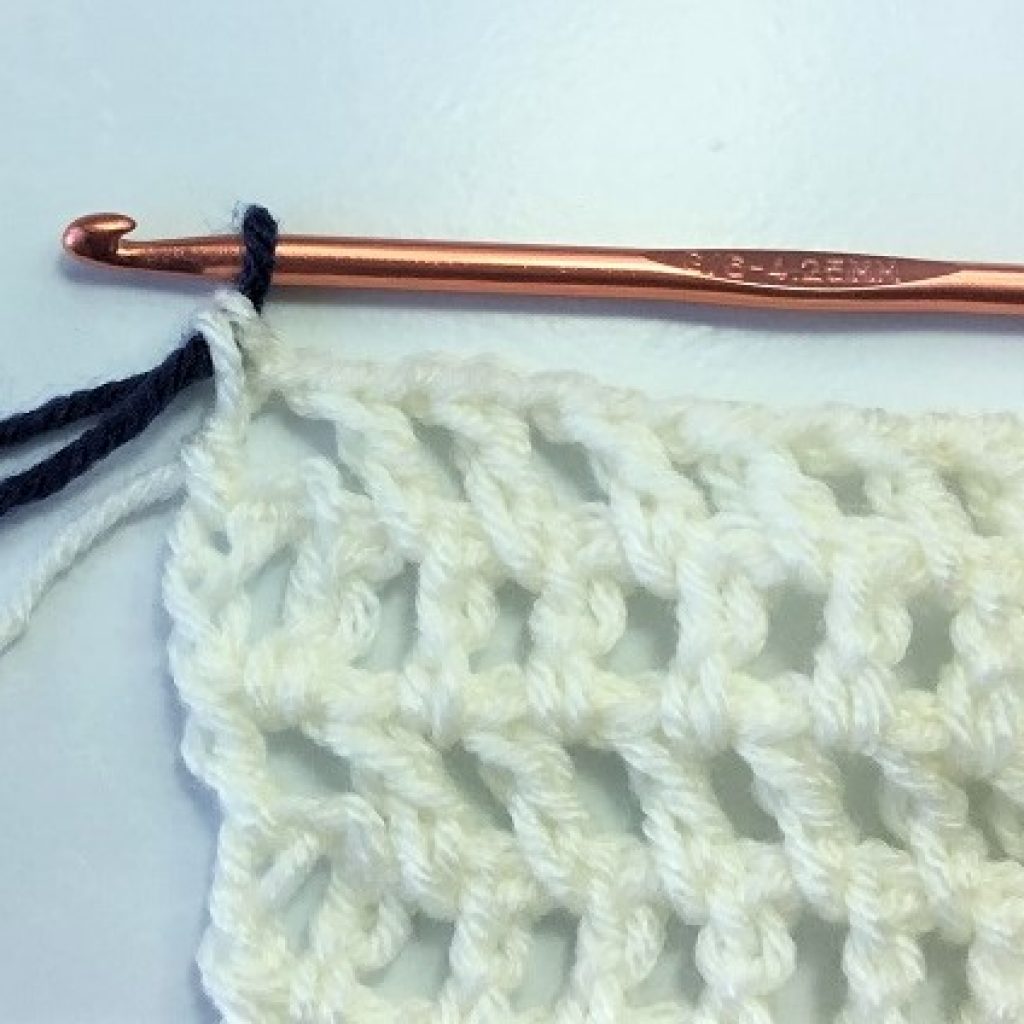

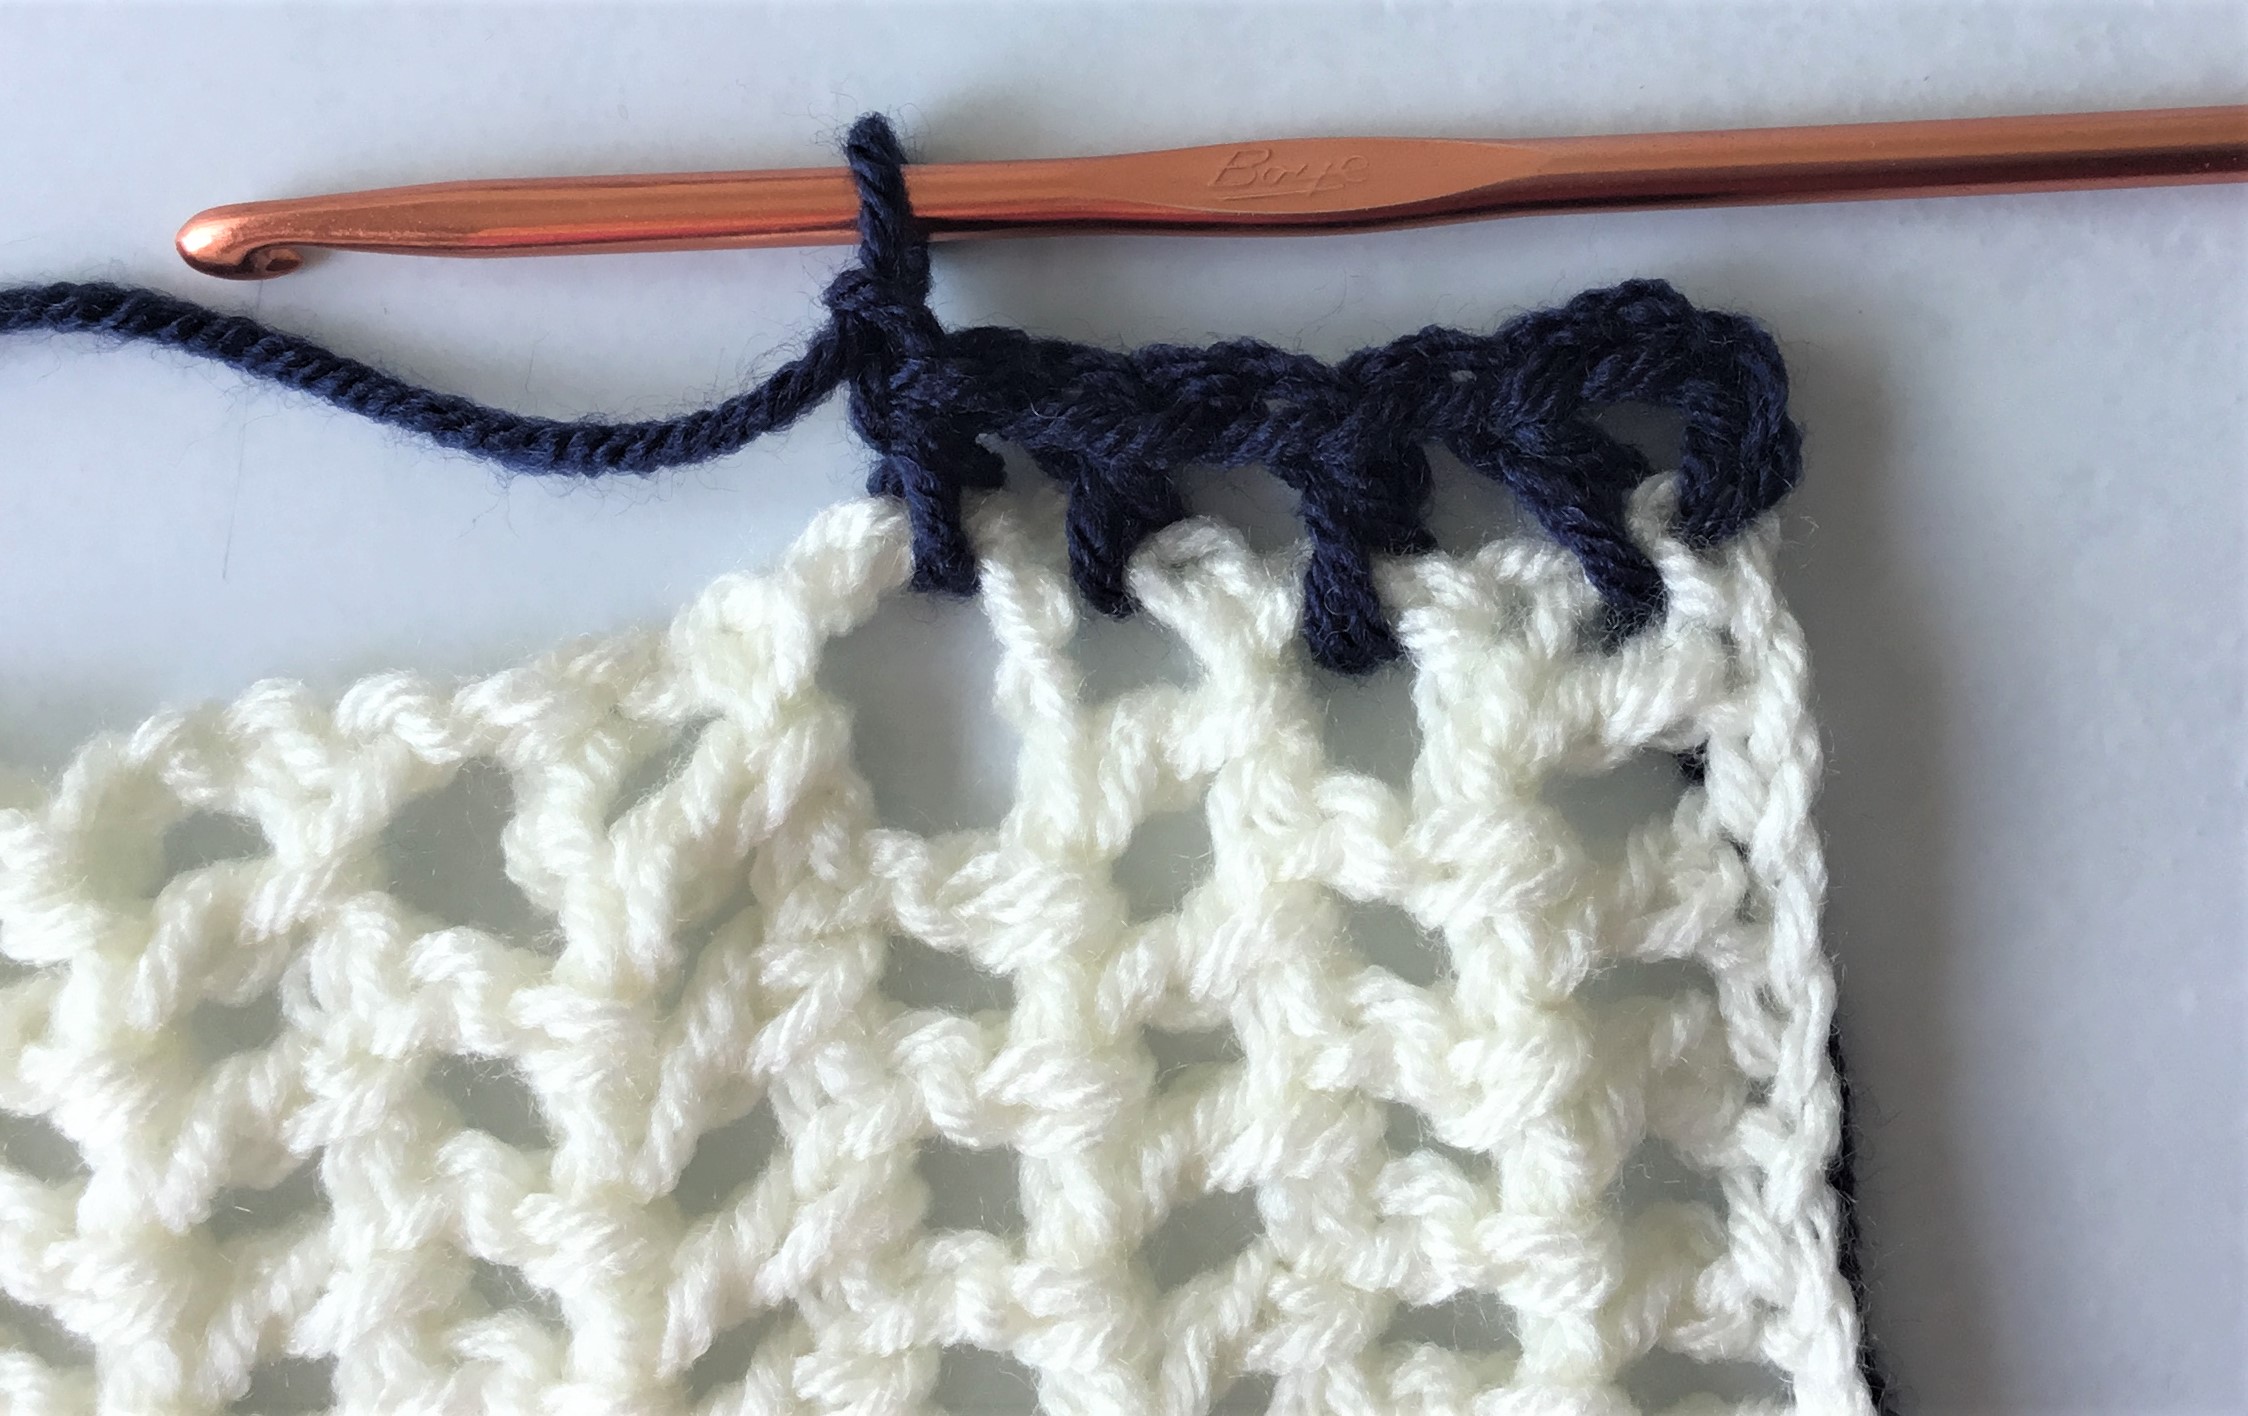
Row 20 (24, 26, 30, 38): Repeat Row 2 to the last dc. Begin the last dc for 2 loops on hook; complete the dc with the blue yarn. Ch 3. Turn
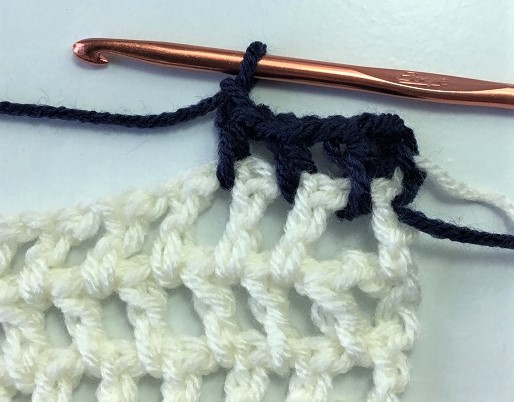
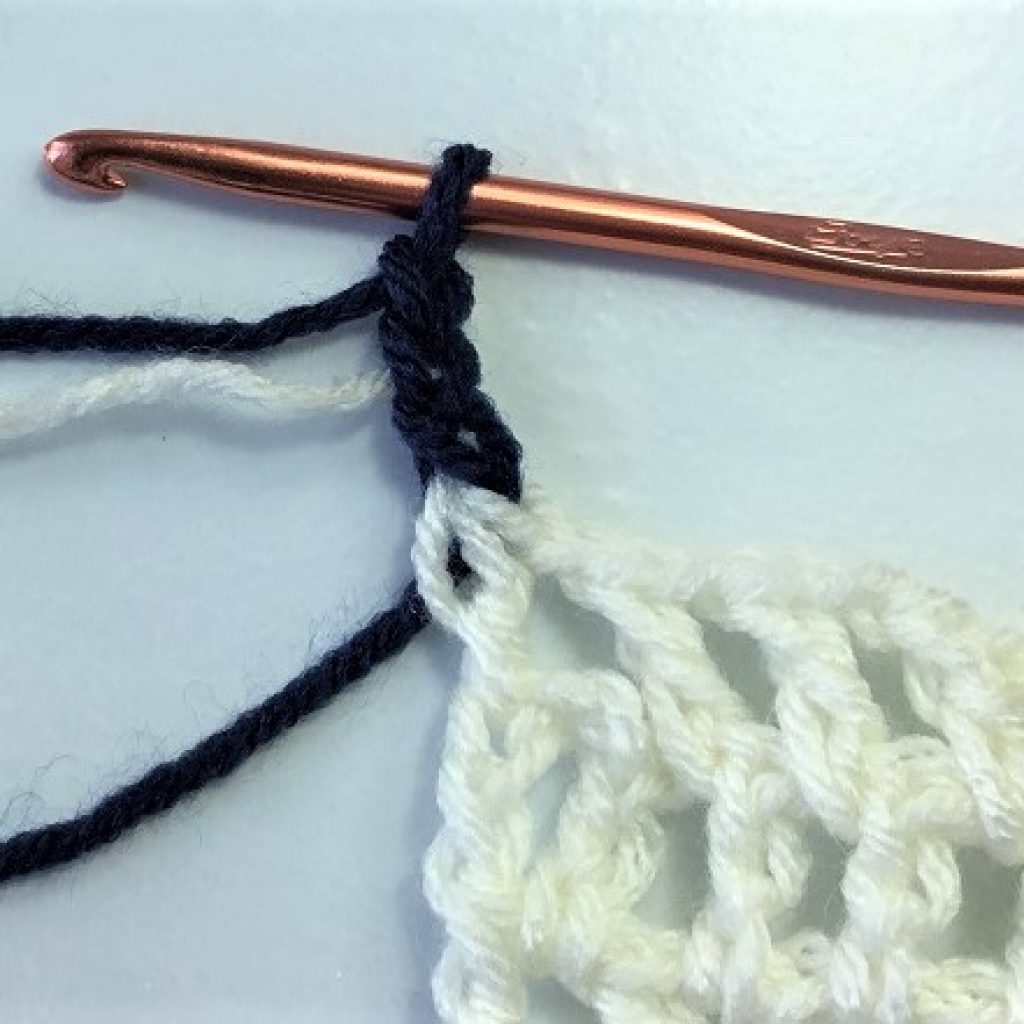
Row 21 – 22 (25-26, 27-28, 31-32, 39-40): hdc in 1st ch 1 sp below; ch 1; *hdc in next ch 1 sp; ch 1*. Repeat from * to * to last sp. Do not enter a hdc in last sp. Hdc into the turning ch. 11 (13, 15, 18, 23) hdc total.
At end of Row 22 (26, 28, 32, 40), begin the last hdc in the turning ch with the blue yarn for 3 loops on hook. Drop blue yarn, complete the hdc with the white yarn. Ch 4. Turn
Remember to continue carrying the previous color yarn up the edge of the rows to be able to make the color changes as needed.
Continue working in pattern, 6 rows white dc and 2 rows blue hdc to complete 8 sets of blue and 8 sets of white blocks (not counting the first, long white block). End the panel on a white block. Do NOT cut off yarn.
NOTE: adding sets (color blocks) will add length. We already added length to the beginning of this panel with the initial white rows. Before adding additional sets (below), check the current length by throwing the panel over your shoulder. The center of the panel is the shoulder. The poncho should land around the hip bones (before fringe) or to your preferred length.
Medium: 8 sets blue; 8 sets white
Large: 8 sets blue; 8 sets white
X Large: 9 sets blue; 9 sets white
1X: 10 sets blue; 10 sets white
At the end of the last row of the panel, change to blue yarn as usual. Ch 3. Turn the panel sideways to work along the long edge. HDC into the 1st sp. Continue working in the same pattern for 6 sets of blue stripes and 5 sets of white blocks ending on the blue. At end of last row cut off yarn.
Medium: 6 sets blue; 5 sets white
Large: 7 sets blue; 6 sets white
X Large: 7 sets blue; 6 sets white
1X: 8 sets blue; 7 sets white
2nd FRONT PANEL
Repeat pattern for the first panel.
At end of the last blue set cut off yarn. At end of the last white block, cut off yarn.
NOTE: For the example poncho, when positioning the completed panels to seam in the center (instructions will be below), I used the “wrong side” of the first panel as the “right side”. This was strictly for aesthetic purposes. I thought the wrong side looked nicer than the right side. As such, for the 2nd panel I needed to adjust how the second portion of the 2nd panel was worked.
With proper right side of the panel facing you (the tail from the foundation chain should be on your left), attach the blue yarn into the bottom corner of the panel (the 1st row of the panel) with a ch 3.
HDC into the 1st sp. Continue working in the same pattern for 6 sets of blue stripes and 5 sets of white blocks ending on the blue. At end of last row cut off yarn.
Follow instructions for 1st panel for size adjustments
.
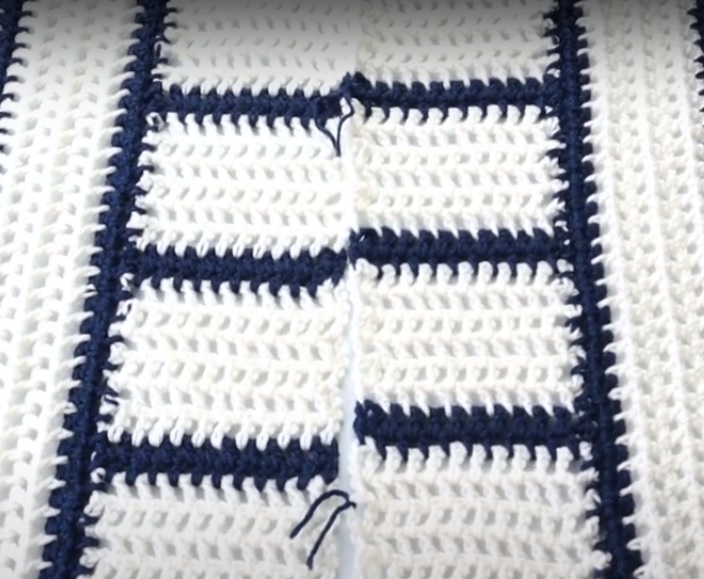
SEAM PANELS
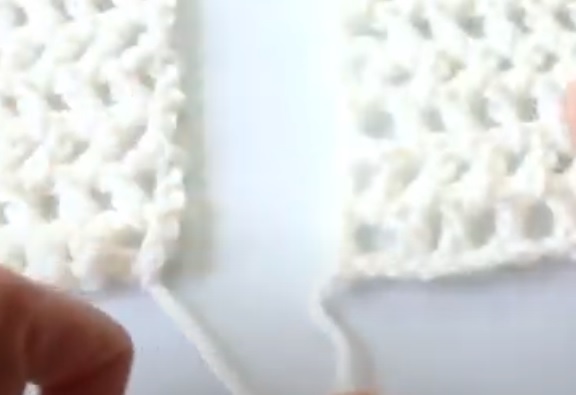
Position panels with foundation chain “tails” as shown in photo above. The first panel worked is on your left and the second panel is on the right.
Determine the bottom of the front neck opening and attach a st marker (I use a small strip of yarn). Remember, when the panel is folded in half, the center is the shoulder. The front seam will be about 13 inches long.
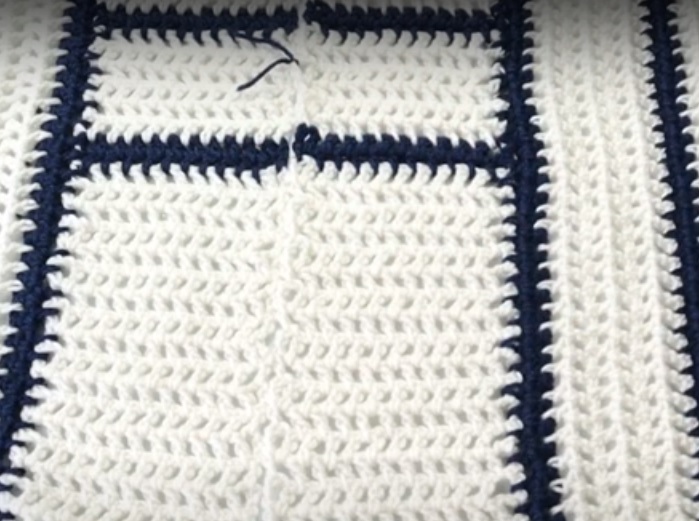
NOTE: Ensure the rows/colors are matching up as you seam.
Position panels together, wrong side facing you. With yarn needle and length of white yarn, use a whip stitch to seam from the bottom of the front panel to the st marker. Tie off yarn.
Determine back neck seam end. I placed the st marker at the 5th blue stripe counting from the bottom up.
Use same method to stitch the back seam.
HOOD
NOTE: This hood is meant to be decorative and not necessarily meant to be worn. As such, it is fairly small and narrow.
Attach white yarn at the center edge of the first full white block beneath the shoulder. Turn garment sideways, front facing you. Attach yarn with a 4 ch st and work in dc, ch 1 pattern as for the main panels, entering dc’s evenly spaced around the neck opening ending at the opposite side white block below the shoulder to match up with the first st. Ch 4. Turn.
As a guide, I had 32 dc’s. This can vary if you worked more or less dc’s in the first hood row. Try not go to go with less than 32 as this is already quite narrow. Continue in the pattern with the 6 white dc rows and 2 hdc blue rows for a total of 4 white blocks and 4 blue stripes ending on the blue.
With wrong side facing you, fold hood in half. Seam along the blue edge to close the hood.
Add a sc border with blue yarn around the edge of the hood. Work sc’s into the actual st’s rather than the large spaces.
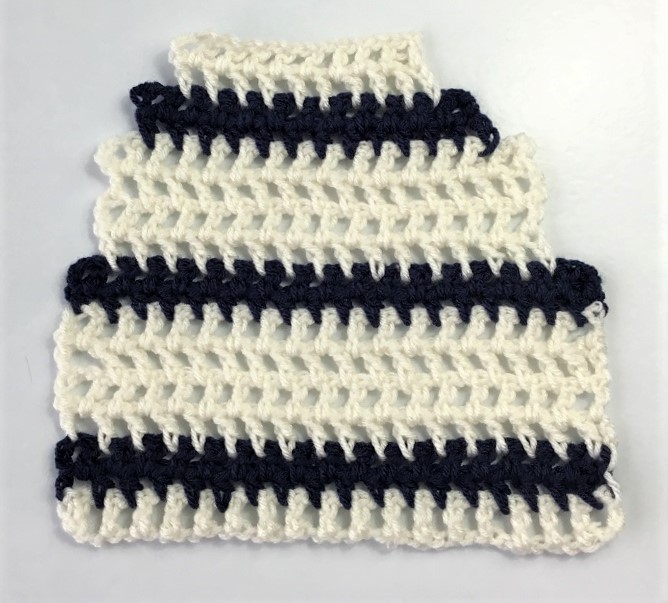
Ch 38
NOTE: Only carry the yarn up the edge of the first 3 rows. Thereafter, we will be cutting the yarn and re-attaching as needed.
Row 1: Working in the established pattern work 1 row of dc in white. 18 dc’s
Rows 2 – 3: Work 2 rows of hdc in blue. Cut off blue yarn. 18 hdc’s
Rows 4 – 7: Work 4 rows dc in white. Cut off white yarn. 18 dc’s
Rows 8 – 9: Work 2 rows hdc in blue. Cut off blue yarn. 18 hdc’s
Rows 10: With white yarn, sk the first sp; attach the yarn with a ch 4 in the next sp. Continue in pattern leaving the last sp unworked. 15 dc’s
Rows 11 – 13: Continue in pattern with white yarn. 15 dc’s.
Row 14: With blue yarn, sk the first sp; attach the yarn with a ch 3 in the next sp. Continue in pattern leaving the last sp unworked. 12 hdc’s
Row 15: Continue in pattern with blue yarn. 12 hdc’s.
Row 16: With white yarn, sk the first sp; attach the yarn with a ch 4 in the next sp. Continue in pattern leaving the last sp unworked. 9 dc’s
Row 17: Continue in pattern with white yarn. 9 dc’s. Cut off yarn.
With right side of poncho facing up and right side of pocket facing up, center the pocket approximately 2 rows from the bottom of the poncho, in the white rows.
Using a whip st seam along the bottom of the pocket.
Leave the pocket rows 1 – 9 unseamed.
Seam around the perimeter of the remaining pocket rows.
NOTE: For larger sizes you may want to make the pocket larger. Add to the beginning foundation chain using an even number. Suggest adding 14 chains. Adjust subsequent rows as needed to follow the pattern.
FRINGE
Use an object about 3 inches long such as a small pack of gum. Using white yarn, wind around the object as many times as necessary to make enough fringe to go around the entire perimeter of the poncho. You will need to repeat the process several times.
Cut the strands of yarn at the bottom of the object.
Working with two strands per tassel, fold strands in half. Enter hook under the sp to grab the strands at the center; pull through the loop on the hook. Pull strands to tighten the knot that forms at the top. Repeat process entering fringe into every other space.
Copyright © 2021 Sylvia Talo You may sell items made from my patterns. Please include a link or reference to my shop CrazyCoolCrochetUS.etsy.com . Pattern and photos are copyright protected; may not be reproduced, redistributed, or displayed publicly in any way.
You May Also Like


[…] how to craft this beautiful dual-toned hooded poncho through this tutorial. Familiarity with just double and half double crochet stitches is all you need to complete this […]
[…] how to crochet this captivating dual-toned hooded poncho through a detailed tutorial. You’ll be pleased to discover that the project requires only a basic understanding of double and […]
[…] how to craft this stunning dual-toned hooded poncho by following this detailed tutorial. Perfect for those who have experience primarily with double and half double crochet stitches, this […]
[…] how to create this stunning dual-toned hooded poncho through this detailed tutorial. The beauty of this project lies in its simplicity, requiring only double and half double crochet […]