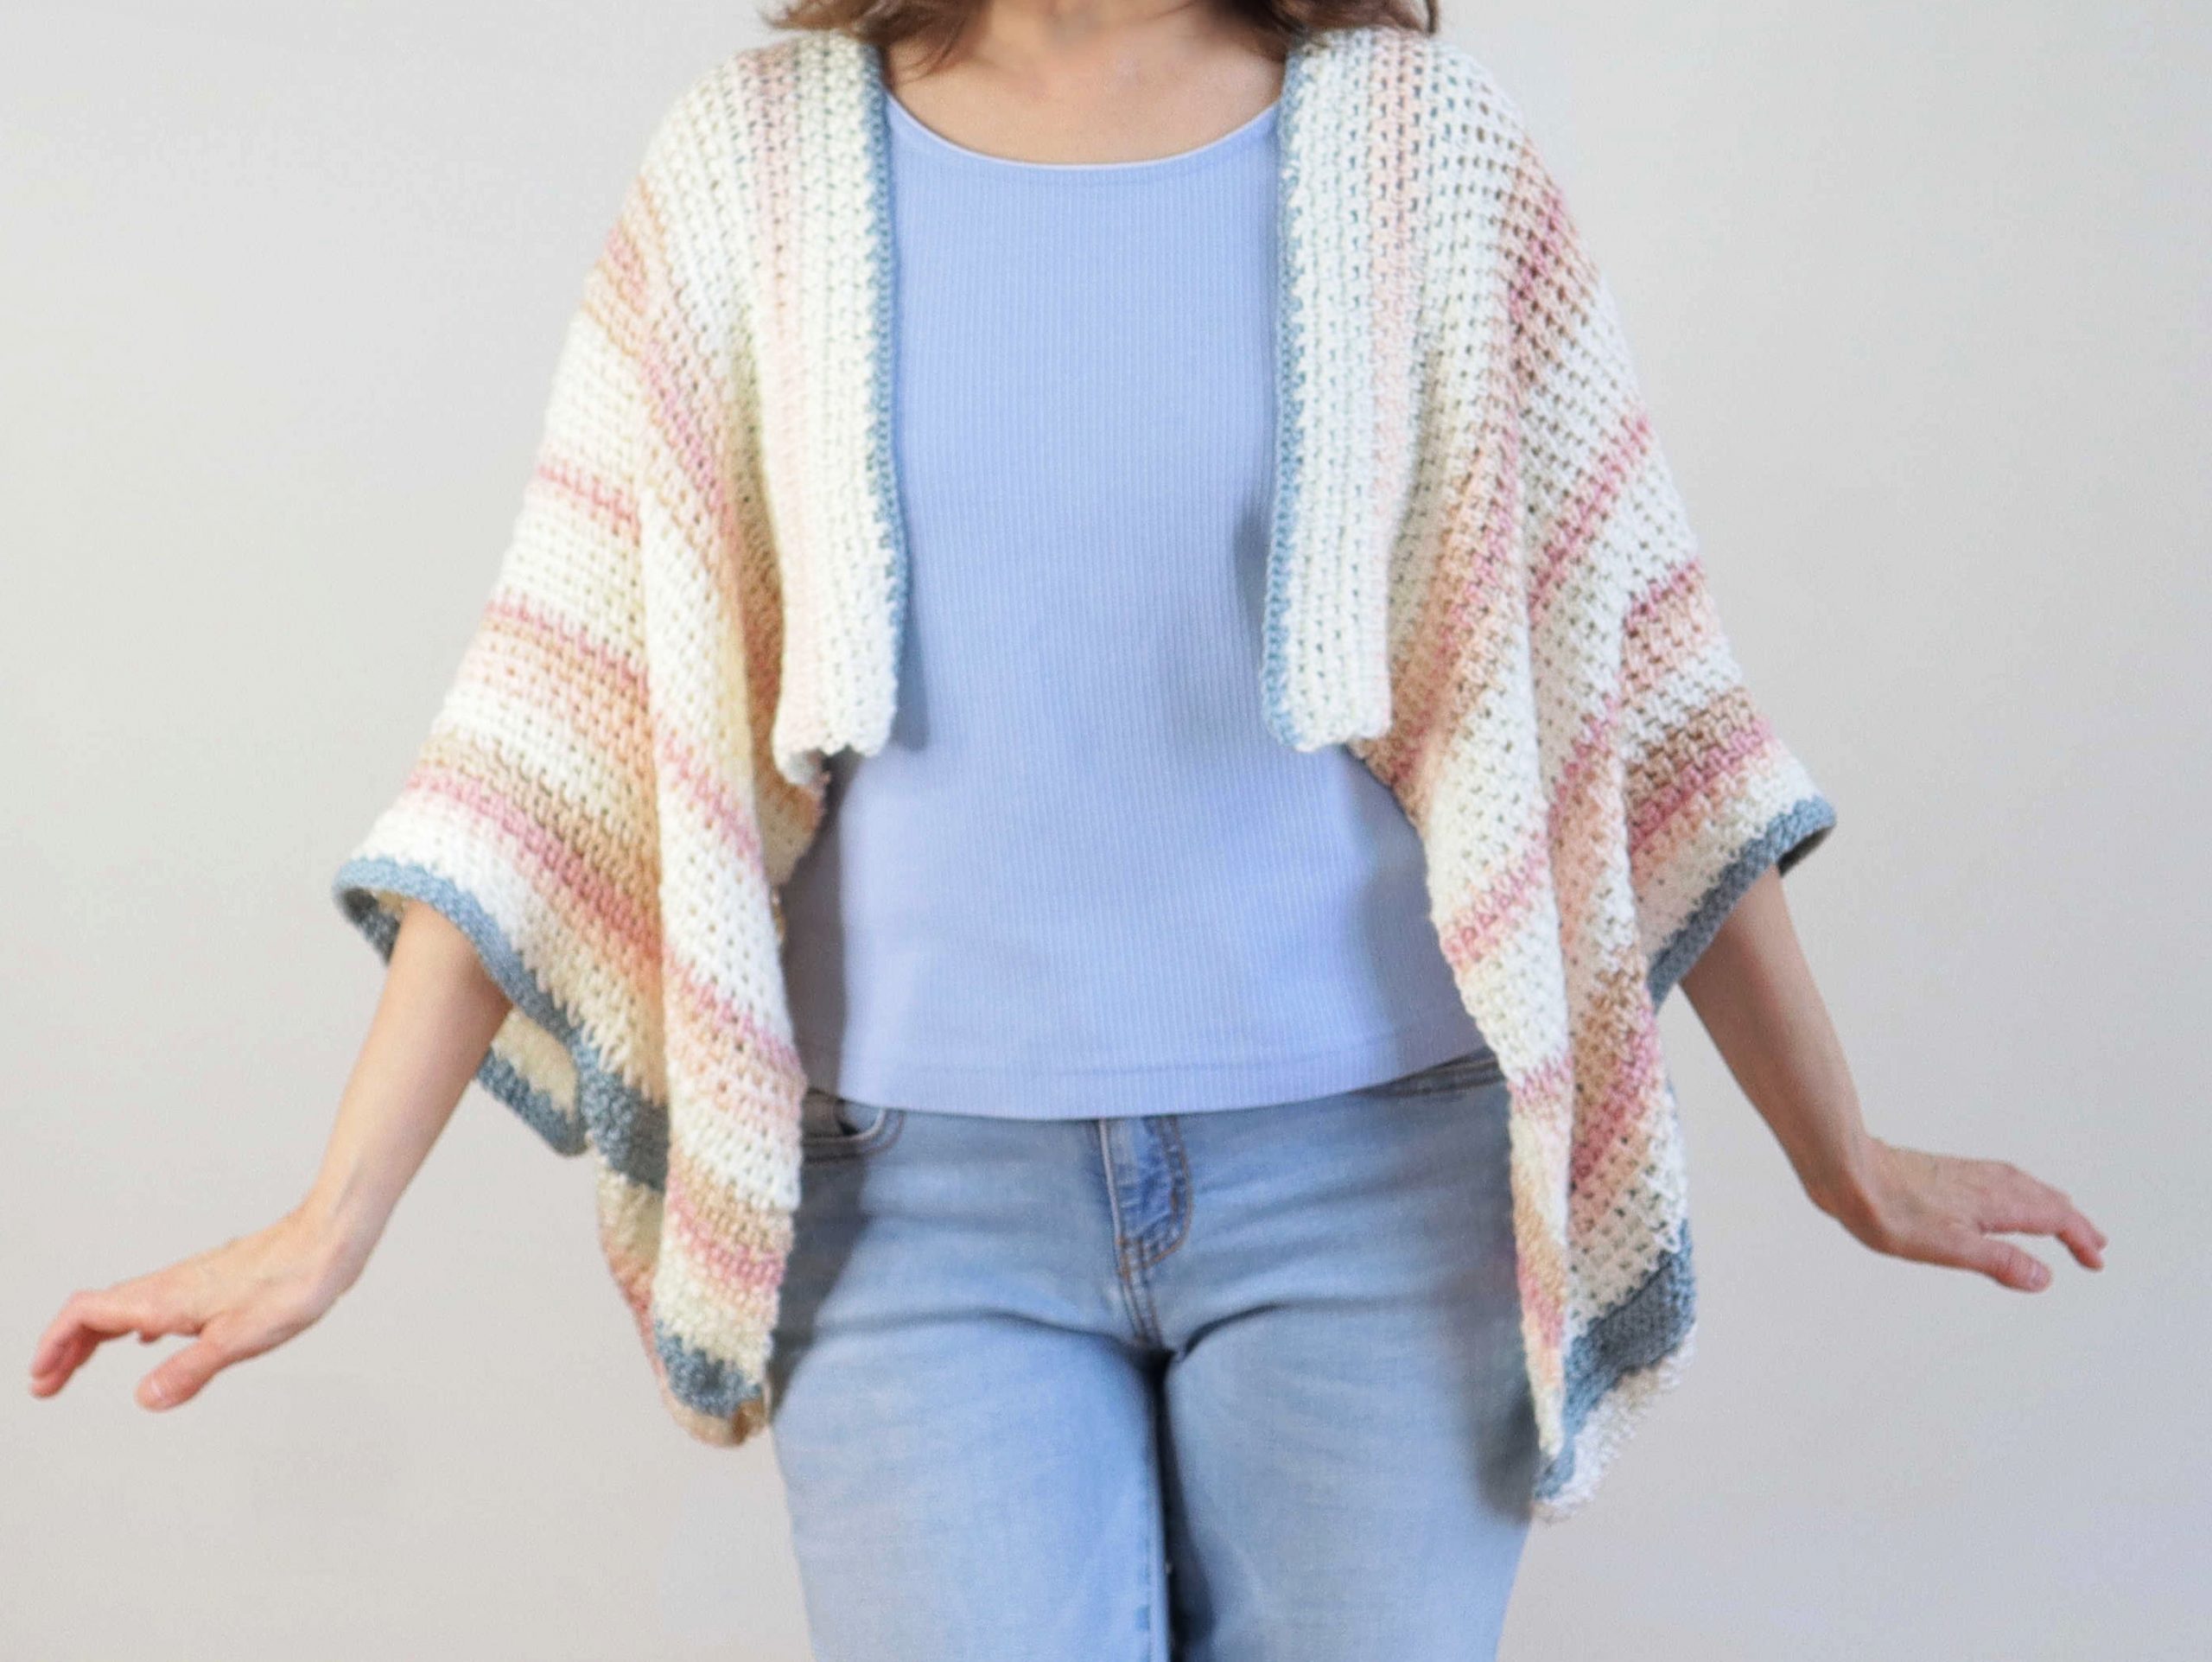
The MOST flowy, lightweight crochet summer cardigan EVER! Two straight panels. No increasing. No decreasing. EASY! The fun, simple Extended Single Crochet stitch gives this an airy, open weave without the holey look! The crochet summer cardigan free pattern will be found below.
Extended Single Crochet
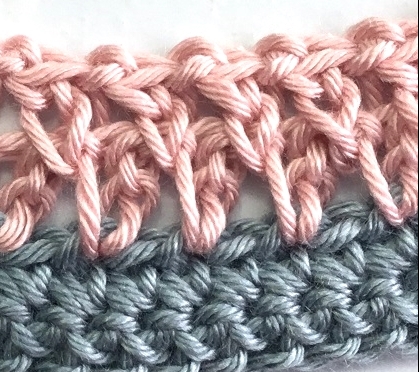
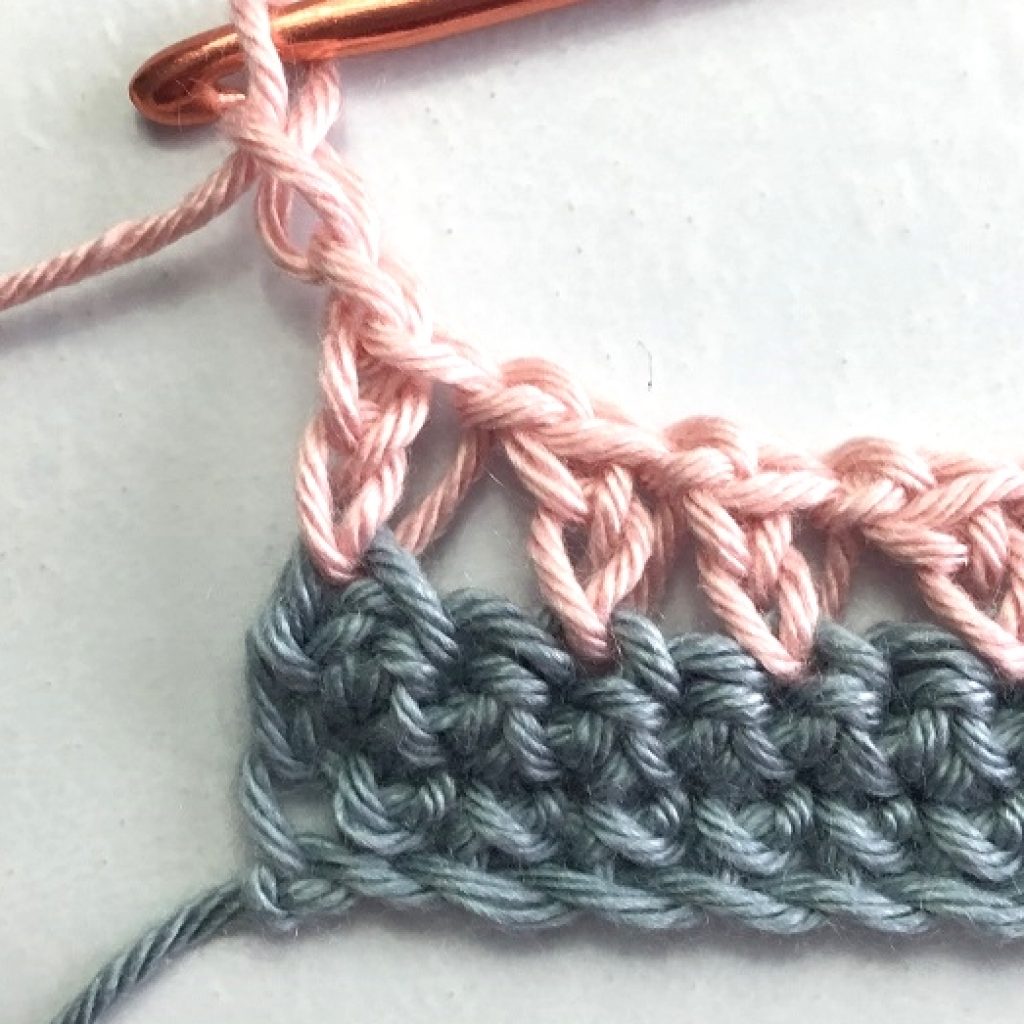
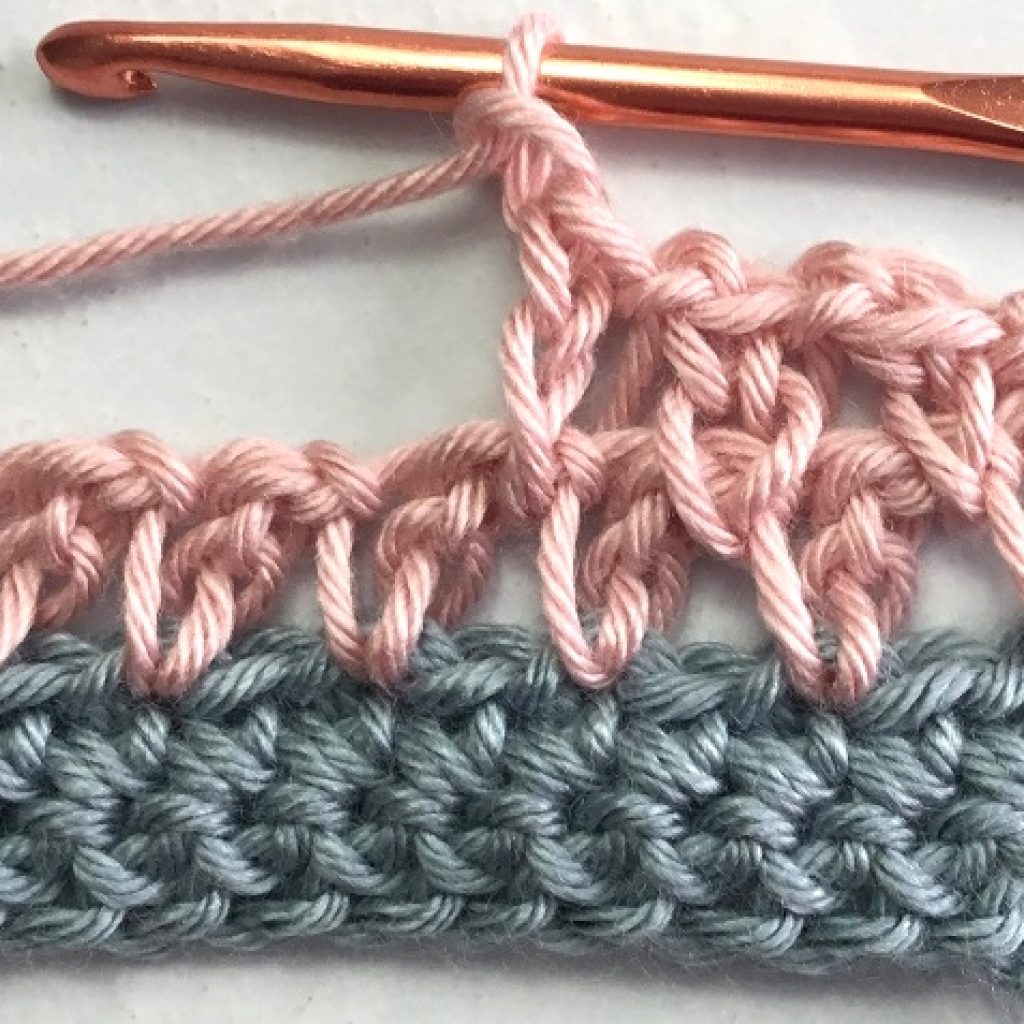
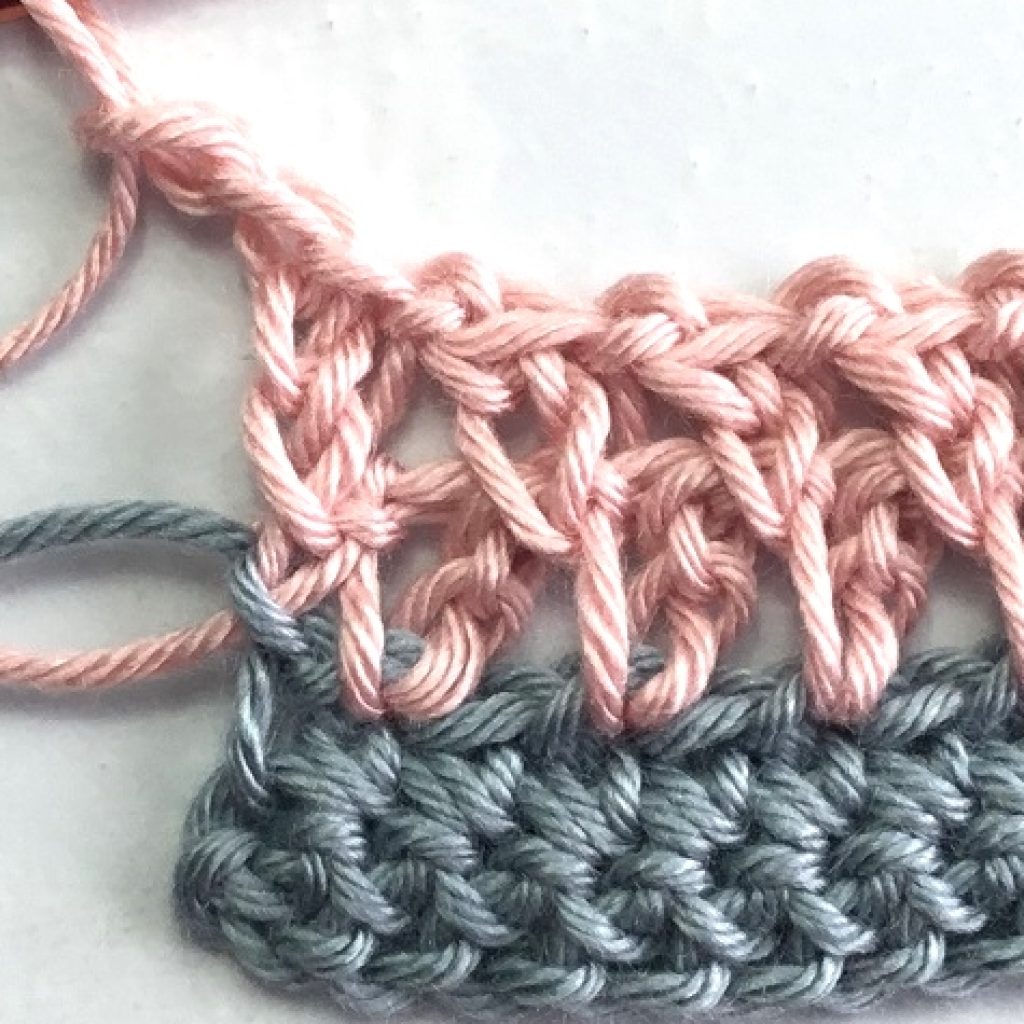
You will love working with the extended single crochet stitch. So simple and easy, yet very different from the basic single crochet stitch. This stitch results in a more open, slightly taller, single crochet that actually looks entirely different and so much more interesting! (The photo below shows the single crochet stitch in blue and the extended single crochet in pink.)
Crochet Summer Cardigan
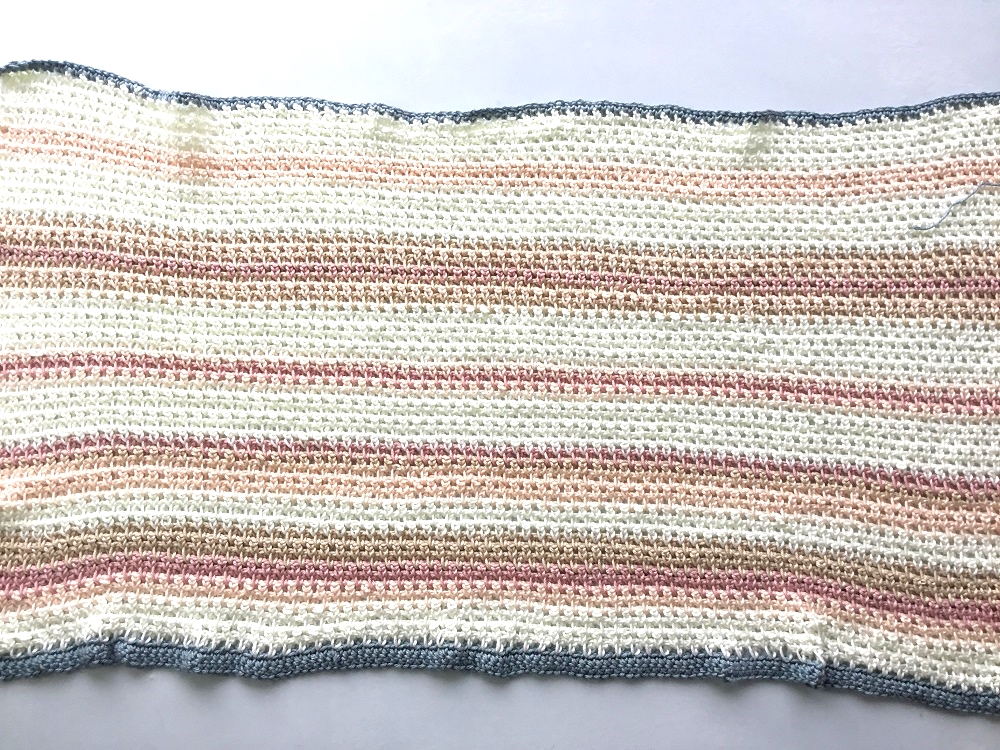
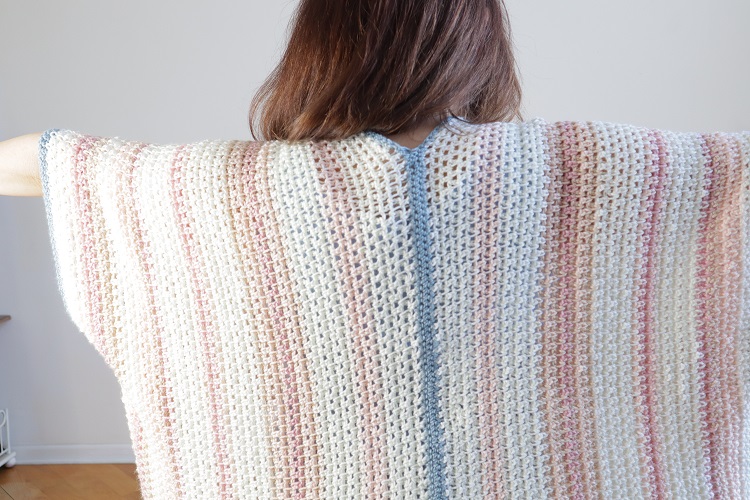
This crochet summer cardigan design has the look of a more complicated construction when it is actually two straight panels with no increasing and no decreasing! No border is required which makes it even easier and faster to work up.
The yarn used here, a #2 fingering, or lightweight yarn, gives us the lightest, most effortless drape. SO incredibly comfortable! This is a perfect little crochet summer top that adds just enough coverage to keep the occasional spring chill in check.
Crochet Summer Cardigan Video Tutorial
The video tutorial for the crochet summer cardigan is provided for your convenience. I ask that you please watch it on YouTube by clicking the little YouTube button at the bottom of the video. This allows you to give it a thumbs up, comment and subscribe. This little bit of interaction is actually hugely helpful to my channel. And of course, it’s helpful for YOU to see the actual stitching being worked up.
You can see how easy it is to change yarn colors as well. If you have never had the opportunity to do this, it will be a game changer!
Printable Crochet Summer Cardigan Pattern
Printable Etsy pattern: CrazyCoolCrochetUS.etsy.com
Size Small
This pattern uses a multiple of 2 plus 1.
Instructions for Medium/ Large, X Large/1X and 2X/3X are in parentheses (X), with additional instructions in applicable rows.
Results will vary according to yarn and tension used. Sizing should be considered “suggestions”. Adjust as needed.
This post contains affiliate links which means I may earn a small commission for purchases made from these links at no additional cost to you.
Crazy Cool Crochet is a participant in the Amazon Services LLC Associates Program, an affiliate advertising program designed to provide a means for sites to earn advertising fees by advertising and linking to Amazon.com
Materials size Small:
Yarn/ Yarn Bee Yarntopia/ light weight #2
Cerulean Blue/ scrap amount
White/ 1 ounce
Blush (light peach)/ 1/2 ounce
Rose (light pink)/ ½ ounce
Ivory (beige)/ 1 ounce
Crochet Hook G /4.25 mm
Yarn needle
Scissors
Measuring Tape
Gauge: 10 combination esc and ch 1 = 4 inches; 14 esc rows = 4 inches
Note: yarn used here is very stretchy. Gauge may vary per yarn used.
Dimensions Size Small: One panel width = 18 inches; length = 34 inches
Abbreviations:
Ch = chain
ESC = extended single crochet
Rpt = repeat
Sc = single crochet
Sk = skip
Sp = space
St = stitch
YO = yarn over
NOTE: Photos are shown above corresponding rows. For easier to view photos (avoiding white yarn against white background), the yarn colors shown in some photos will vary from the actual colors used in the pattern. FOLLOW THE INSTRUCTIONS AS WRITTEN FOR COLOR CHANGES.
NOTE 2: Cut off previous color yarn at each change in color leaving a 5 inch tail to weave in when the panel is completed. Do not carry the yarn up the edge.
Please watch the video tutorial above for visual instruction!
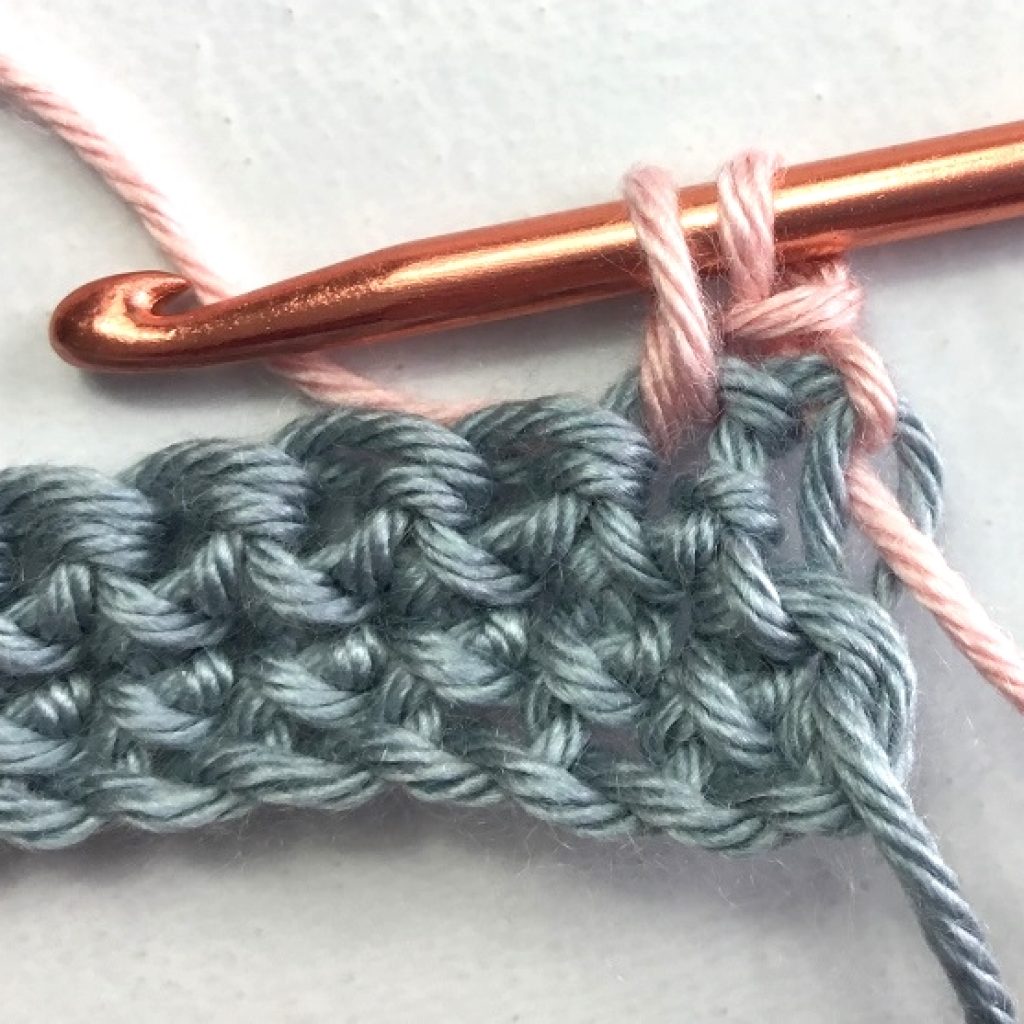
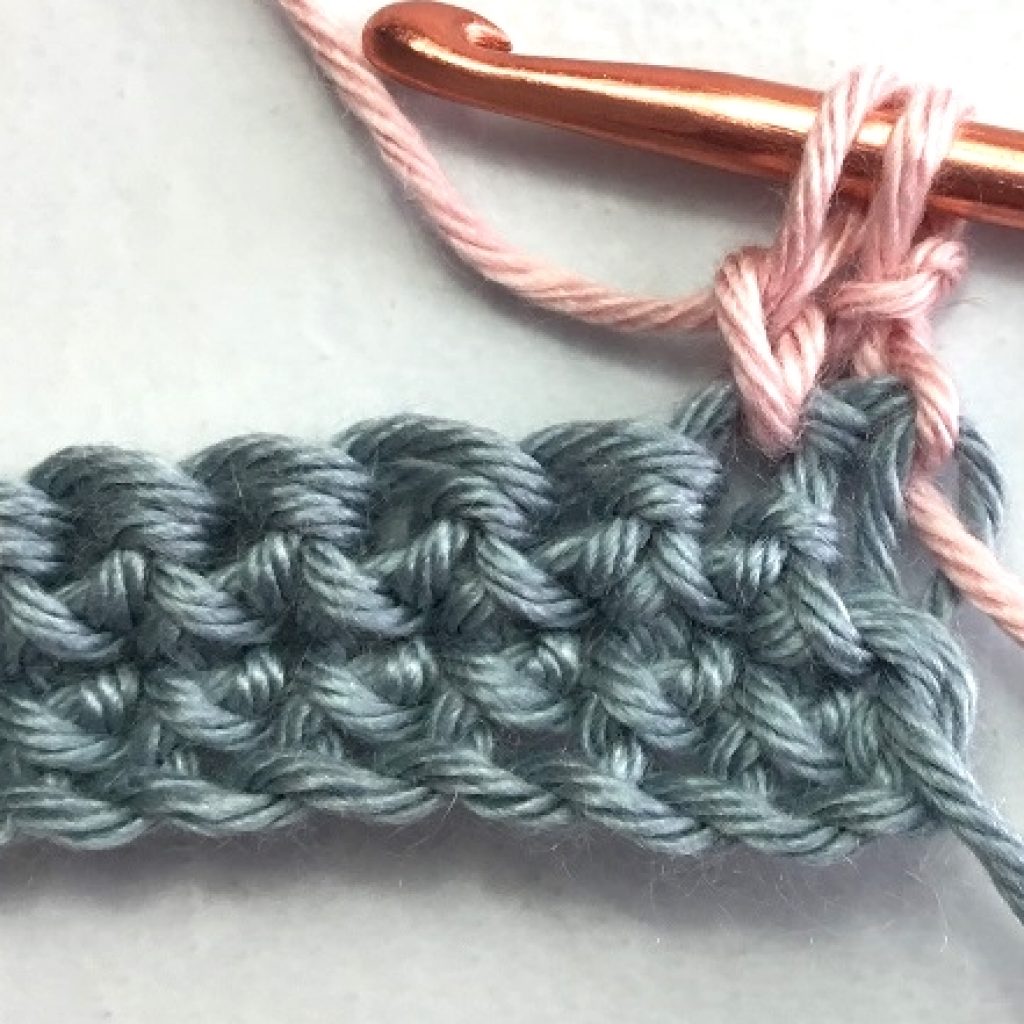
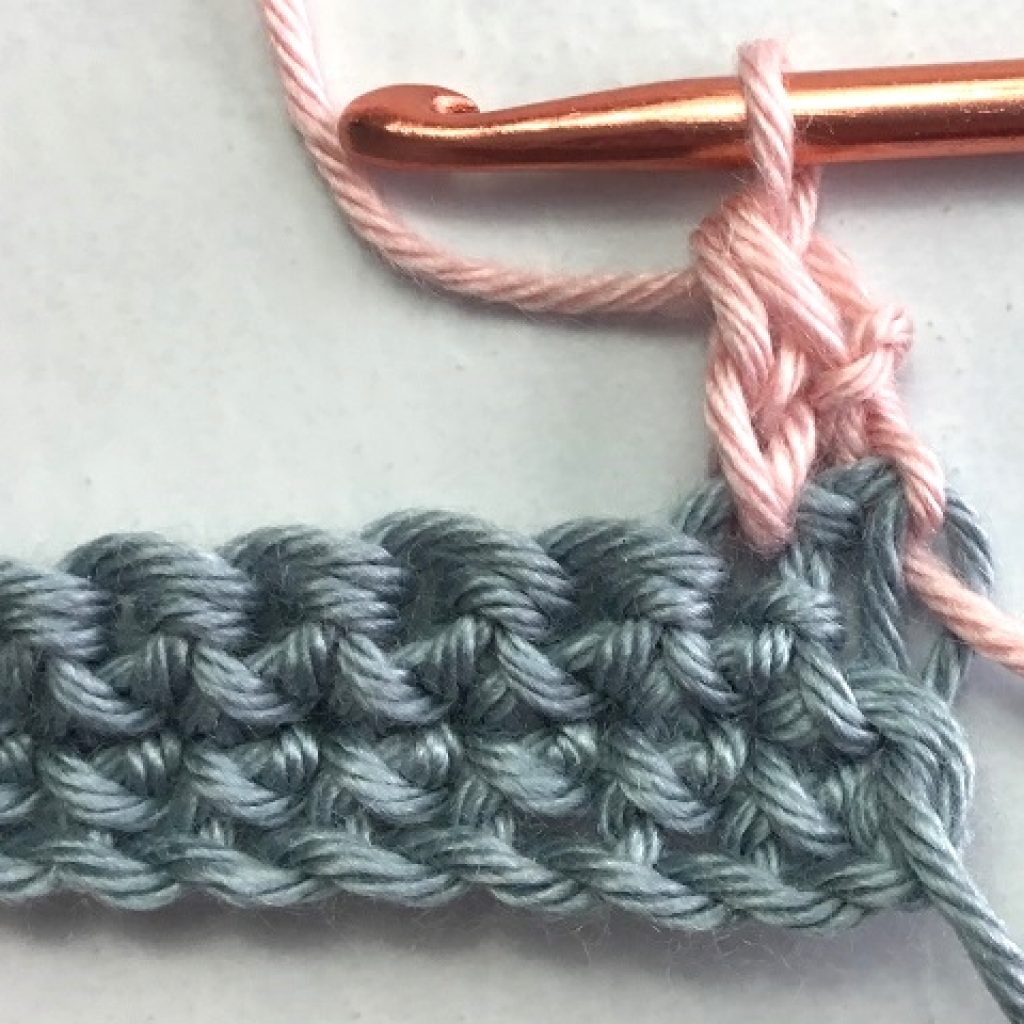
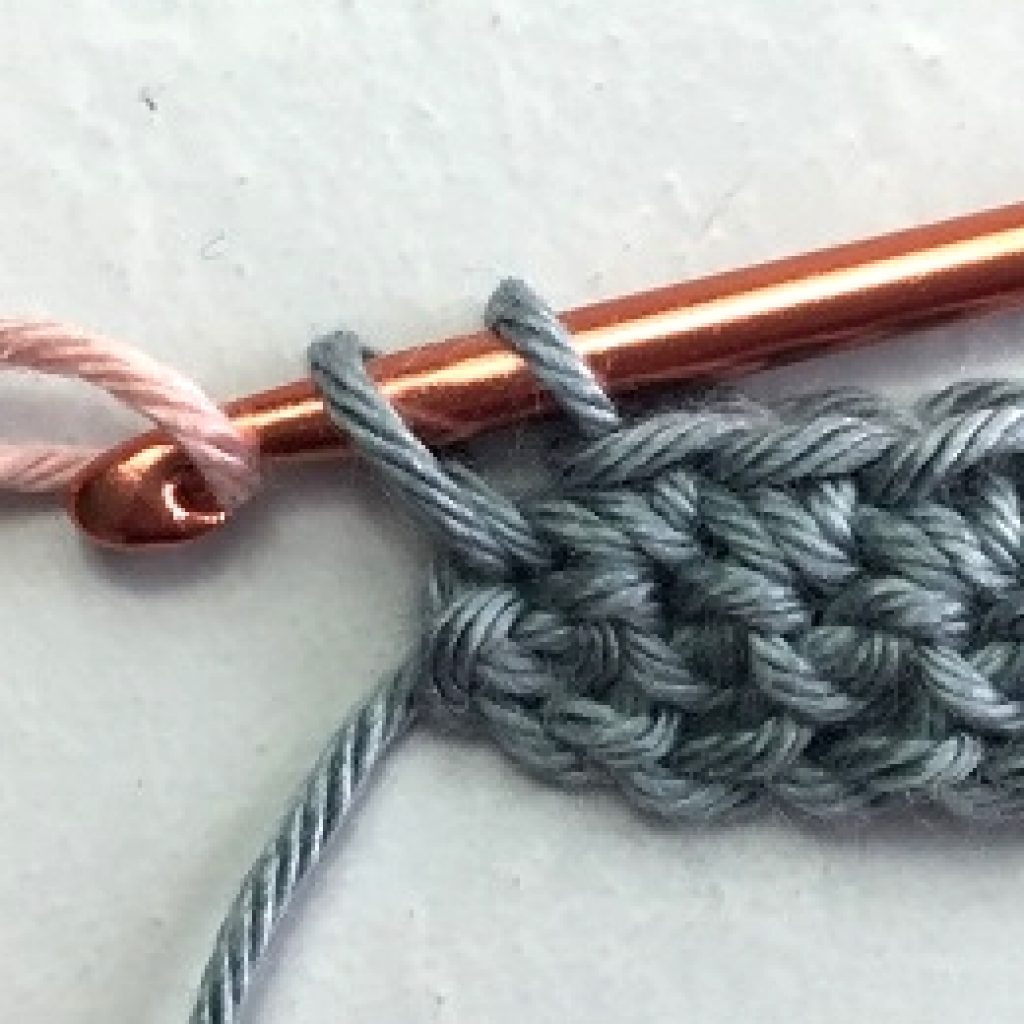
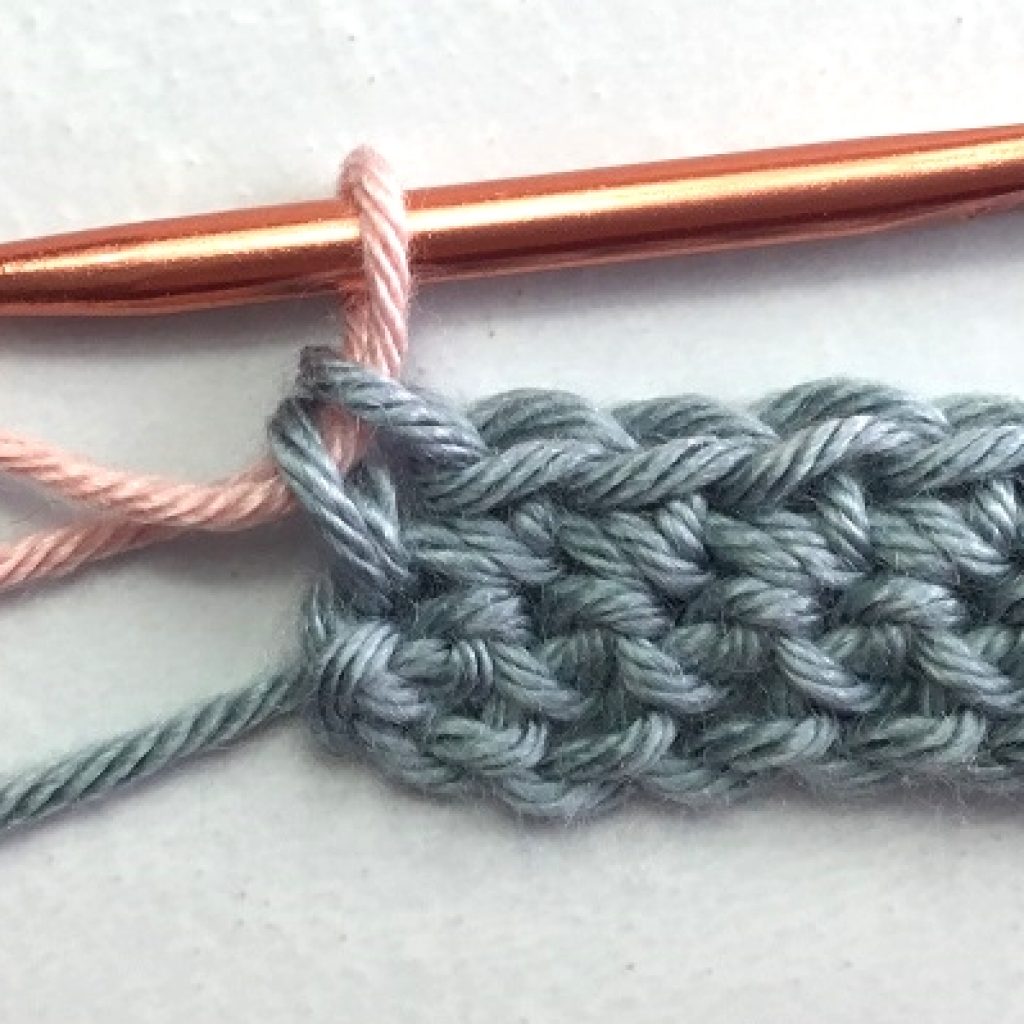
Extended Single Crochet: Begin as for a single crochet with 2 loops on hook; yo, pull through 1st loop on hook; yo, pull through 2 loops on hook.
PANEL (make 2)
Ch 157 (173, 189, 205) with blue yarn
Note: Foundation chain determines length. This is by design a short cardigan.
Ch 157 = 34 inch long panel
Ch 173 = 37 inch long panel
Ch 189 = 40 inch long panel
Ch 205 = 43 inch long panel
Row 1: Note: If needed, adjust the number of sc’s per the foundation chain length you chose.
With blue yarn, Sc in 2nd ch from hook and ea ch across. 156 (172, 188, 204) sc’s. Ch 1. Turn
Row 2: sc in 1st st and ea st across the row. 156 (172, 188, 204) sc’s. Change to white yarn with the last sc (shown in photo above with rose color). Ch 2. Turn
Note: For size2X/3X work 4 total blue sc rows. At end of last sc row change to white yarn. Ch 2. Turn
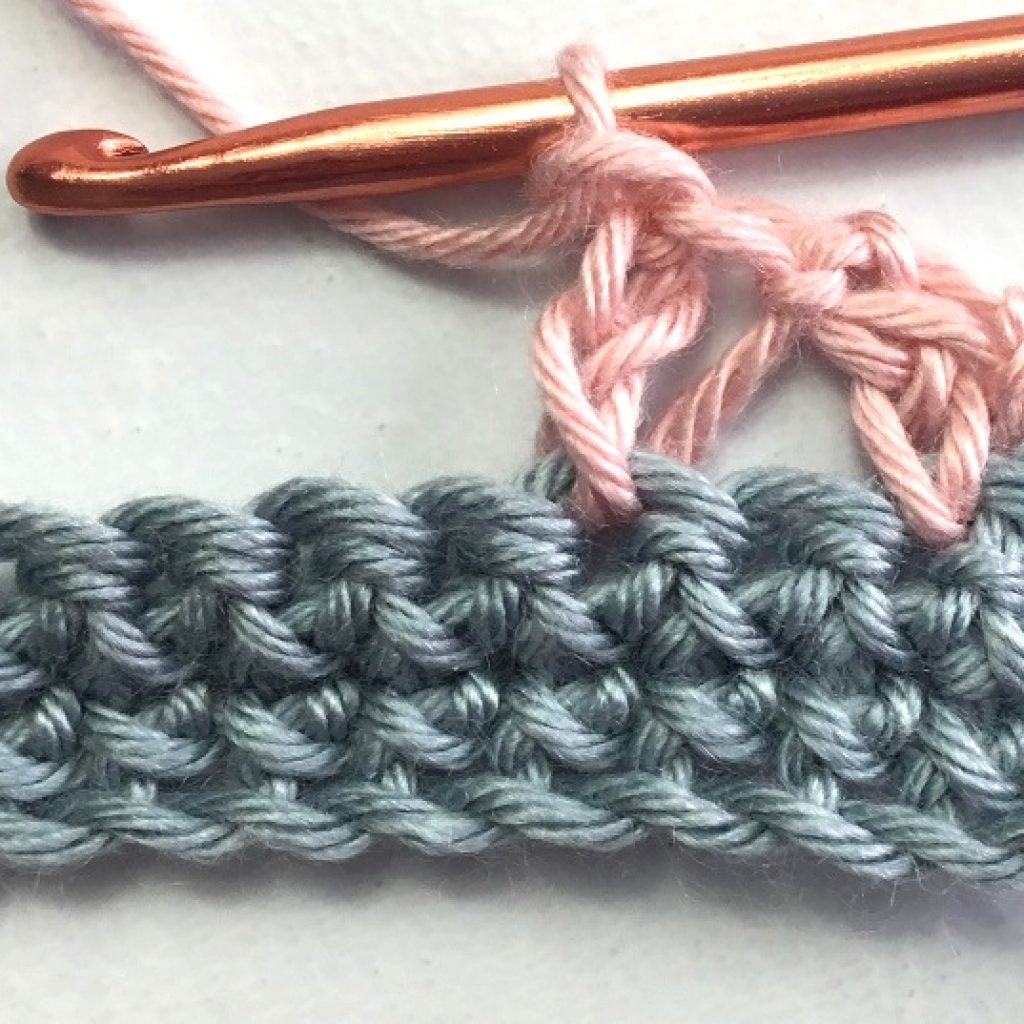
Row 3 (3, 3, 5): Work ESC into the 2nd sp (sk sp under the turning ch); *ch 1; sk next sp; ESC in the next sp*. Rpt from * to * entering the last ESC into the last sp. Ch 2. Turn 78 (86, 94,102) ESC total.
Rows 4 – 6 (4-8, 4-10, 6-12): Note: For this row and all ESC rows going forward, you are working ESC’s into the spaces between the ESC’s in the previous row.
Work ESC in the 1st sp; *ch 1; ESC in the next sp*. Rpt from * to * entering the last ESC in the last sp.At end of last row change to Blush yarn (light peach). Ch 2. Turn 78 (86, 94,102) ESC total.
Rows 7- 8 (9-10, 11-12, 13-14): Rpt Row 4 in blush (peach)
Rows 9 – 10 (11-12, 13-14, 15-16): Rpt Row 4 in rose
Rows 11 = 13 (13-15, 15-17, 17-19): Rpt Row 4 in ivory (beige)
Rows 14 – 16 (16-18, 18-20, 20-22): Rpt Row 4 in white
Rows 17 -19 (19-21, 21-23, 23-25): Rpt Row 4 in blush (peach)
Rows 20 (22, 24, 26): Rpt Row 4 in ivory
Rows 21 (23, 25, 27): Rpt Row 4 in rose
Rows 22 – 27 (24-31, 26-35, 28-39): Rpt Row 4 in white
Rows 28 (32, 36, 40): Rpt Row 4 in blush
Row 29 (33, 37, 41): Rpt Row 4 in rose
Row 30 (34, 38, 42) Rpt Row 4 in blush
Rows 31 – 36 (35-42, 39-48, 43-54): Rpt Row 4 in white
Row 37 (43, 49, 55): Rpt Row 4 in ivory
Row 38 (44, 50, 56): Rpt Row 4 in blush
Row 39 (45, 51, 57): Rpt Row 4 in ivory
Row 40 (46, 52, 58): Rpt Row 4 in rose
Row 41 (47, 53, 59): Rpt Row 4 in ivory
Row 42 (48, 54, 60): Rpt Row 4 in blush
Row 43 (49, 55, 61): Rpt Row 4 in ivory
Rows 44 – 49 (50-57, 56-65, 62-73): Rpt Row 4 in white
Rows 50 – 52 (58-61, 66-70, 74-79): Rpt Row 4 in blush
Rows 53 – 58 (62-69, 71-80, 80-91): Rpt Row 4 in whiteRow 59 (70, 81, 92): With blue yarn sc in ea st of the row. Cut off yarn
Weave in all tails.
BACK SEAM
The final blue sc row on ea panel will be the back seam.
With wrong sides facing you, place front and back panels together. Beginning at the bottom corners, with a yarn needle, length of yarn and whip stitch, seam for 18 inches toward the neck. Cut off yarn.
SIDE SEAMS

With right sides facing you, fold panels from top to bottom. The garment is now wrong side facing up. Using same process as for the back seam, seam for 10 inches from the bottom up to create an armhole opening. Adjust seam length to your preferred armhole width. Repeat for opposite side.

Copyright © 2022 Sylvia Talo You may sell items made from my patterns. Please include a link or reference to my shop CrazyCoolCrochetUS.etsy.com. Pattern and photos are copyright protected; they may not be reproduced, redistributed, or displayed publicly in any way.
You May Also Like


