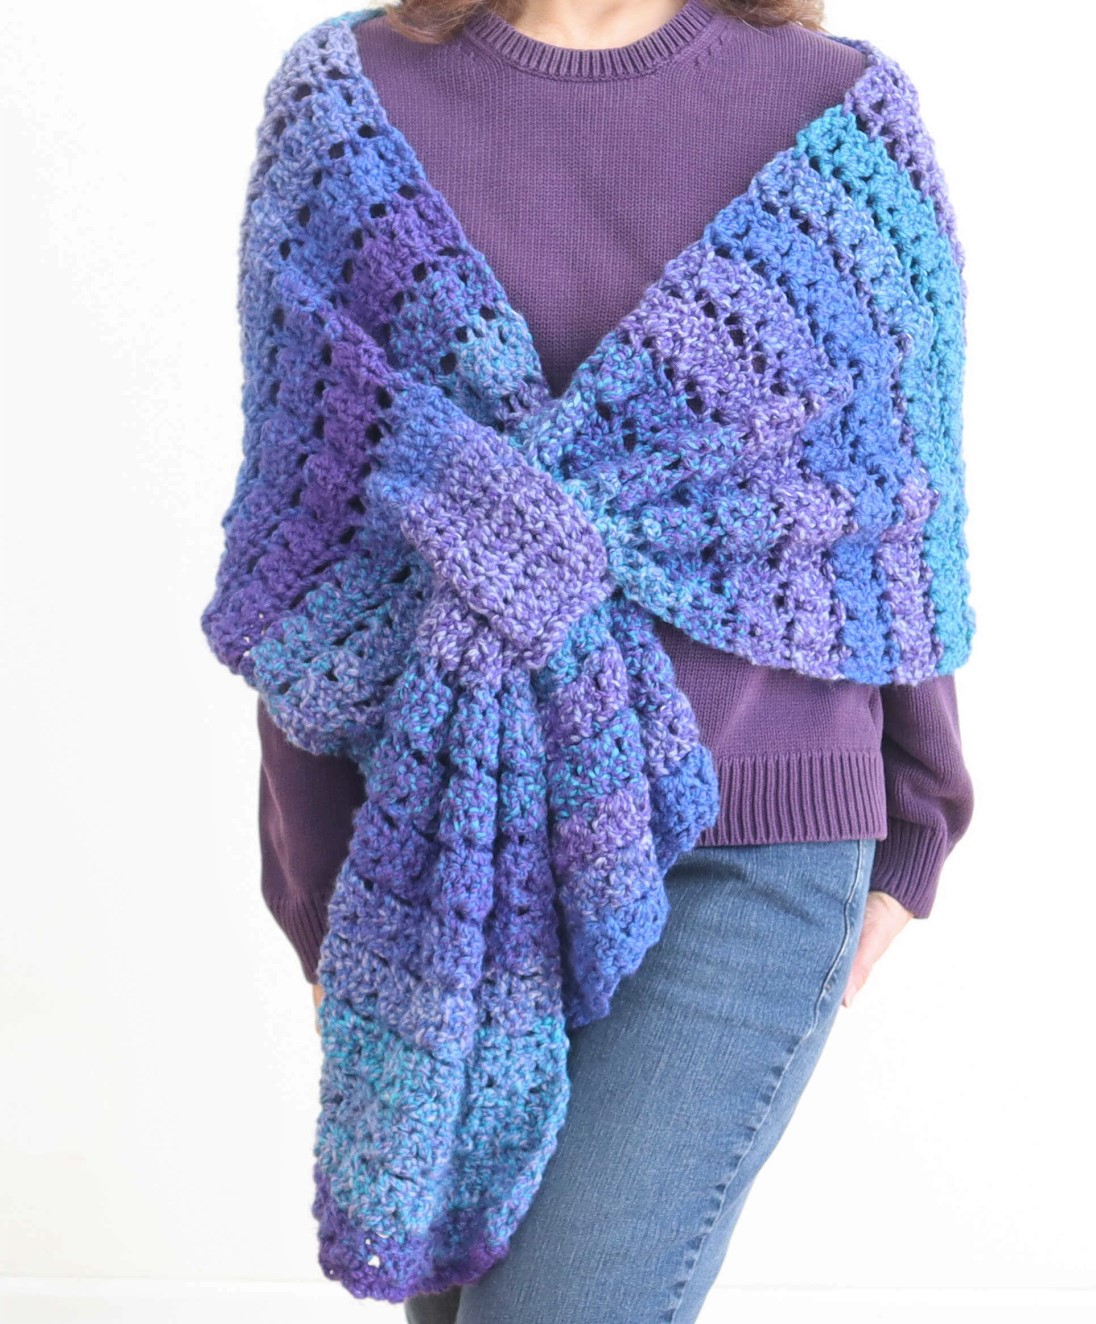
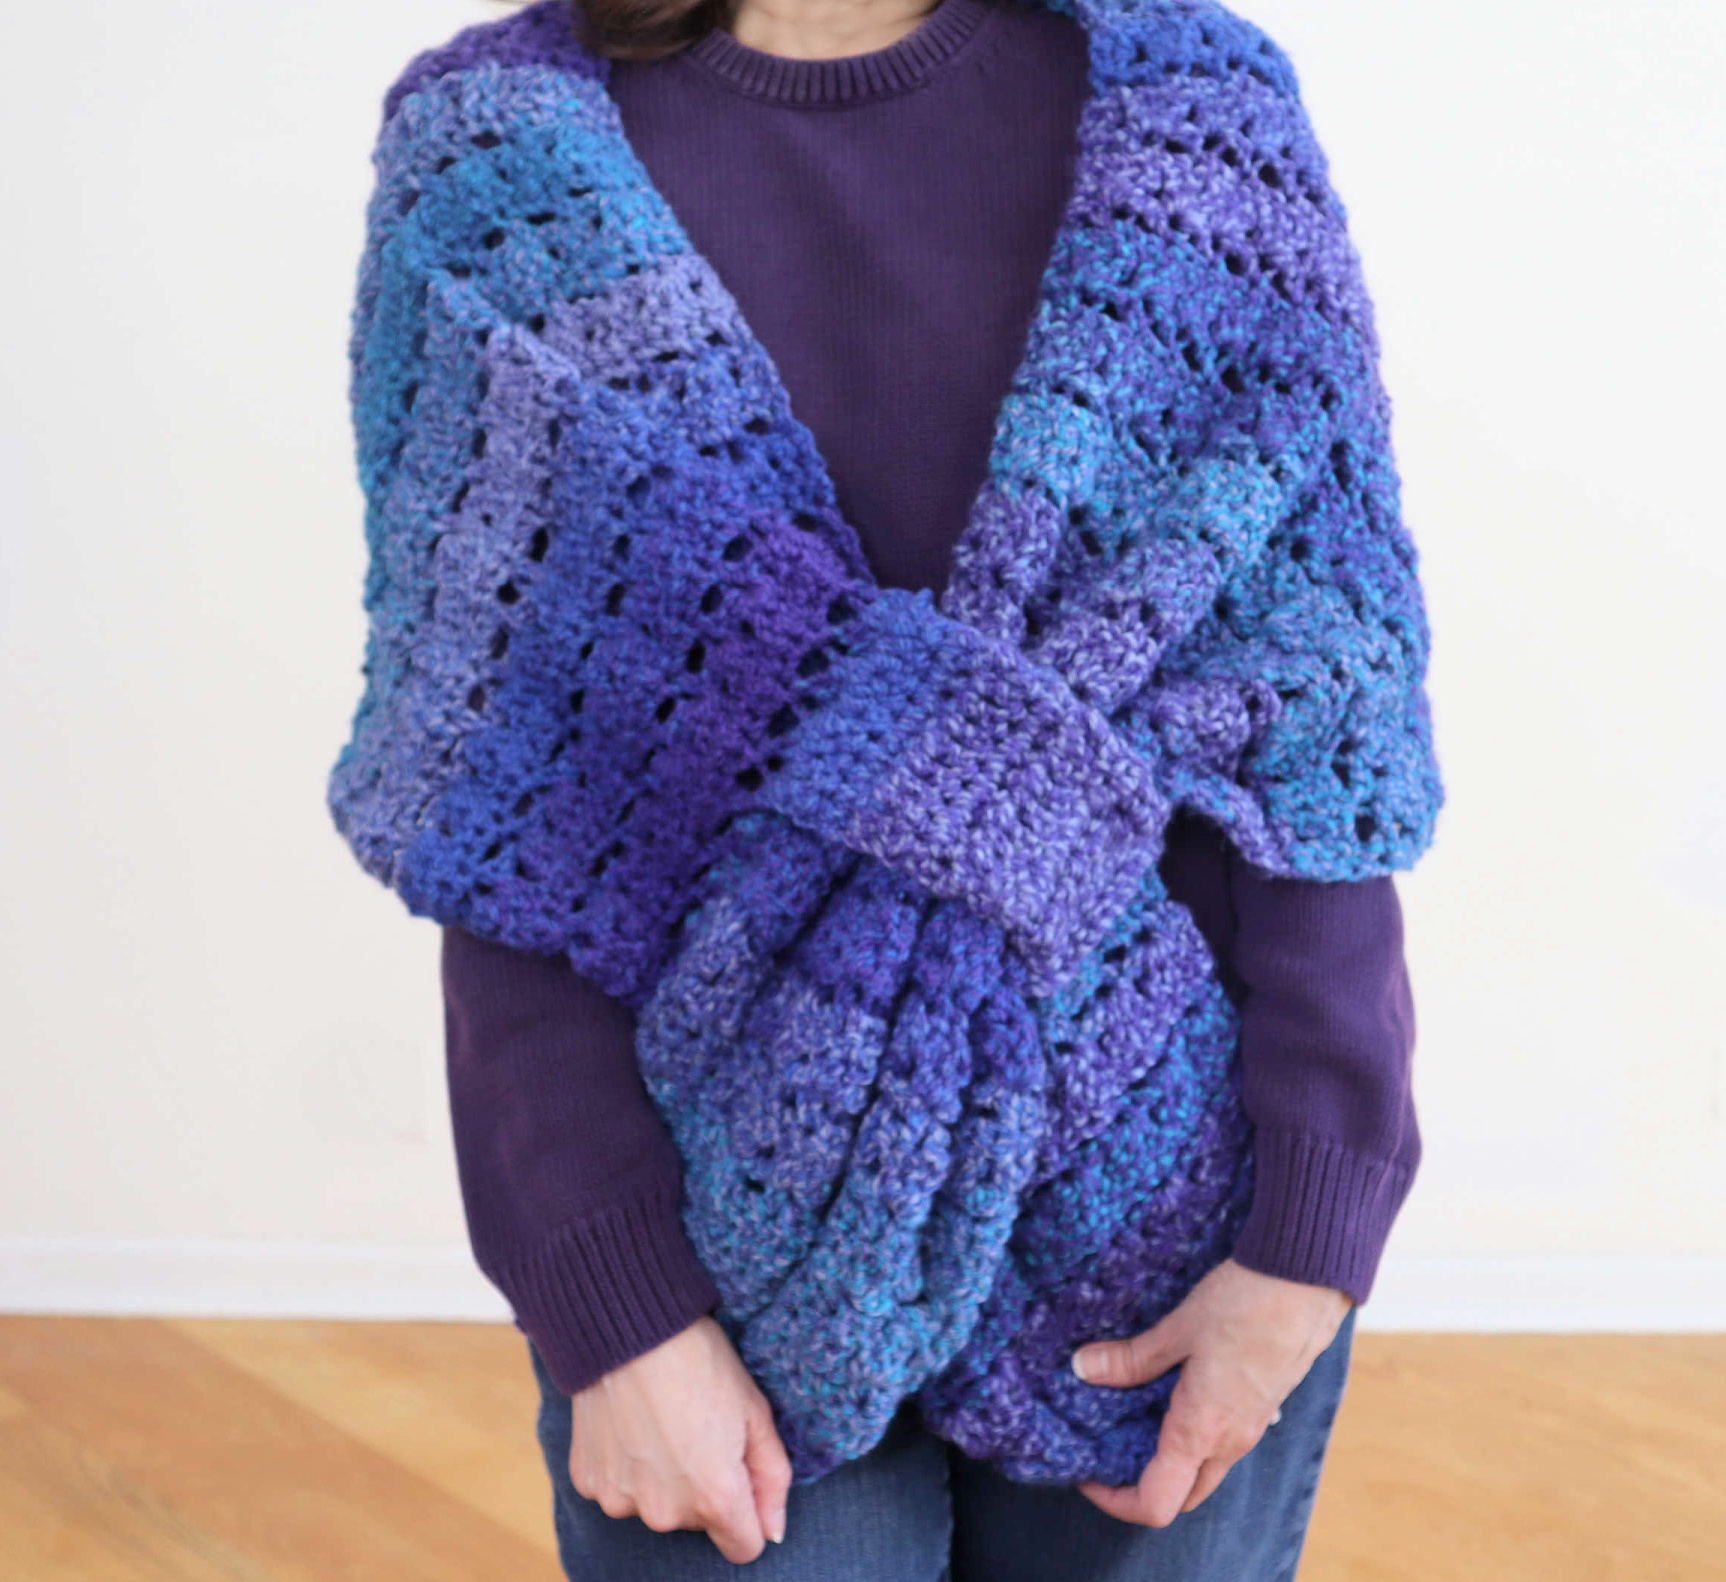
This Crochet Wrap with CLOSURE allows you to close the comfy crochet wrap and leave your hands free to move about. No more shifting or falling from your shoulders. Uses a super easy crochet stitch! Crochet beginner friendly project.
This crochet wrap uses a soft #5 bulky yarn that allows for a lovely drape. The stitch used, the easy to learn crochet parquet stitch, creates a slightly open weave that offsets the “thickness” of the #5 yarn. This results in a wonderfully comfortable crochet wrap that is perfect for a little added warmth on cooler days.
Crochet Beginner Friendly
Everything about this design contributes to an overall crochet beginner friendly wearable. The bulky weight yarn helps the project work up faster. The yarn used here is super soft and not at all heavy. The term “bulky” denotes something thick and uncomfortable which is the exact opposite of the end result!
Although this yarn is super inexpensive (Walmart), it is surprisingly cushiony! The easy crochet parquet stitch (a row of double crochets and a row of single crochets) is perfect for a crochet beginner!
Crochet Wrap Video Tutorial
Be sure to watch the video on the YouTube platform (click on the black button on the bottom of the video) so you can support my efforts (thank you!) by subscribing, commenting, giving a thumbs up and watching all the way to the end. YouTube LOVES interaction by the viewers and the channel (Crazy Cool Crochet). This also helps YouTube further recommend my videos to more viewers. As this is my only source of income, every little bit helps! I appreciate your support so much!!
Printable Etsy Pattern for Crochet Wrap with Closure:
Etsy pattern has more photos!
Size Small/Medium
This pattern uses a multiple of 3.
Instructions for Large/ X Large, 1X/2X and 3X/4X are in parentheses (X).
Results will vary according to yarn and tension used. Sizing should be considered “suggestions”. Adjust as needed.
This post contains affiliate links which allows me to earn a small commission for purchases made from these links at no additional charge to you.
CrazyCoolCrochet.com is a participant in the Amazon Services LLC Associates Program, an affiliate advertising program designed to provide a means for sites to earn advertising fees by advertising and linking to Amazon.com
Materials:
Walmart Premier Puzzle/ #5 bulky/ color Hangman/ used 14 ounces / 656 yards
Purchase yarn here:
Crochet hooks N / 9 mm
scissors
Gauge: 4 DC clusters = 4 inches , 3 DC cluster rows and 3 SC rows = 4 inches
Dimensions Size Small:
68 inches long; 16 inches wide
Abbreviations:
Ch = chain
DC = double crochet
Ea = each
Sc = single crochet
Sk = skip
Sp = space
St = stitch
NOTE: Be sure to VIEW THE VIDEO TUTORIAL ABOVE for better visual instruction!
Ch 48 (57, 66, 75)
Row 1: Sc in 6th ch from hook; *ch 2; sk 2 ch’s; sc in next ch*. Repeat from * to * to the last 3 ch’s. Sk 2 ch’s; sc in last ch. Ch 3 .Turn
Row 2: Dc in 1st sc sp; *work 3 dc’s into the next sc*; repeat from * to * to the last sc sp. Enter 2 dc’s into the 3rd ch of the turning ch. Ch 1. Turn
Row 3: Sc in 1st sp; *ch 2; sc into the top of the center dc of the 3 dc cluster*; repeat from * to * to the last cluster. Work the sc in the last cluster; ch 2; work 1 sc into the turning ch. Ch 3. Turn
Row 4: Dc in 1st sc sp; *work 3 dc’s into the next sc*; repeat from * to * to the last sc. Enter 2 dc’s into the last sc. Ch 1. Turn
Repeat Rows 3 and 4 to complete a total of 89 (95, 101, 107) rows. End with a sc row. Cut off yarn.
NOTE: Add or subtract rows to your preference length, ending with a sc row.
TAB
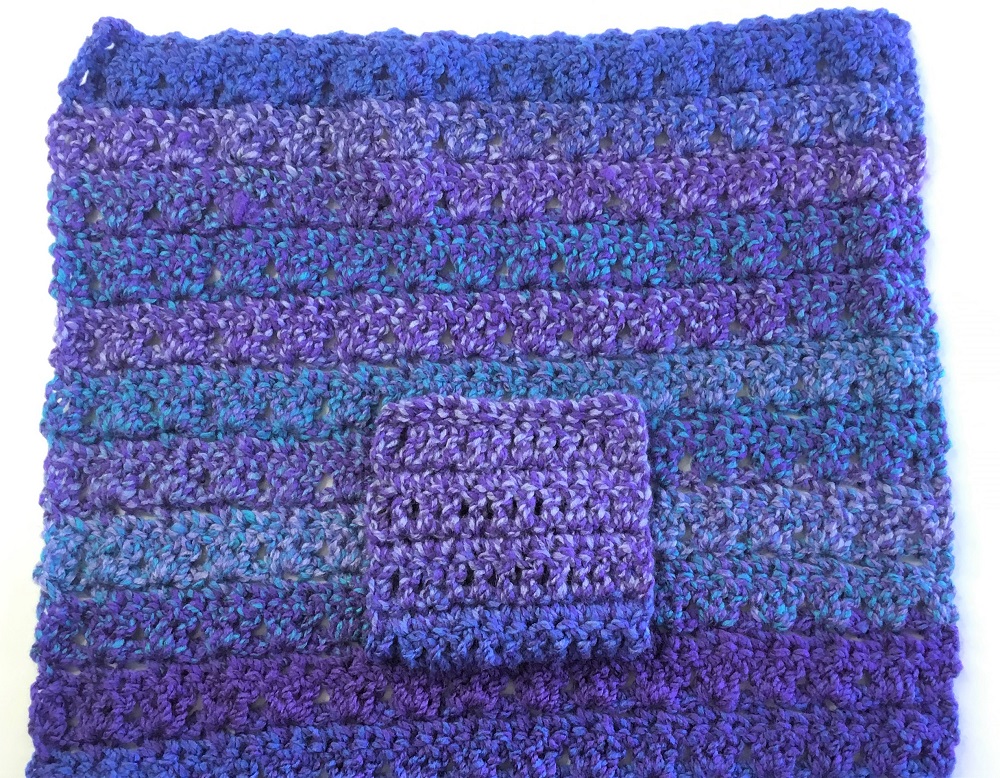
Right side facing you:
SEE NOTE BELOW
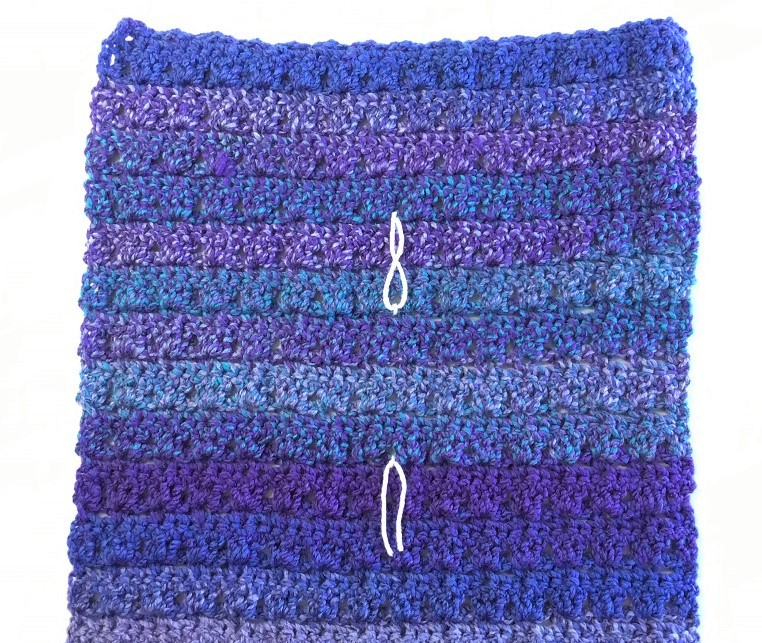
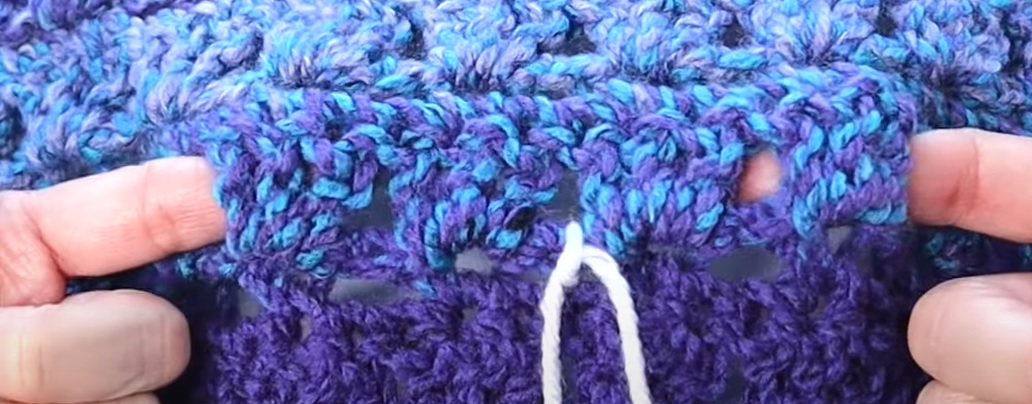
Counting from the last row worked (not from the true Row 1), enter a stitch marker in the center of the sc row that is 13 rows from the last row worked.
Enter another stitch marker 19 rows from the last row worked (or 6 rows below the 1st stitch marker). Ensure st marker is centered on that row.
NOTE: Adjust placement of tab and stitch markers to your preference. Place panel around your shoulders and determine tab placement (if adjusting for Rows 13/19).
Row 1: Beginning with the bottom stitch marker (Row 19 from last row worked), you will be working across 4 dc clusters (two clusters on either side of the st marker).
Attach yarn in space to the right of the dc cluster with a ch1. *Sc in sp between the 1st 2 dc’s of the cluster; sc in the next sp between the 2nd and 3rd dc; sc in sp between the clusters*. Repeat from * to * ending with the last dc cluster. 11 sc’s total. Ch 3. Turn
Row 2: Dc in 2nd sp and ea sp across entering the last dc into the beginning ch 1 sp. 11 dc’s. Ch 1. Turn
Row 3: Sc in 2nd sp and ea sp across. 11 sc’s. Ch 3. Turn
Row 4: Dc in 2nd sp and ea sp across entering last dc into the turning ch. 11 dc’s. Ch 1. Turn
Repeat Rows 3 and 4 to complete 8 rows ending with a Dc row.
To attach the tab to the panel, adjust panel so the 2nd st marker is above the tab.
You will work sc’s to attach. Insert hook into sp to the right of the 1st of 4 dc clusters centered on that row. Ch 1.
Insert hook into the dc sp of the tab and into the panel with a sc in sp between the 1st 2 dc’s of the cluster; repeat into ea sp of the tab and panel entering a sc in next sp; sc in sp between the clusters. Continue across the 4 dc clusters ending with the hook into the turning ch of the tab and working the sc in last sp between dc’s. Tie off yarn.
Copyright © 2022 Sylvia Talo You may sell items made from my patterns. Please include a link or reference to my shop CrazyCoolCrochetUS.etsy.com . Pattern and photos are copyright protected; they may not be reproduced, redistributed, or displayed publicly in any way.
You May Also Like


I just finished mine, Sylvia and I love it! You’ve got to stop showing us projects that I want to make for someone else but then have a hard time giving up! This one was so fast, easy, fun and gorgeous in the Premier Puzzle yarn. I used the color Backgammon. It’s so soft and a little stretchy…so perfect. Thanks for your terrific step-by-instruction, so easy to follow. Going to make one for myself next and I can’t wait.
Yay! It makes me so happy to hear that you found the pattern easy and fun and wearable! THank you so much for taking the time to let us know here in the comments.
Best,
Sylvia
CrazyCoolCrochet.com
What are the dimensions of this shawl?
The dimensions are in the pattern details on the post. 68 inches long; 16 inches wide
Thank you for visiting!
Sylvia
CrazyCoolCrochet.com
Sorry, missed it. Thank you!