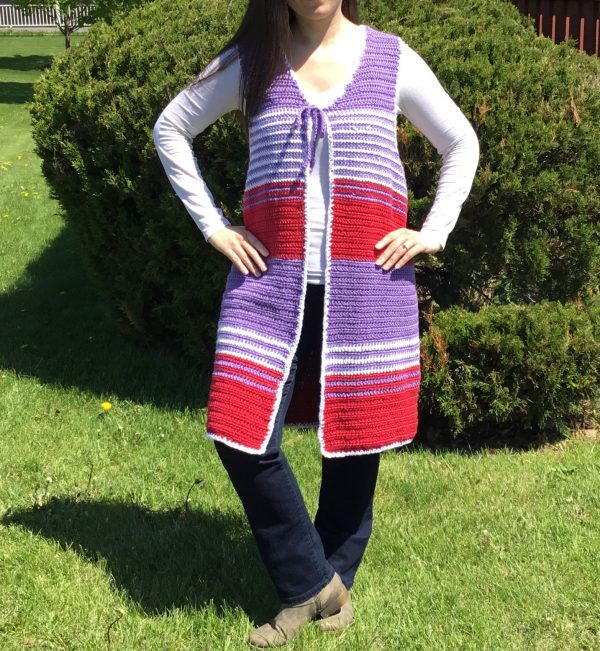
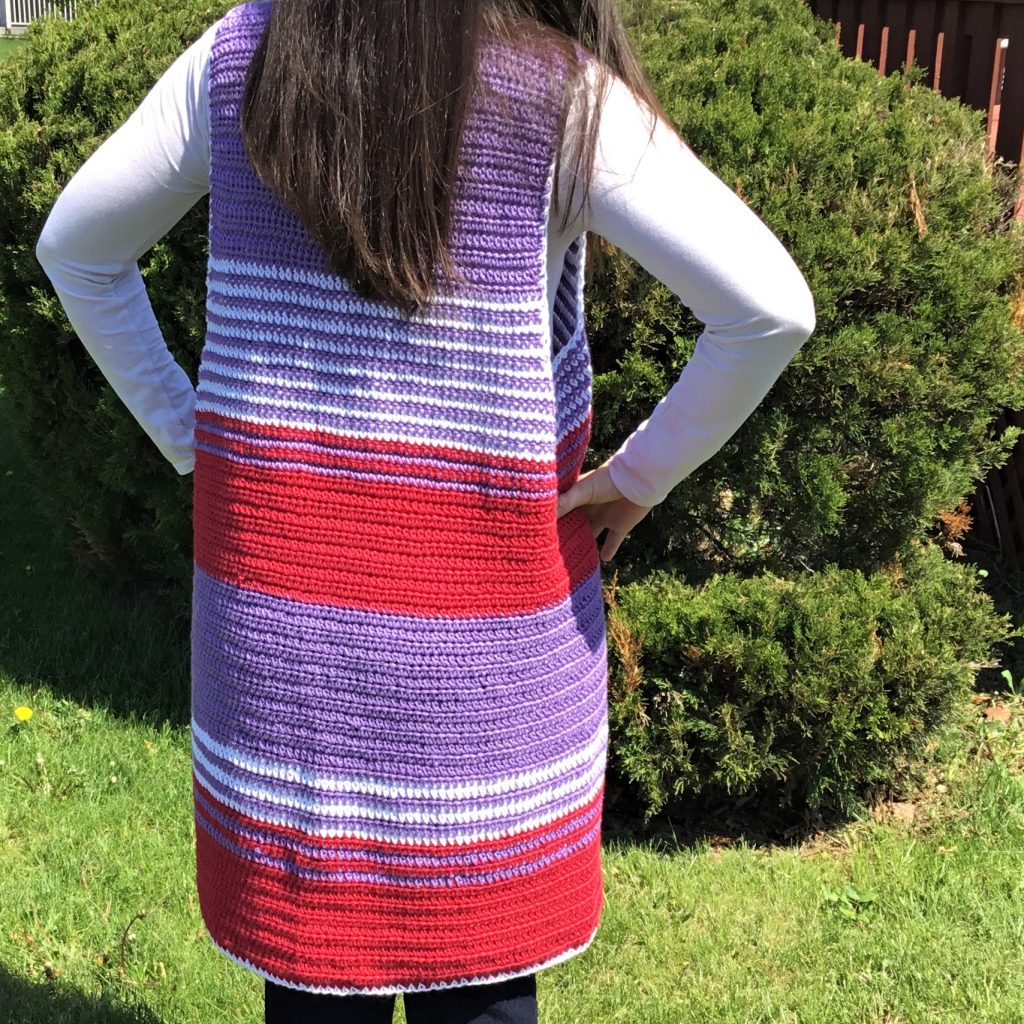
FREE PATTERN and VIDEO for this long crochet vest duster is below. The unique color combinations and cotton yarn make this the perfect spring and summer cover up.
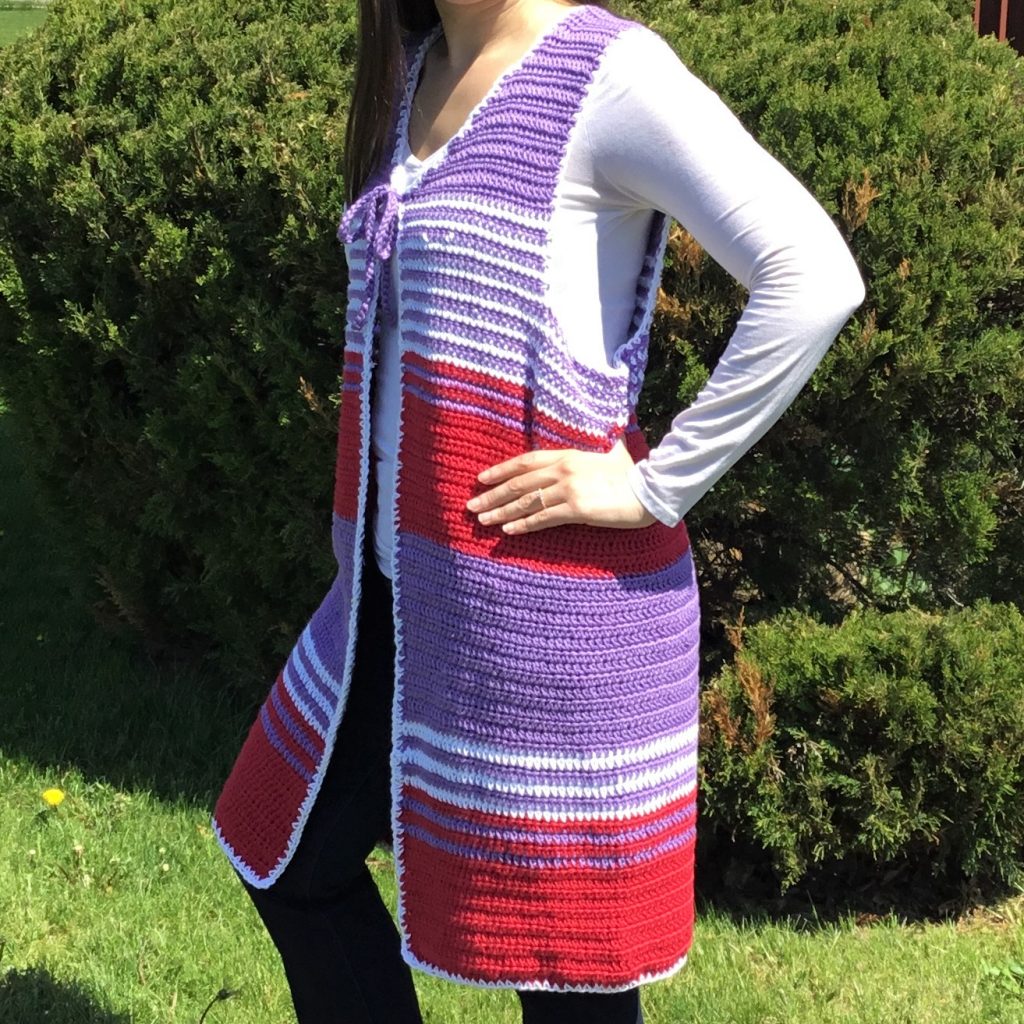
This beautiful crochet vest or duster is shown on a shorter (5’1″) woman. It will not be quite as long on a taller woman.
The pattern is for a size MEDIUM.
For experienced crocheters: As this pattern does not require a multiple, you can adjust the pattern for smaller or larger sizes by adding or subtracting to the beginning chain. Also, adjust the placement of stitch markers for armholes as needed.
At this time, the pattern does not show line by line adjustments for smaller or large sizes.
More detail and more photos available with the printable Etsy version: CrazyCoolCrochetUS.etsy.com
This post contains affiliate links. I may receive a small commission from purchases made through my links at no additional cost to you.
Materials:
Yarn #4 medium weight; I Love This Cotton by Hobby Lobby

Colors: Amethyst (lavender) (3 skeins of 3.5 oz ea)
Red (2 skeins of 3.5 oz ea)
White (1 skein of 3.5 oz ea)Crochet hook size H / 5 mm
Tapestry needle
Scissors
Gauge: 4 hdc = 1” , 2 hdc rows = 1”
Dimensions: Shoulder to bottom = 34”; entire circumference = 40”
MAIN PANEL
Ch 154
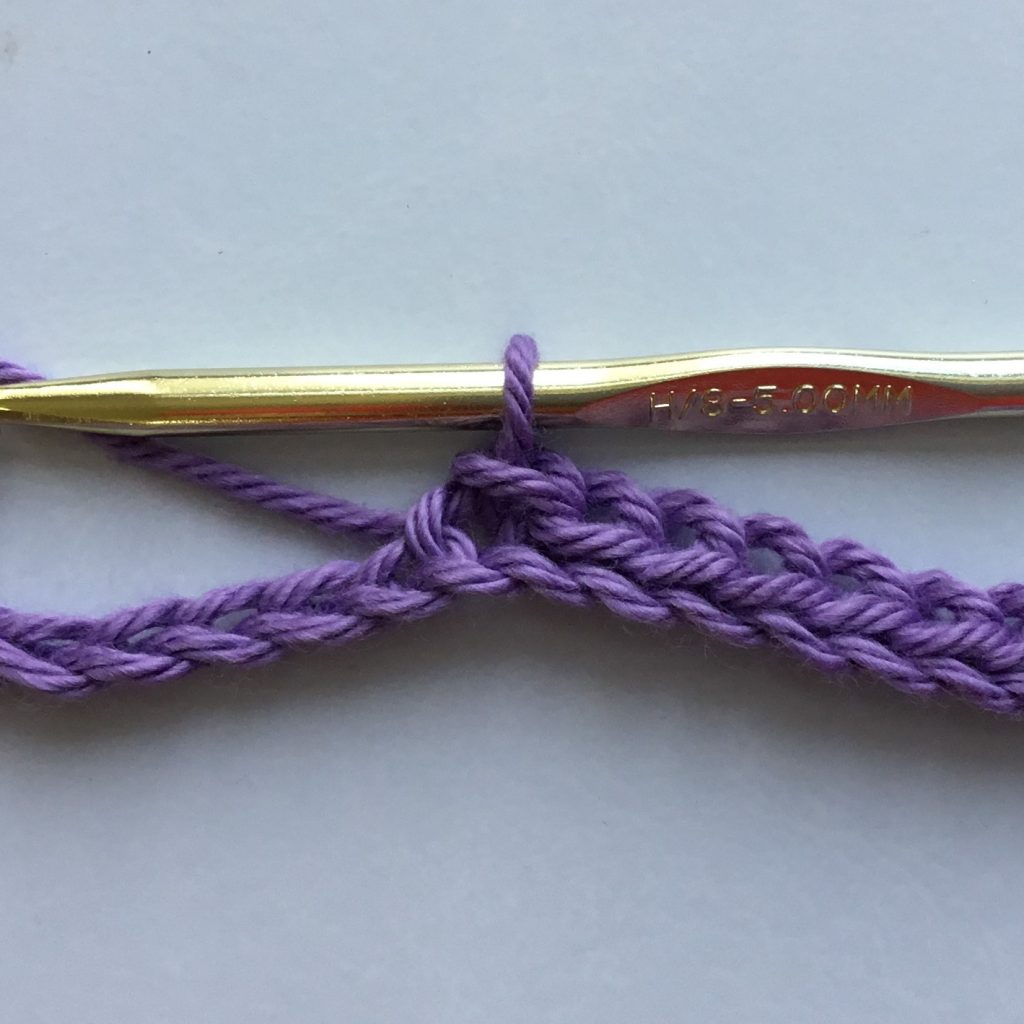
Row 1: hdc in 3rd ch from hook and in each ch across. 152 total hdc’s. Ch 2. Turn
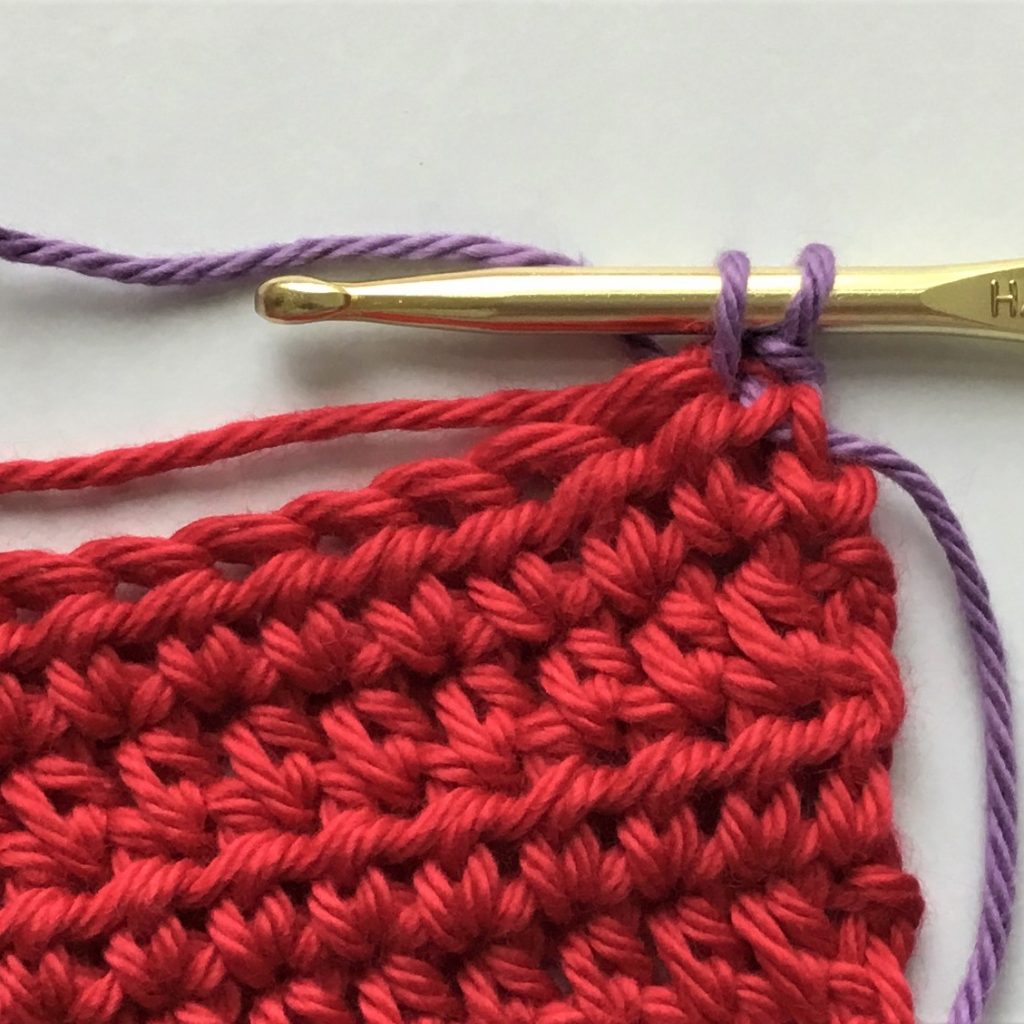
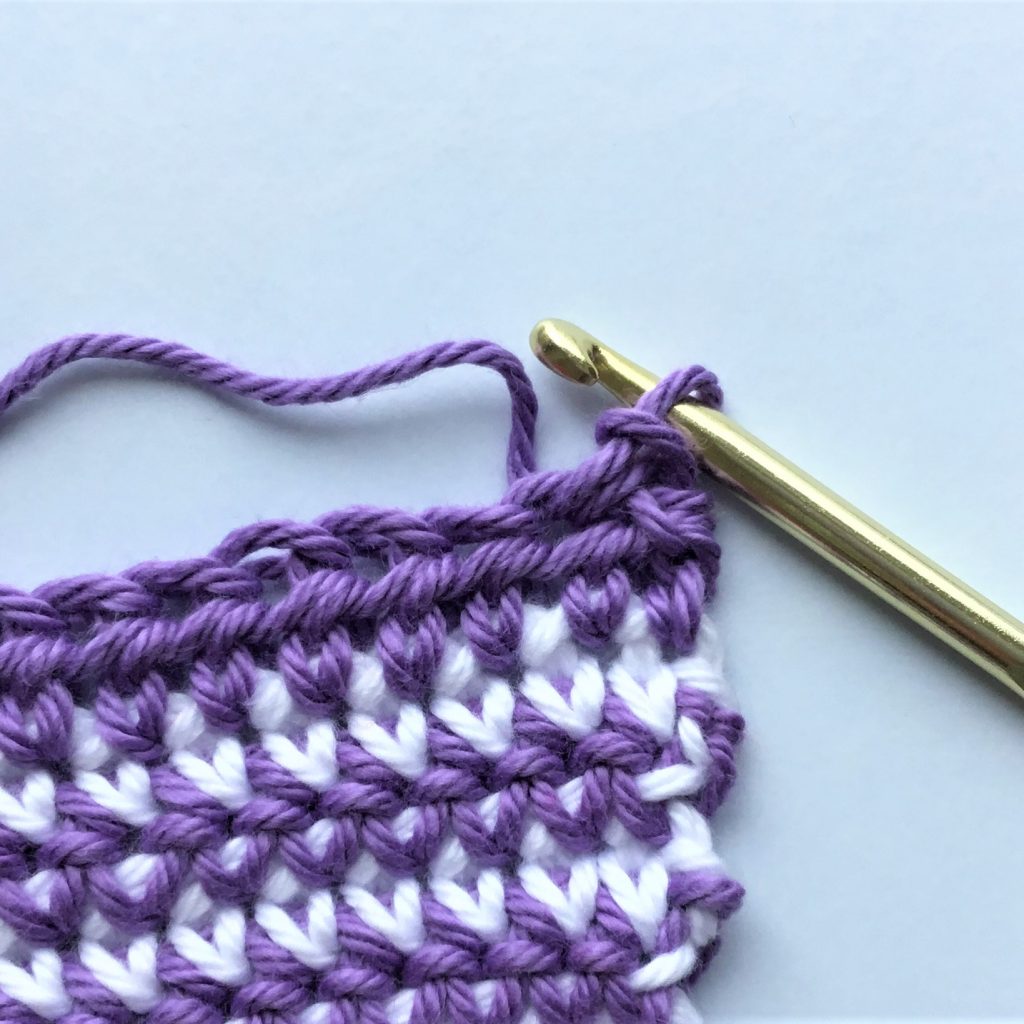
Row 2: hdc in 1st sp (see 2nd photo above) and in ea sp across. 152 hdc’s. Ch 2. Turn
Row 3 – 11: Repeat row 2. Ch 2. Turn
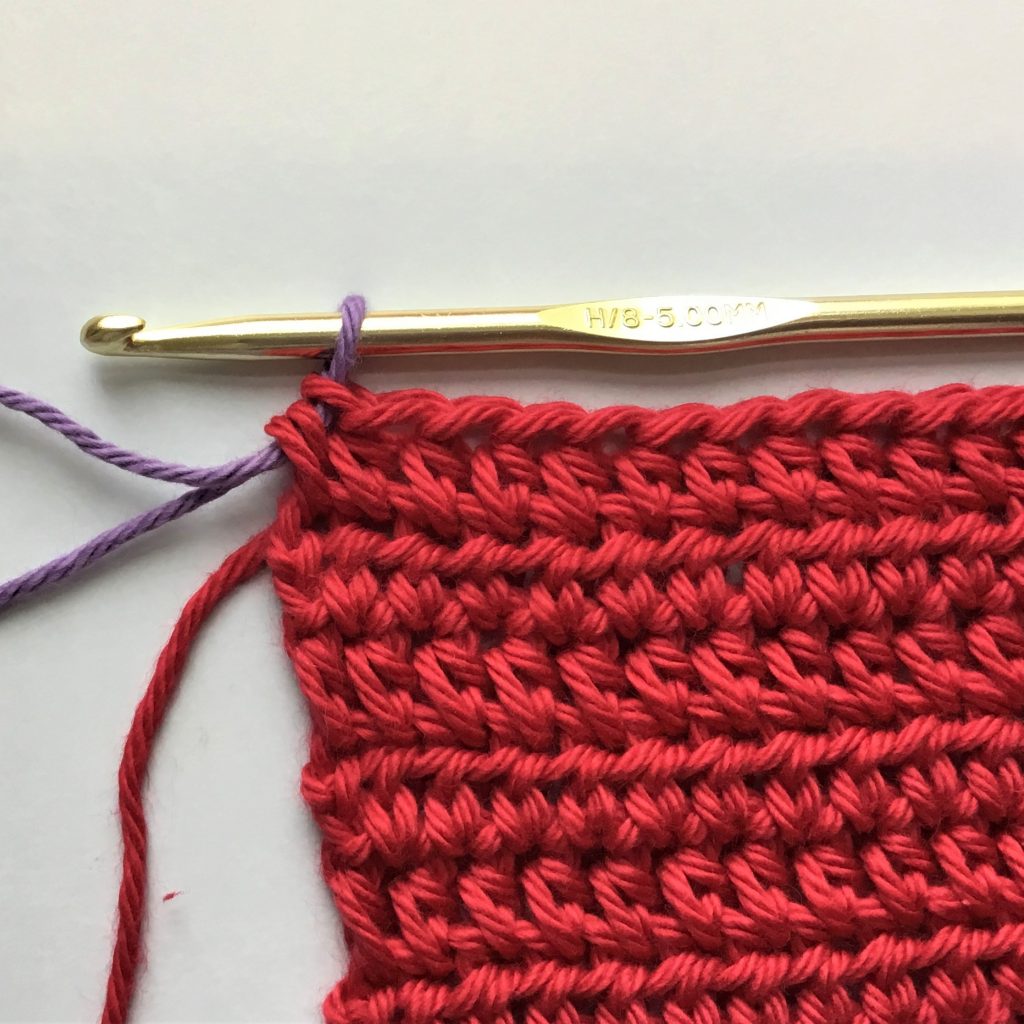
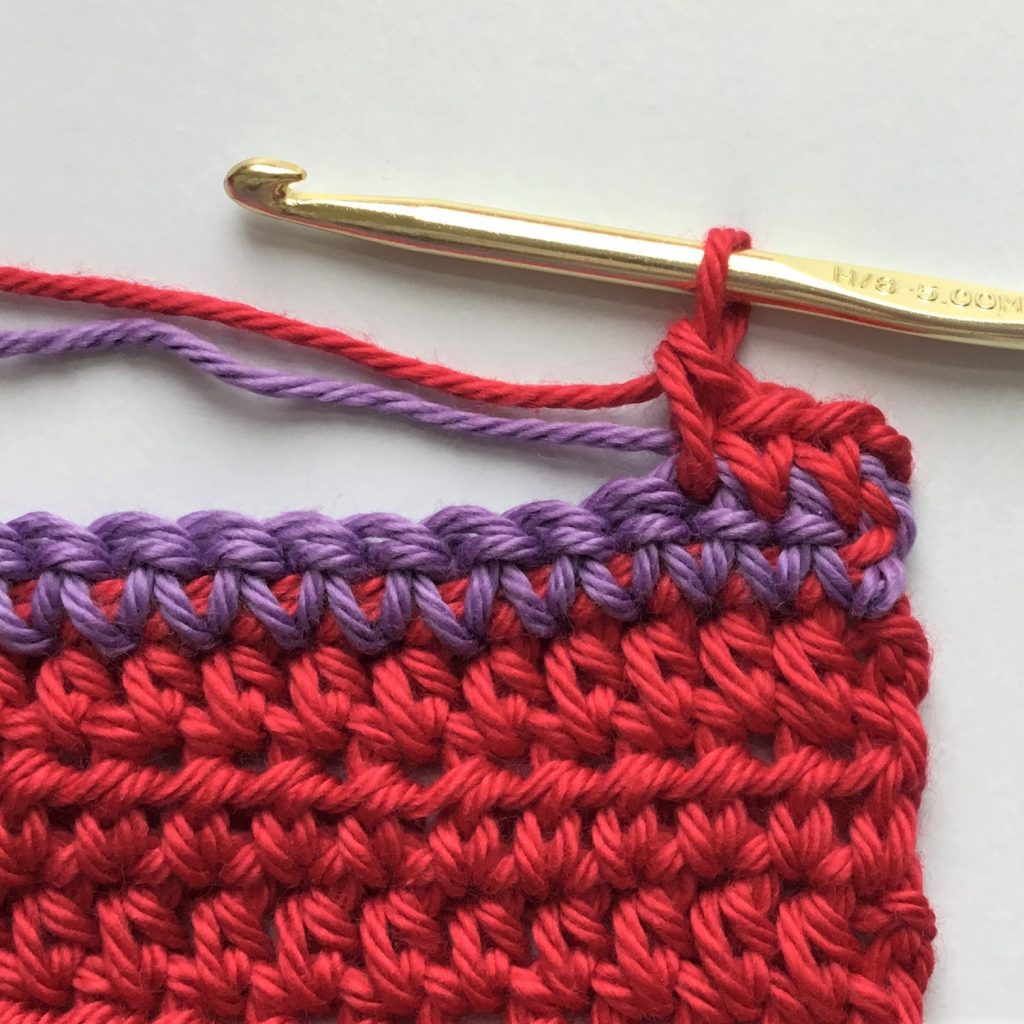
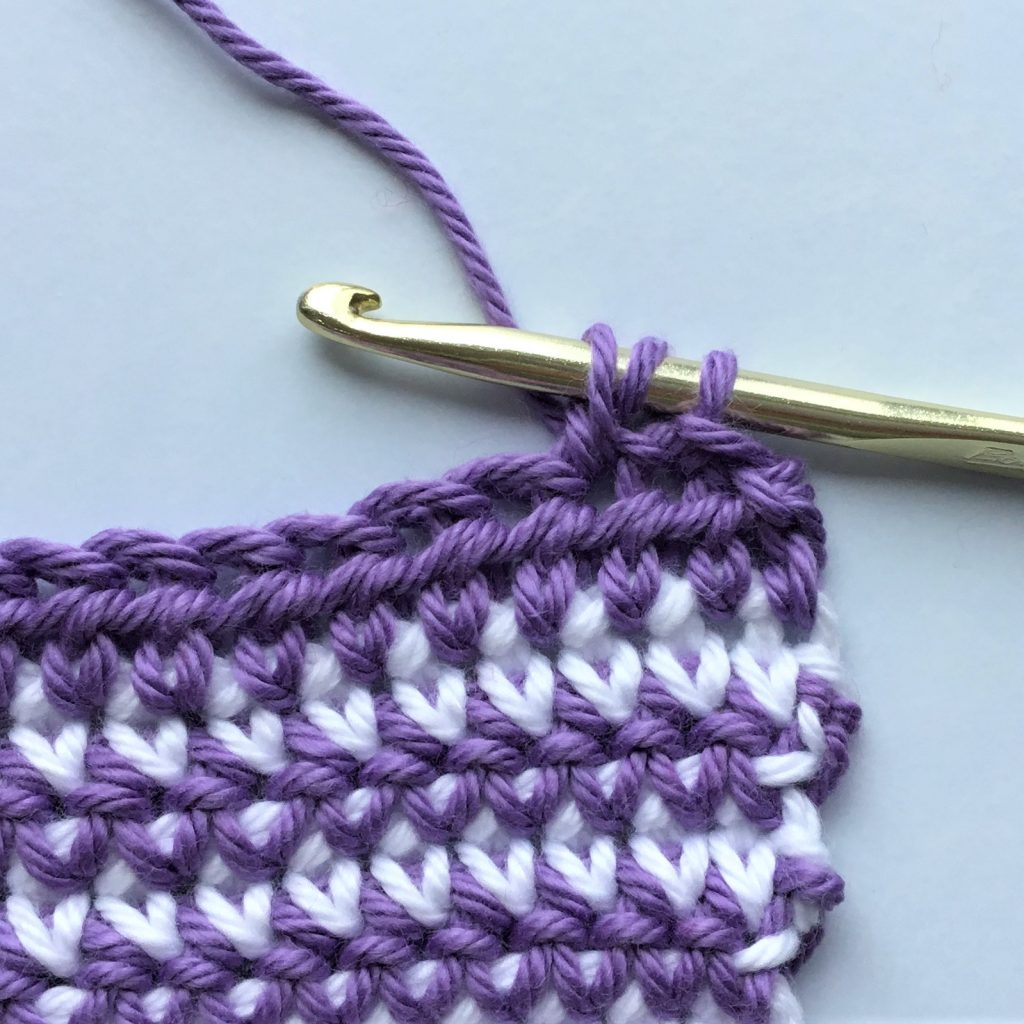
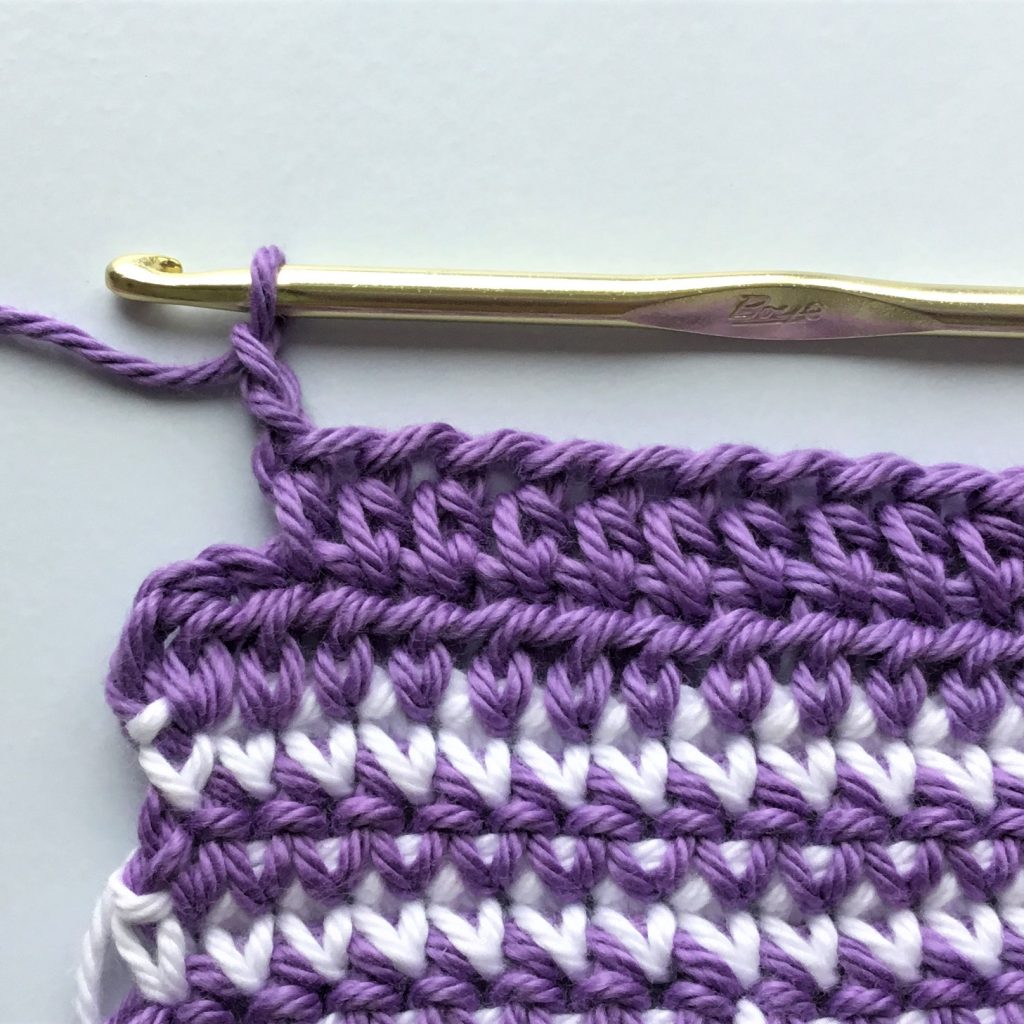
Row 12: See photo above. Hdc in ea st to last st. Begin the last hdc for 3 loops on hook; drop red, pick up lavender; yo with lavender to complete the hdc. Ch 2. Turn
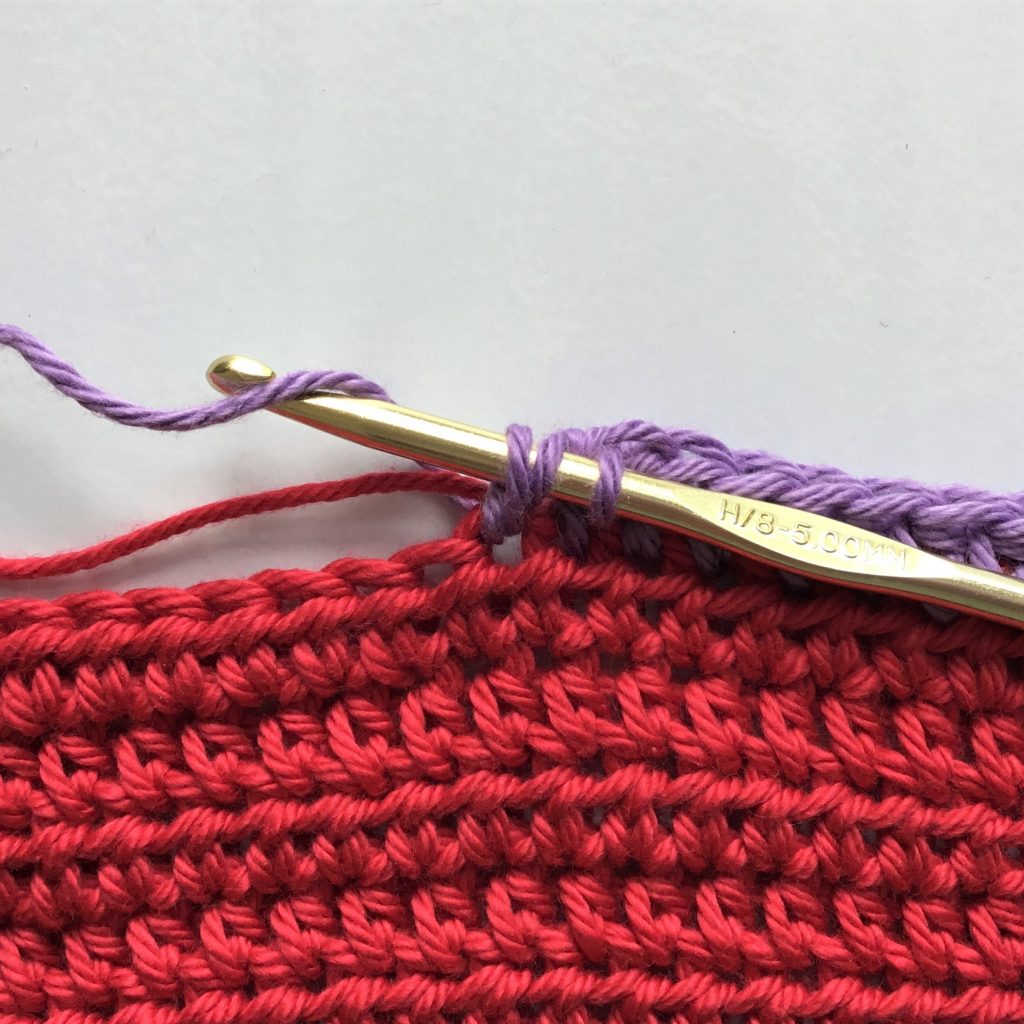
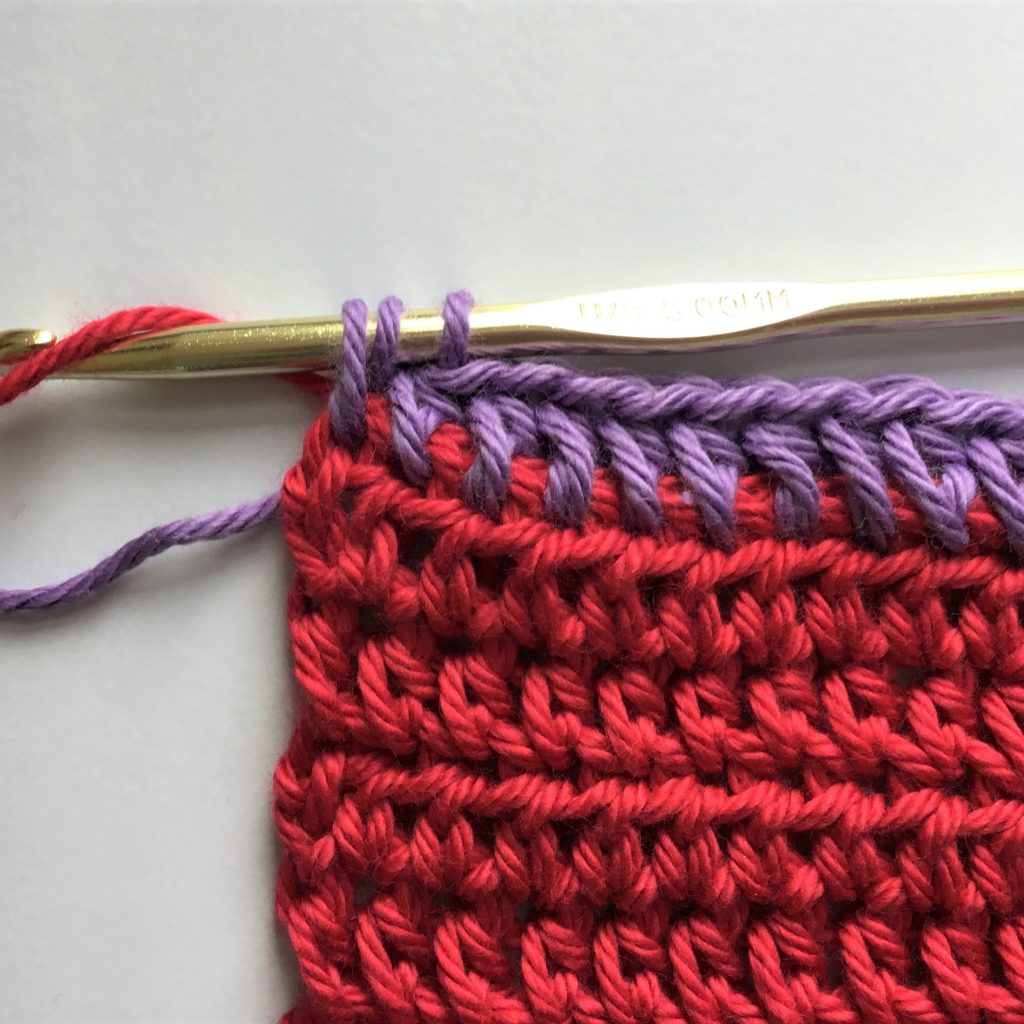
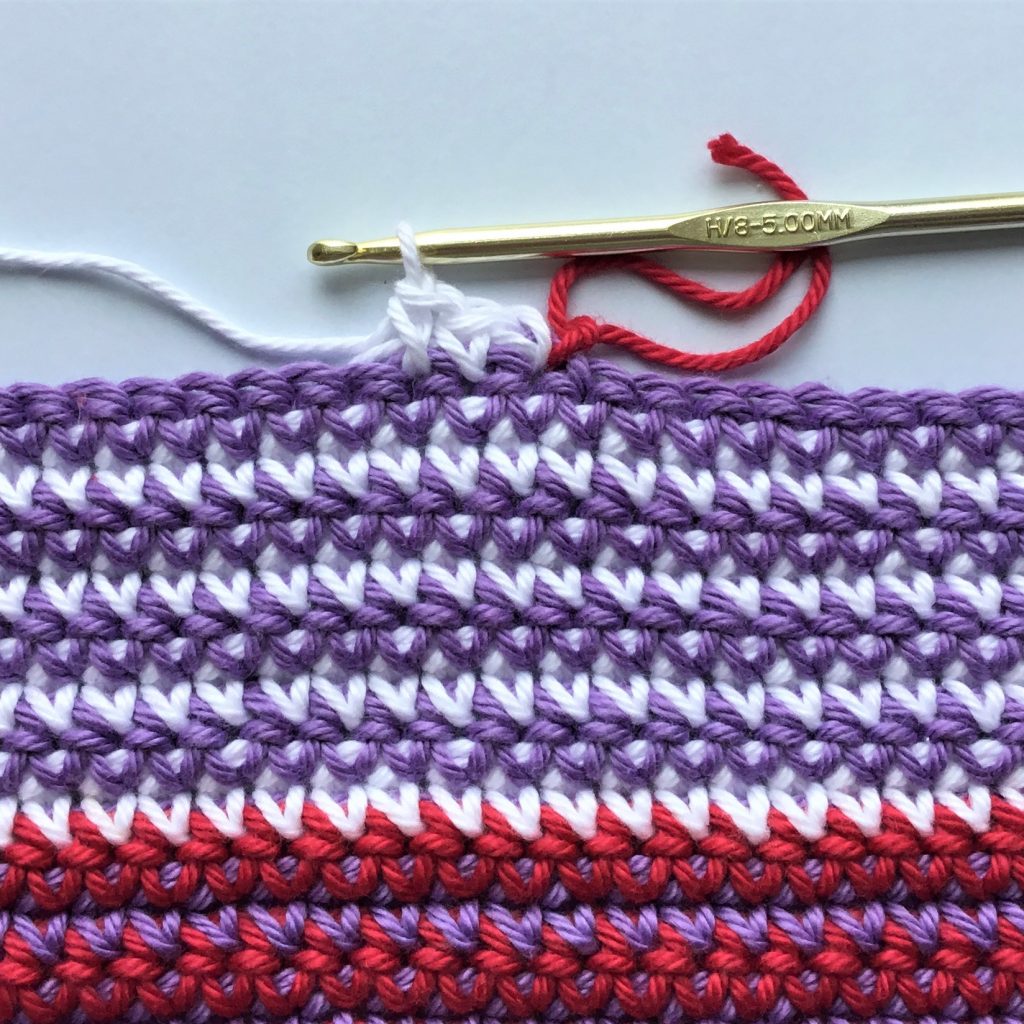
Row 13: With lavender, hdc in 1st st and ea across to last st, carrying the red across the row, incorporating into the lavender row (see photo above; also view on YouTube video [link is at top of page]). This will allow you to drop the current color and pick up the next color at end of each stripe row as needed. As you carry the 2nd color along the row, give it a slight tug every few stitches to keep it hidden and taut in the row. Do not pull too tightly as this will cause the garment to pucker.
At last st, begin last hdc for 3 loops on hook, drop lavender, pick up red to complete the hdc. Ch 2. Turn
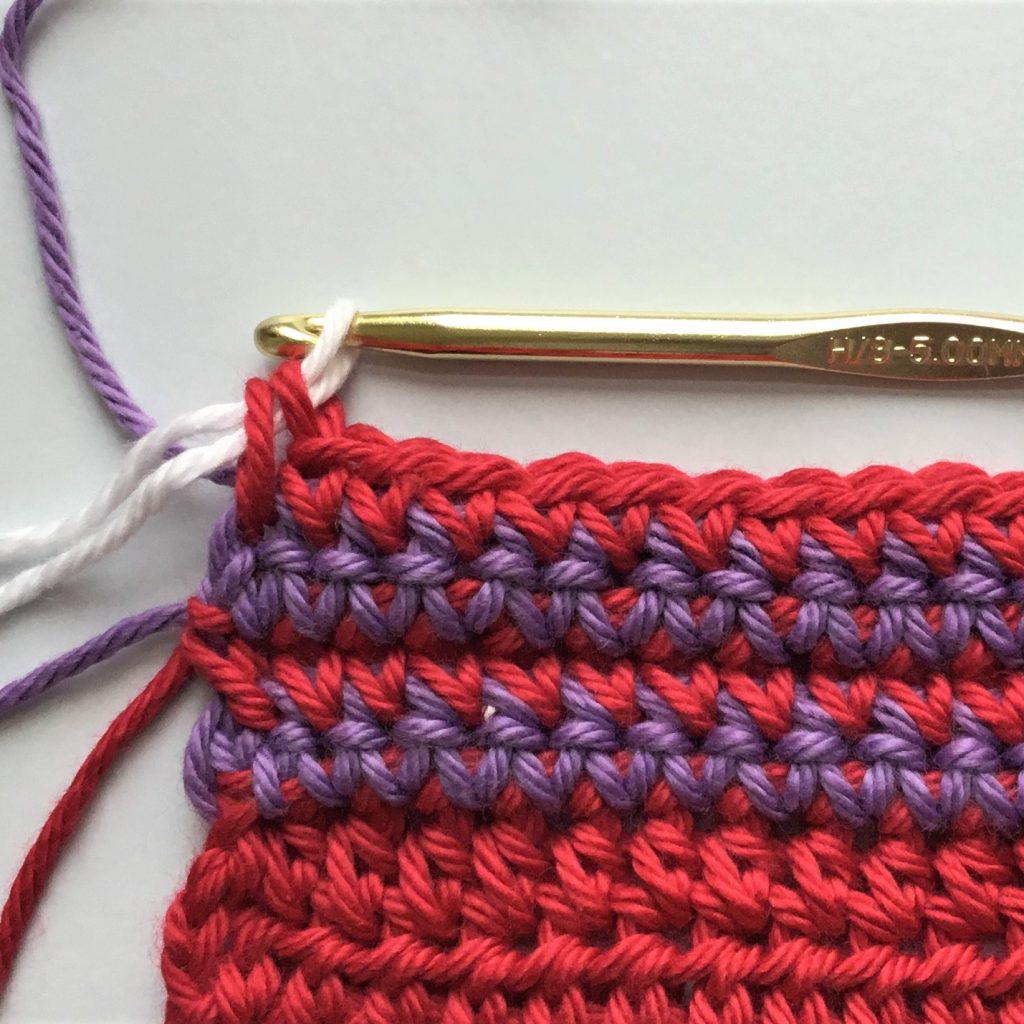
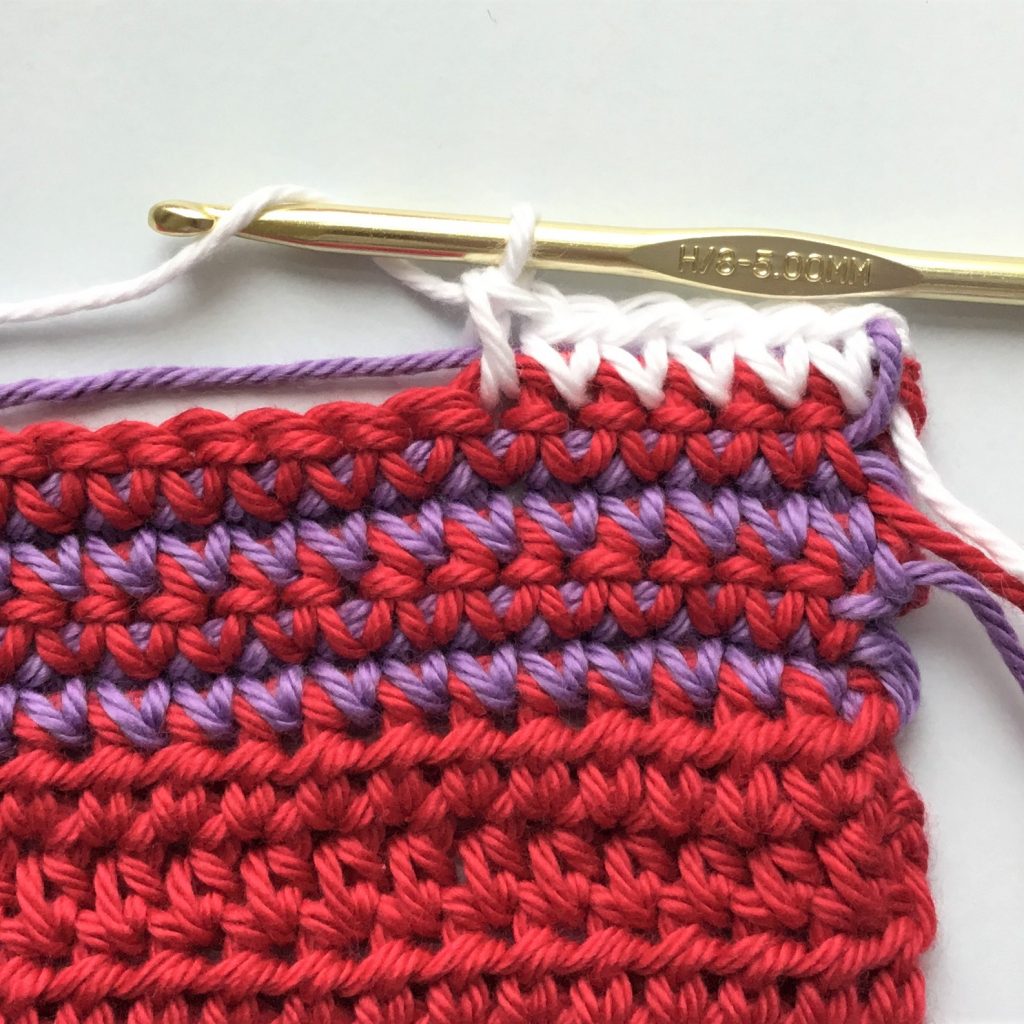
Rows 14 – 16: Repeat row 13 reversing colors ending with red. At end of row 16, drop red, attach white. Cut red. Ch 2. Turn
Rows 17 – 21: Repeat row 13 alternating white and lavender ending with white. Complete the last hdc picking up the lavender. Cut white. Ch 2. Turn
Rows 22 – 36: With lavender work hdc’s across row for 152 hdc. At end of row 36 complete the last hdc by attaching the red. Cut the lavender. Ch 2. Turn
Rows 37 – 46: With red continue in pattern for 152 hdc’s in ea row. Complete the last hdc in row 36 picking up the lavender (keeping the red to carry across the row). Ch 1. Turn
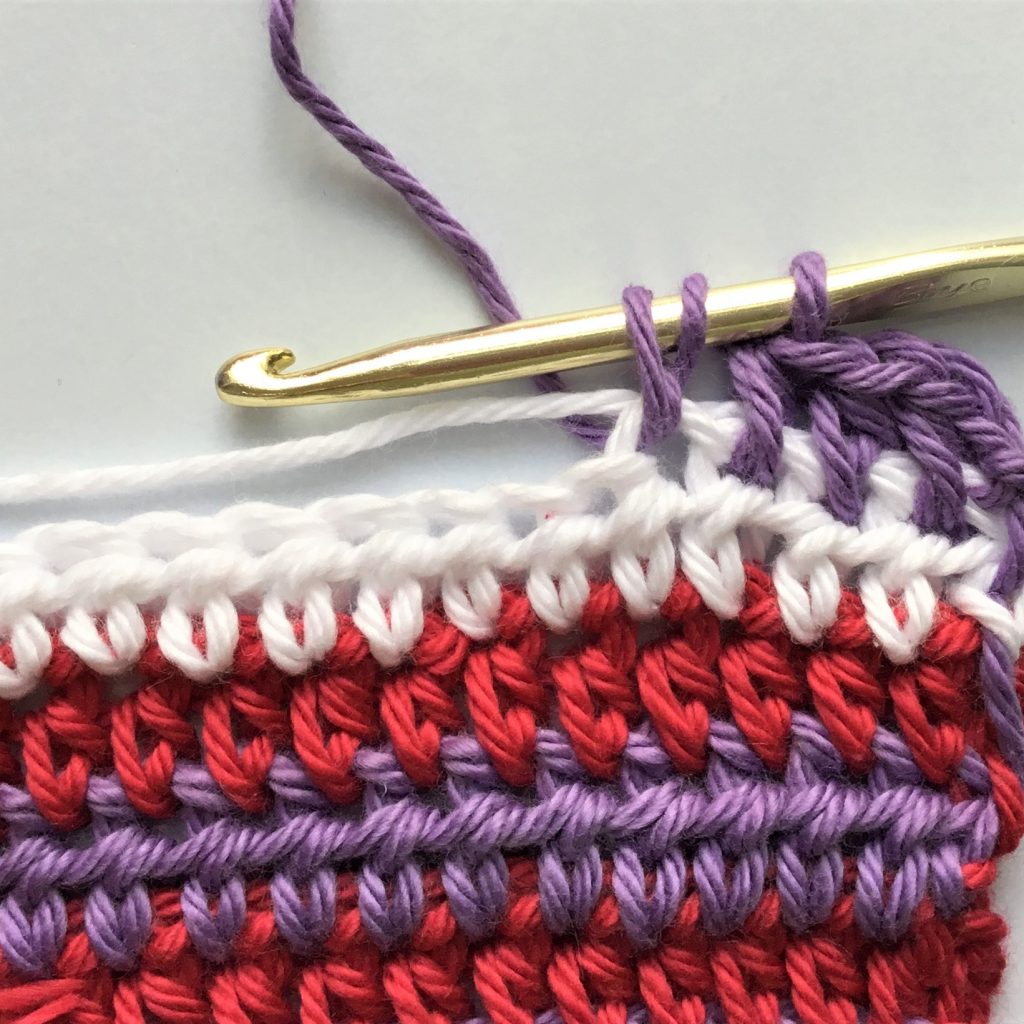
Row 47: With lavender work sc’s in 1st st and in ea st across. Complete the last sc dropping the lavender and picking up the red. 152 sc’s. Ch 1. Turn
Rows 48 – 50: Continue in pattern alternating red and lavender. At last red sc in row 50 drop the red, pick up the white to complete the last sc. Cut red.
Rows 51 – 58: Continue in striping pattern in sc’s with white and lavender ending with a lavender row. 152 sc’s per row. Do NOT cut yarn.
STITCH MARKERS
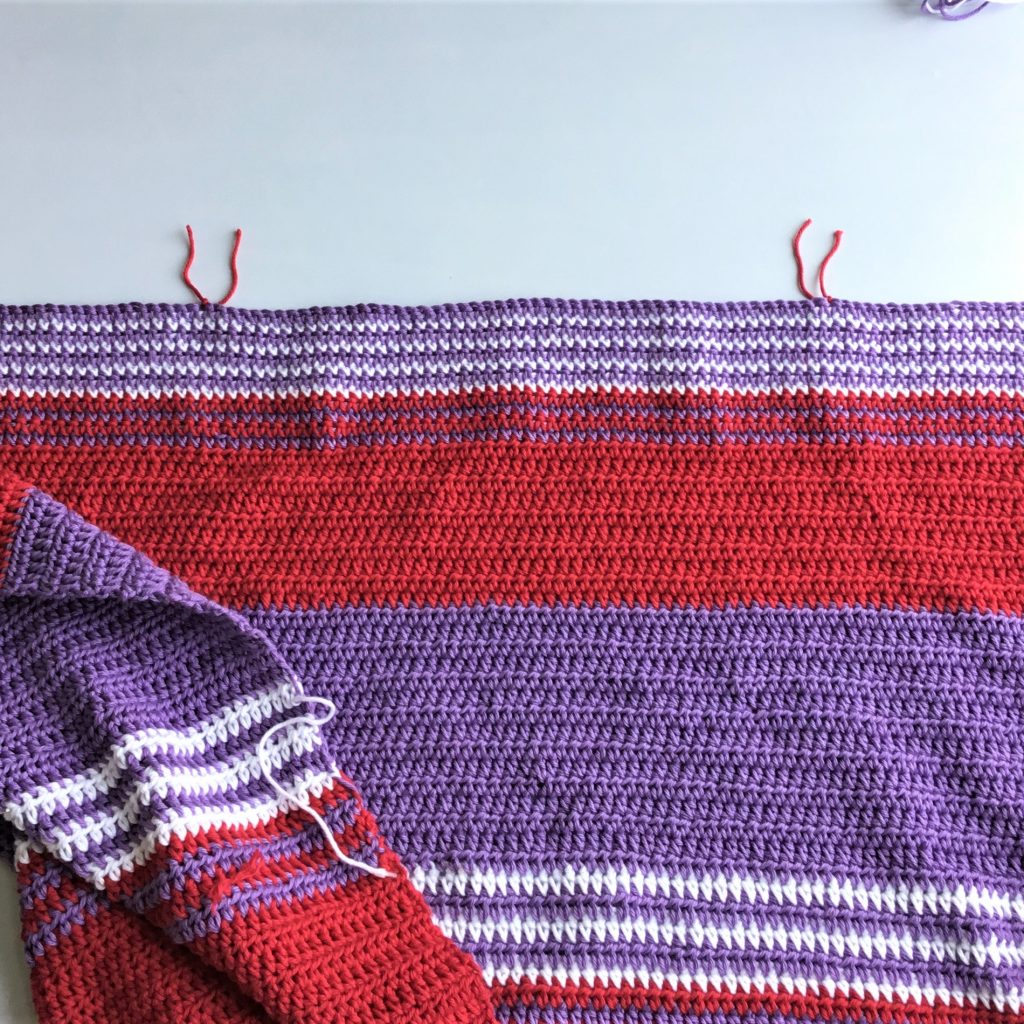
Attach a stitch marker at the 25th st from the left edge; add a stitch marker at 25th st from the right edge; add another stitch marker 25 st’s from the 1st stitch marker (counting toward the center); and another stitch marker 25 st’s from the right stitch marker (counting toward the center). Four stitch markers total. [My apologies. The photo is cutting off the left and right stitch markers. Please follow pattern as written.]
The spaces between the 1st (left) st marker and the next will be left blank to create the armhole. Similarly for the right side.
The rows that will be worked to the left and right of the armholes will create the front panels.
The space between the two center st markers will be worked to create the back panel.
1st FRONT PANEL
1st Panel (right side) Rows 59 – 65: (You are working these sc rows only up to the st marker.) Continue working in white and lavender sc stripes, beginning with the white for 25 sc’s. Ending with white row, complete last sc picking up the lavender. Cut white. Ch 2. Turn.
Row 66: With lavender work 25 hdc’s. Do NOT ch. Turn.
We will be working decrease rows to create the neckline.
Row 67: Skip 1st st, sl st in next st. Hdc in 3rd st and ea st across. 23 hdc’s. Ch 2. Turn
Row 68: Hdc in ea st. 23 hdc. Do NOT ch. Turn
Row 69: Repeat Row 67 for 21 hdc’s.
Row 70: Repeat Row 68 for 21 hdc’s.
Row 71: Repeat Row 67 for 19 (hdc’s.
Row 72: Repeat Row 68 for 19 hdc’s.
Row 73: Repeat Row 67 for 17 hdc’s.
Row 74: Repeat Row 68 for 17 hdc’s.
Row 75: Repeat Row 67 for 15 hdc’s. Ch 2. Turn
Row 76: Work a hdc in ea st. 15 hdc’s. Ch 2.Turn.
Rows 77 – 81: Repeat Row 76. Cut yarn.
BACK PANEL
Attach white yarn at 2nd stitch marker from the right edge with a sc.
Rows 59 – 65: Continue in sc’s working the pattern in white and lavender stripes in sc’s for 52 sc’s. At end of row 65, Ch 2. Turn
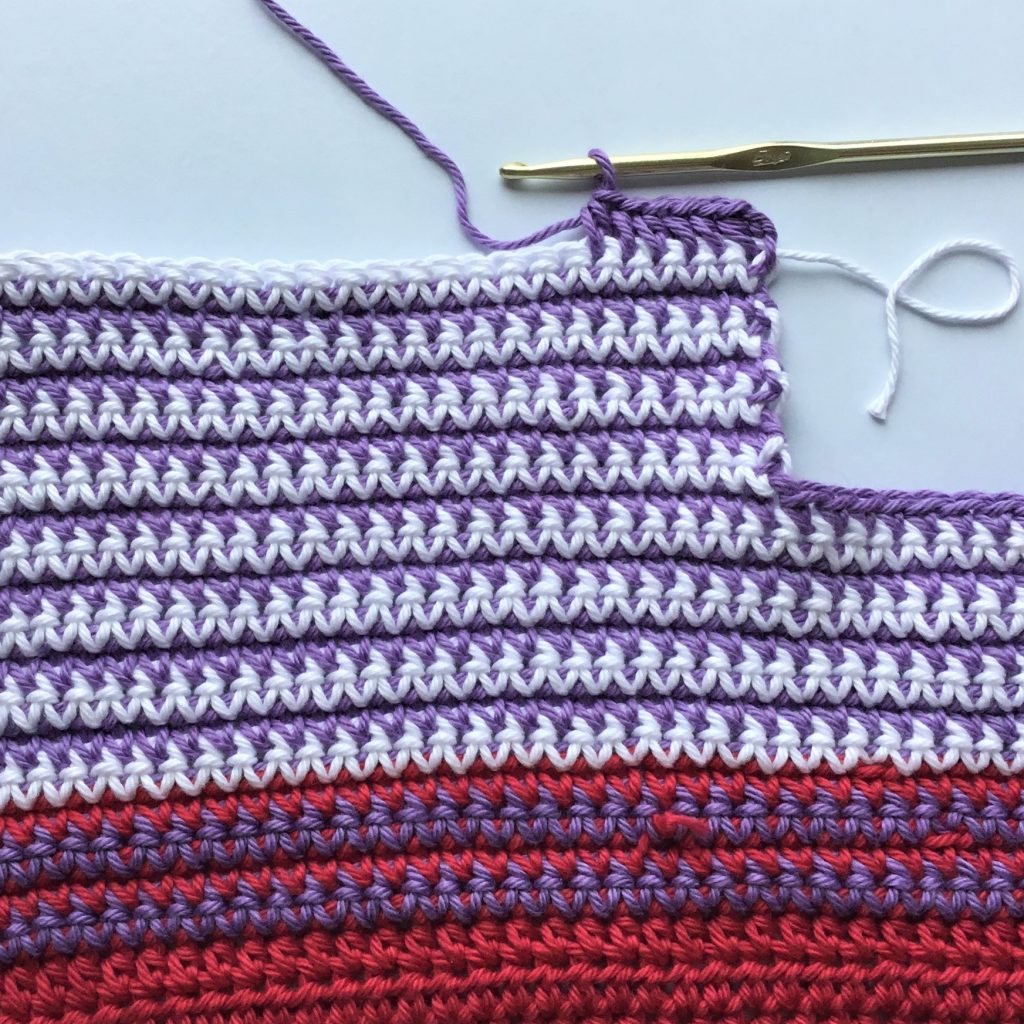
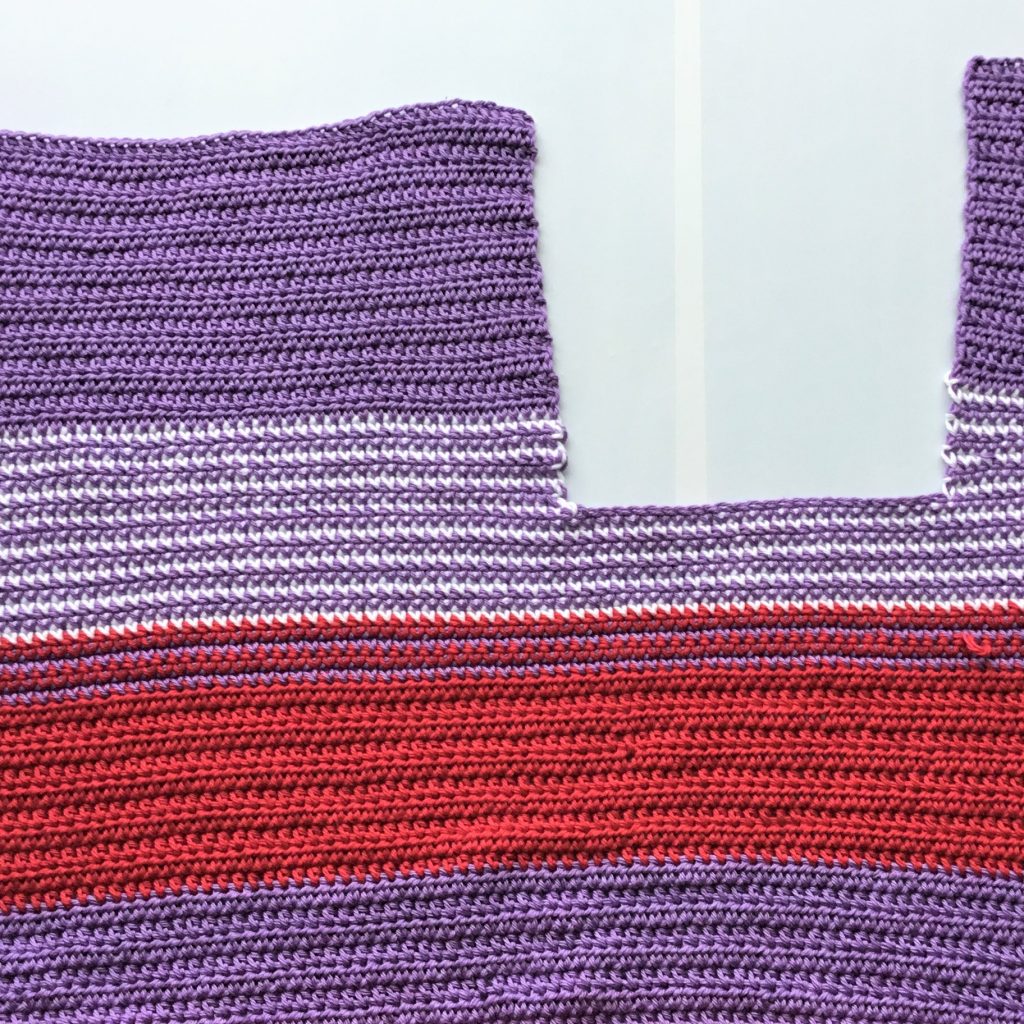
Rows 66 – 81: Work 52 hdc’s per row in lavender. At last hdc cut yarn. (Photo above shows the back panel and the 1st front panel.)
2nd FRONT PANEL
Attach white yarn at stitch marker that was 25 st’s from the left edge.
Rows 59 – 65: Continue working in white and lavender sc stripes, beginning with the white for 25 sc’s. Ending with white row, complete last sc picking up the lavender. Cut white. Ch 2. Turn.
Row 66: With lavender work 25 hdc’s. Ch 2. Turn.
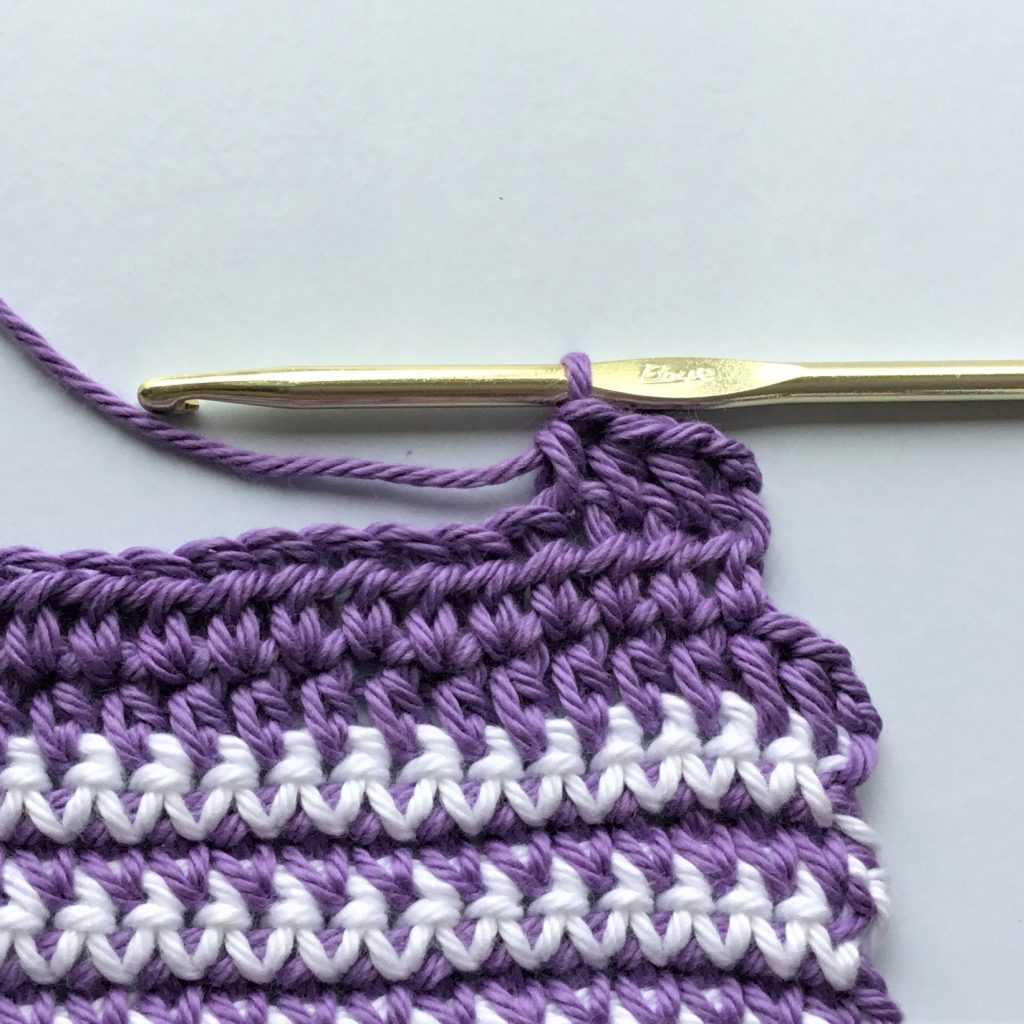
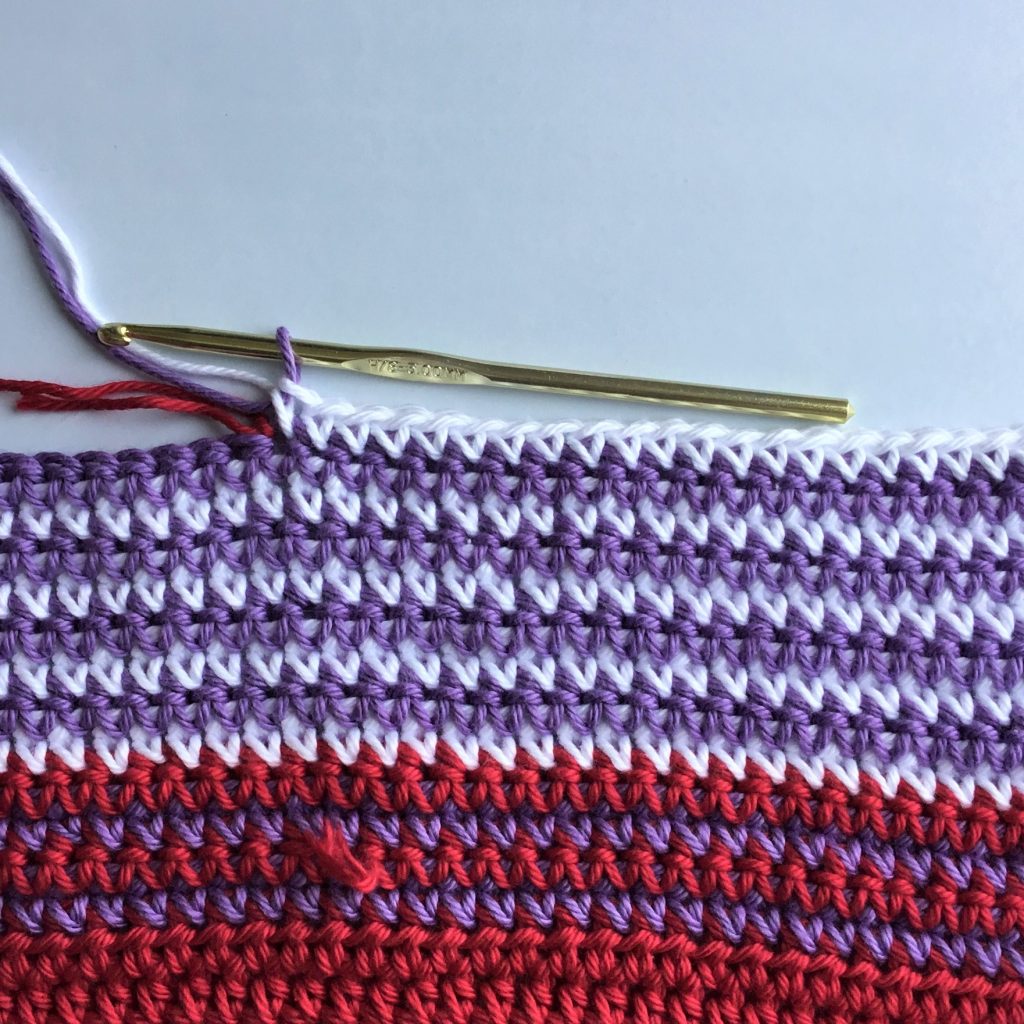
Row 67: See photo above. Hdc in 1st st and in ea st to the last two st’s. 23 hdc’s. Ch 2. Turn
Row 68: Hdc in ea st. 23 hdc. Photo above.
Row 69: Repeat Row 67 for 21 hdc’s.
Row 70: Repeat Row 68 for 21 hdc’s.
Row 71: Repeat Row 67 for 19 hdc’s.
Row 72: Repeat Row 68 for 19 hdc’s.
Row 73: Repeat Row 67 for 17 hdc’s.
Row 74: Repeat Row 68 for 17 hdc’s.
Row 75: Repeat Row 67 for 15 hdc’s. Ch 2. Turn
Row 76: Work a hdc in ea st. 15 hdc’s. Ch 2.Turn.
Rows 77 – 81: Repeat Row 76. Cut yarn.
ATTACH PANELS AT SHOULDERS
Fold front panels over back panel, right sides together; wrong side up. (The white sc’s on the right side look much smaller than the white sc’s on the wrong side.)
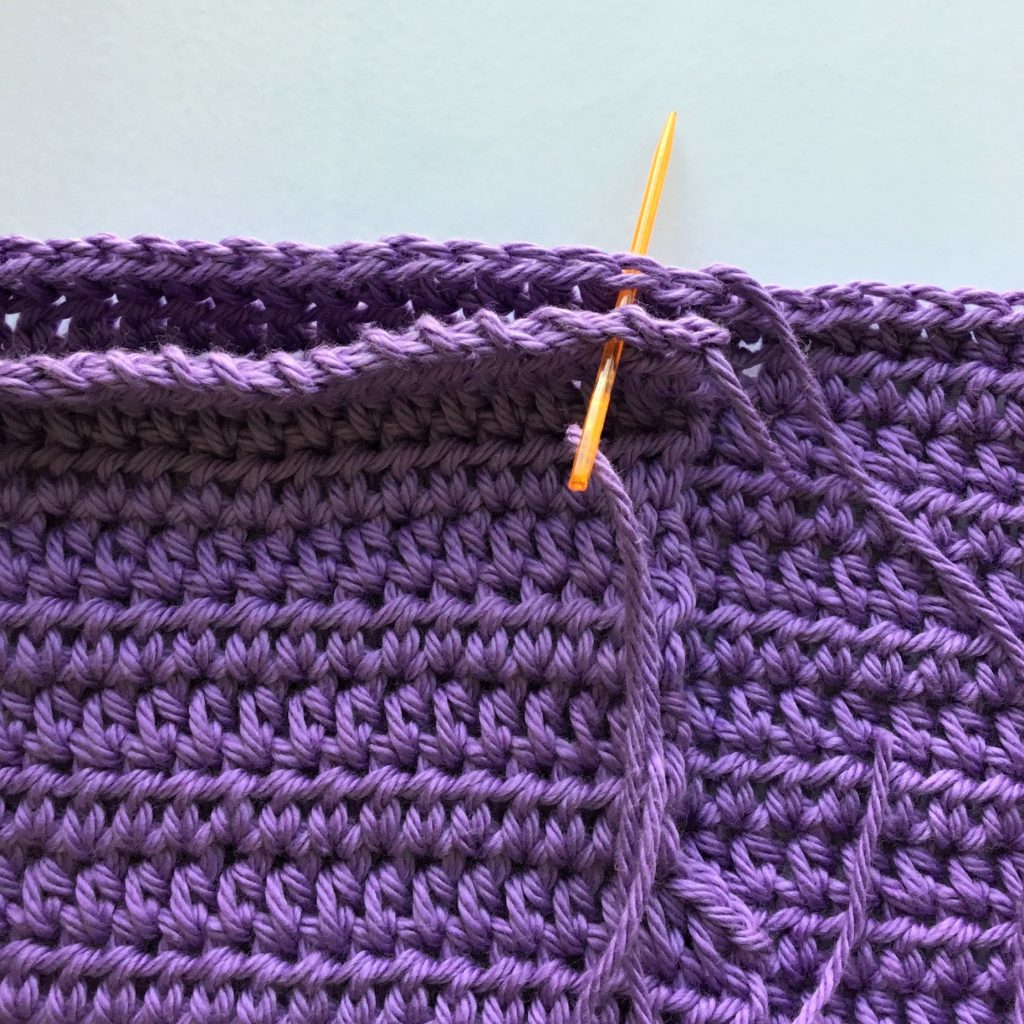
Using tapestry needle and length of lavender yarn, sew at shoulders.
BORDER
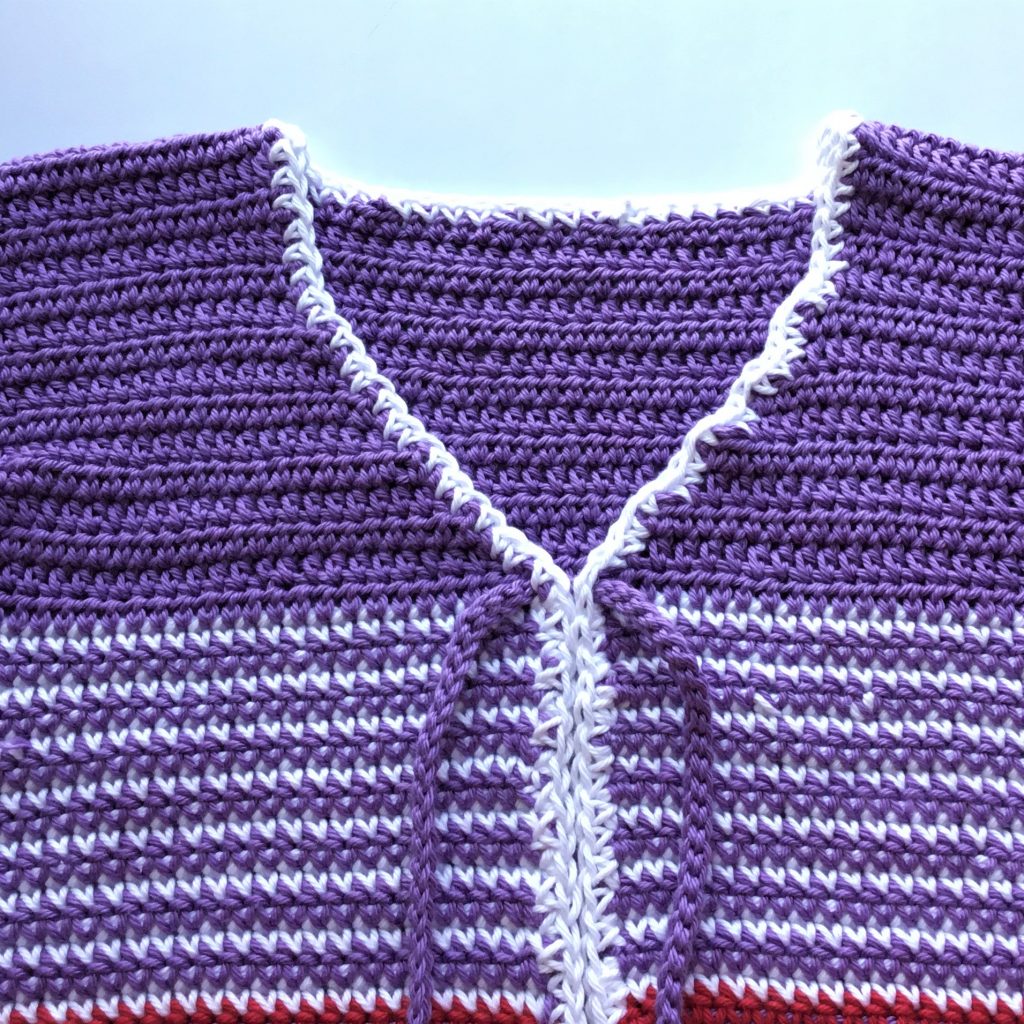
With cardigan right side facing you, insert yarn at center of neck with a sc. Work 1 row of single sc around the neck, front panels and bottom, inserting 3 sc’s in bottom corners. Enter sc’s as evenly around the garment as possible. At end of row join with a sl st in starting sc.
TIE
Ch 100
Sl st in ea ch. Take care not to work too tightly. Tie off.
You will also want to try this lightweight crochet duster. This design has been hugely popular! Crochet Duster
Copyright © 2019 Sylvia Talo You may sell items made from my patterns. Please include a link or reference to my shop CrazyCoolCrochetUS.etsy.com . Pattern is copyright protected; it may not be reproduced, redistributed, or displayed publicly in any way.
You May Also Like


