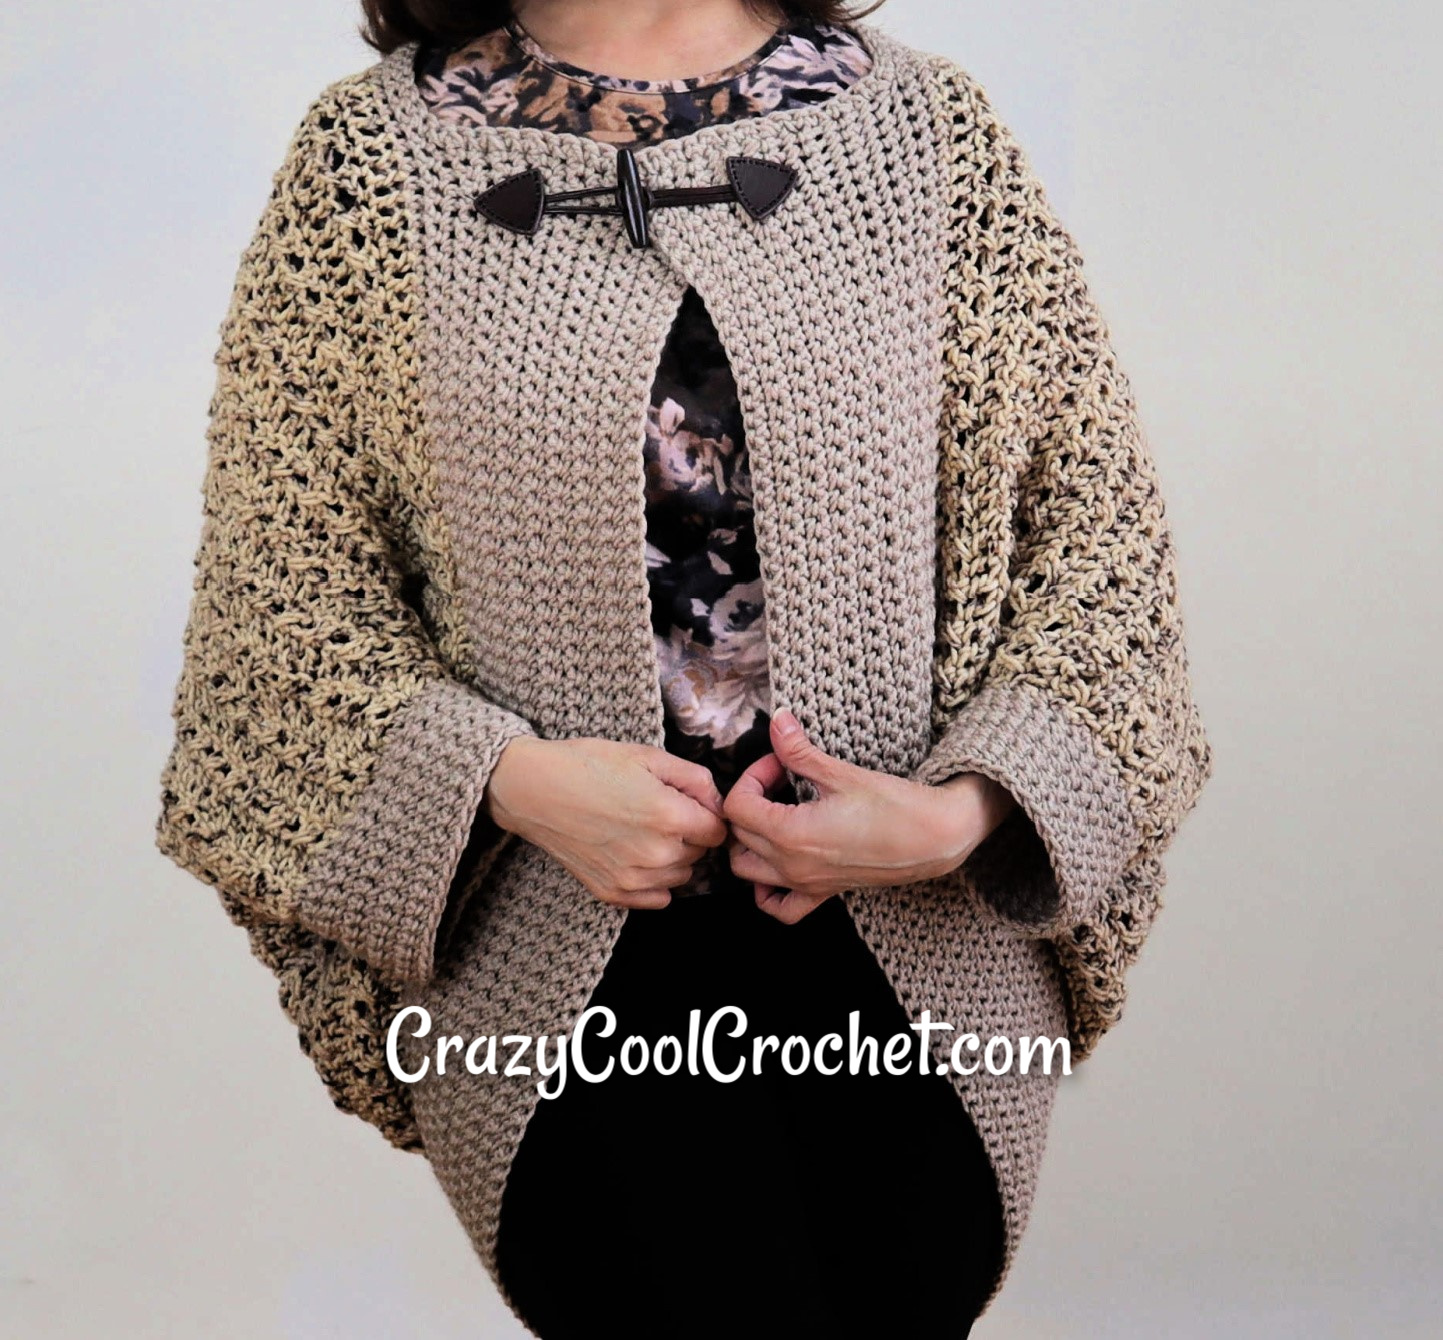
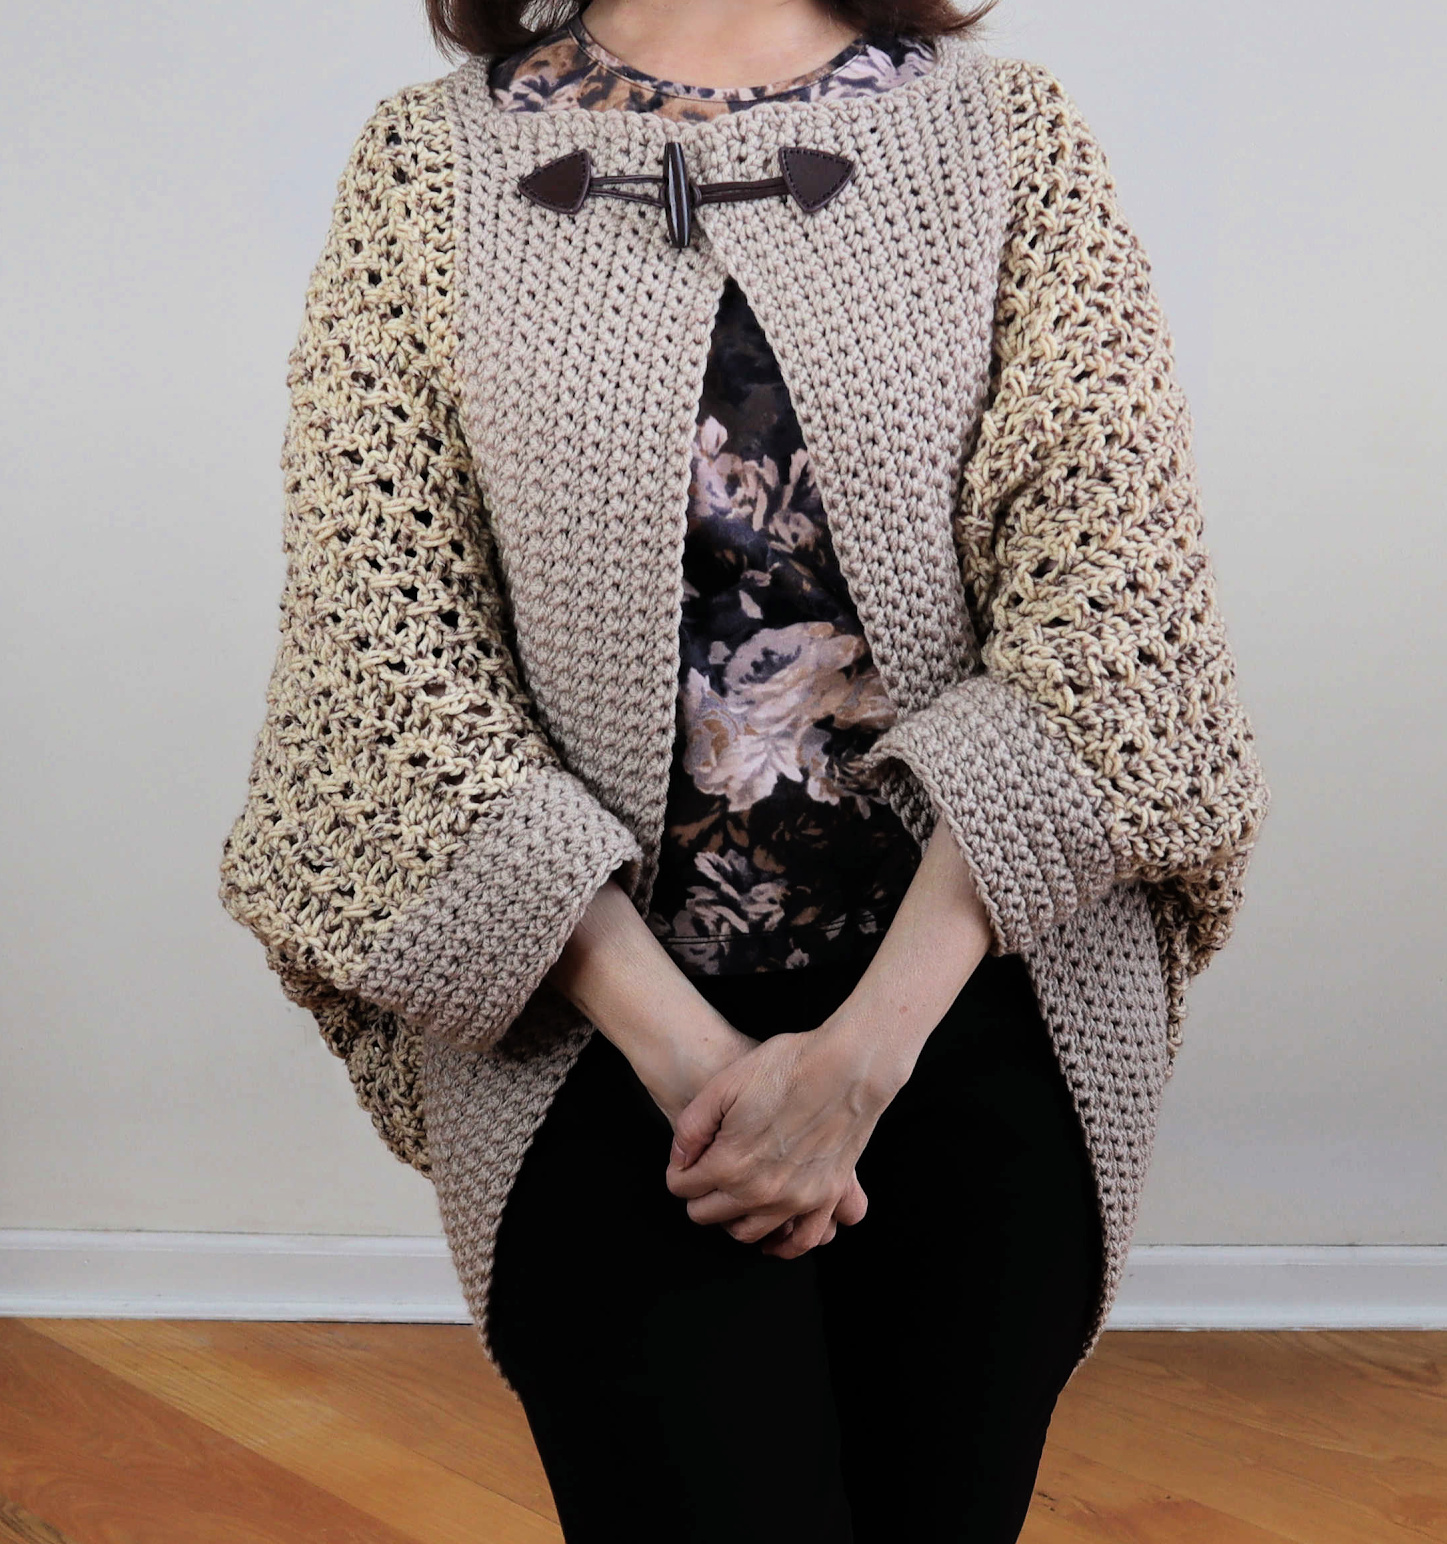
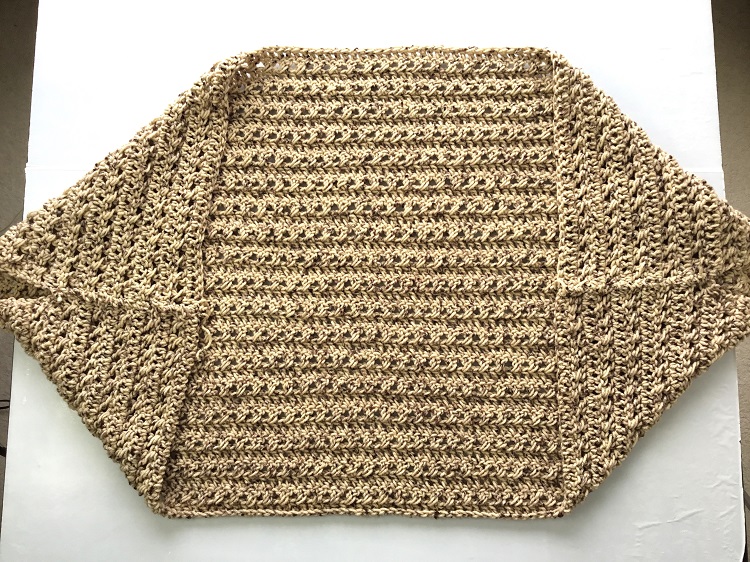
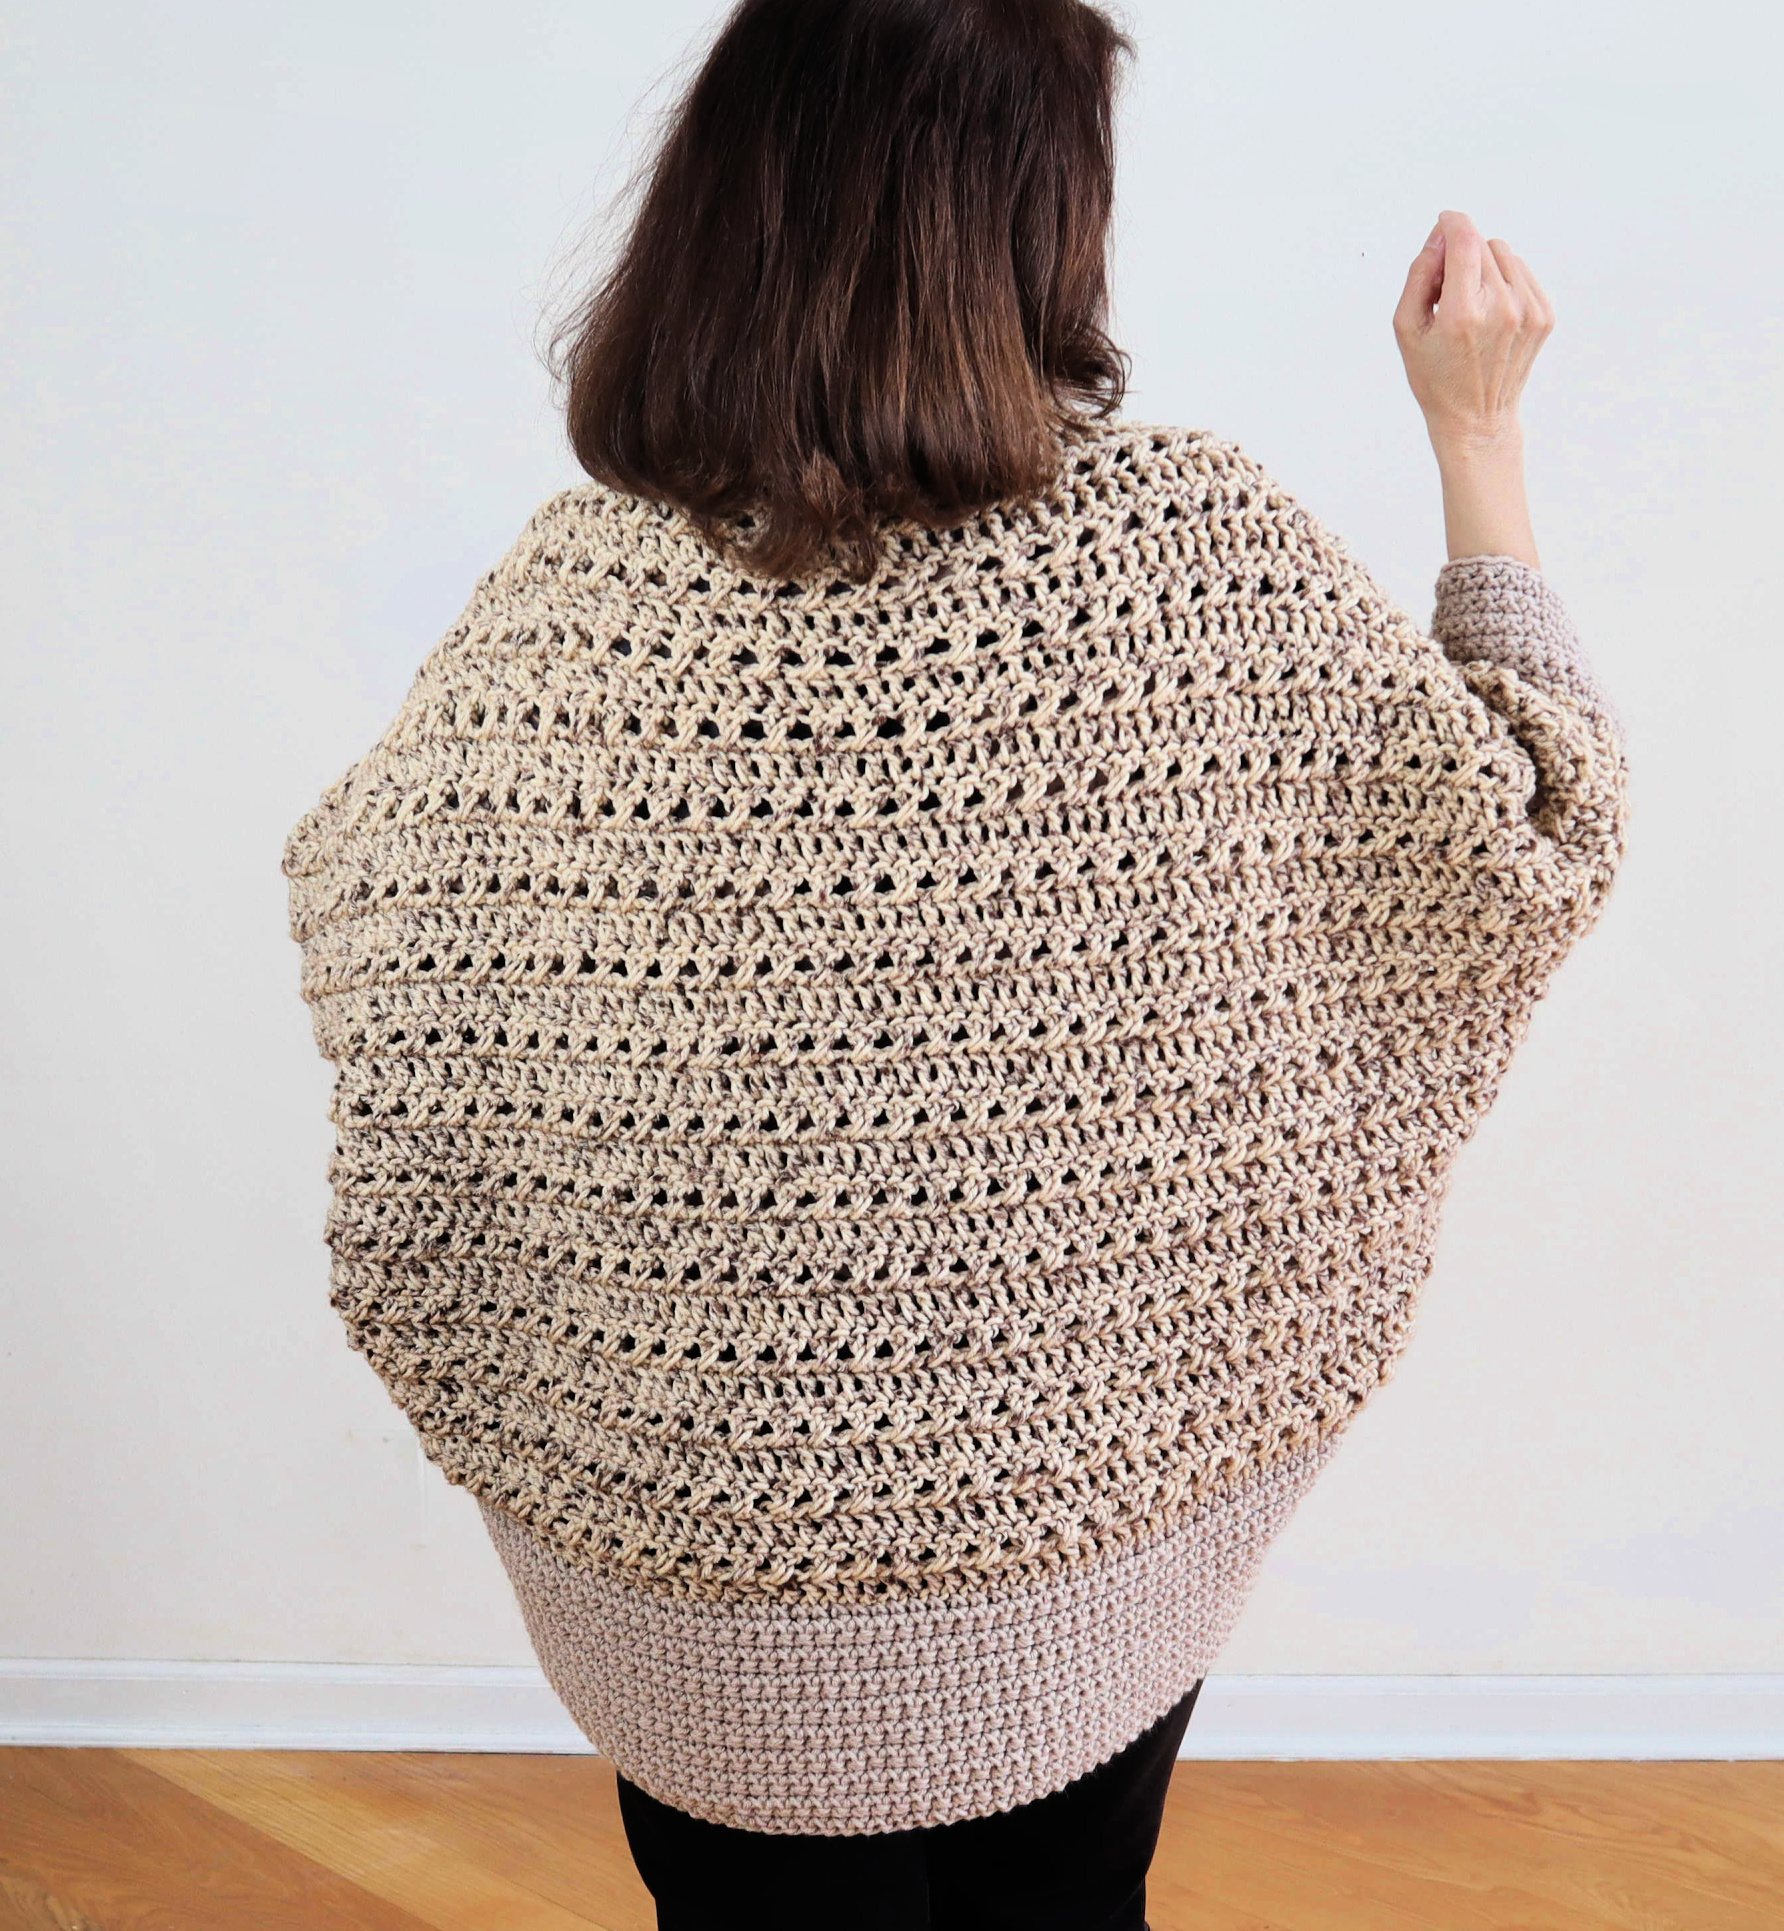
You will LOVE this gorgeous, unique Crochet Cardigan Shrug free pattern! It works up super fast using the easy, fun Crossed Double Crochet stitch. The extra wide border and TOGGLE button closure make this crochet shrug extra special!
Crossed Double Crochet Stitch
The crossed double crochet stitch is super EASY and produces a beautiful combination crochet stitch. You will want to use this stitch again and again. I used it for this crazy cool crochet Floor Pillow/Crochet Lounger. This is a must see: Floor Pillow/Crochet Lounger
Crochet Shrug Video Tutorial
The video tutorial below will help you visualize the written pattern included below. If you would like to support my work (THANK YOU) please watch on YouTube (click the box at the bottom of the video here) so you can give it a thumbs up and comment. It would also be super helpful if you would please watch as much of the video as possible. YouTube promotes videos with more viewed times. I appreciate your help SO MUCH!!
Printable Etsy Pattern
The printable Etsy version of this pattern is available. Thank you for your support of my small business. CrazyCoolCrochetUS.etsy.com
SIZING
Instructions are for a size Small. Instructions for larger sizes, Medium, Large/XLarge, 1X/2X, 3X/4X, are in parentheses (X, X, X, X).
Results will vary according to yarn and tension used. Sizing should be considered “suggestions”. Adjust as needed.
This post contains affiliate links which means I may earn a small commission for purchases made from these links at no additional cost to you.
Crazy Cool Crochet is a participant in the Amazon Services LLC Associates Program, an affiliate advertising program designed to provide a means for sites to earn advertising fees by advertising and linking to Amazon.com
Materials
Yarn: use any medium weight #4 yarn.
Purchase equivalent yarn here:
Used here: Yarn Bee Soft and Sleek/ main color Oatmeal14 ounces/651 yards
Border color Linen/ 6 ounces / 260 yards
Crochet Hook J/6 mm
Yarn needle
Sewing needle/thread
scissors
Measuring Tape
Stitch markers (2) or contrasting strands of yarn
Toggle “button”
Gauge: 6 CDC = 4 inches , 7 rows (cdc and dc) = 4 inches, 12 dc’s = 4 inches
Abbreviations:
Ch = chain
Dc = double crochet
CDC = crossed double crochet
Sc = single crochet
Sk = skip
Sp = space
St = stitch
YO= yarn over
NOTE: Photos are shown above corresponding rows.
Please view the video above for better visual instruction.
FRONT PANEL
Ch 102 (112, 118, 128, 138)
Row 1: Dc in 3rd ch from hook and in ea ch across. 100 (110, 116, 126, 136) total dc’s. Ch 2. Turn
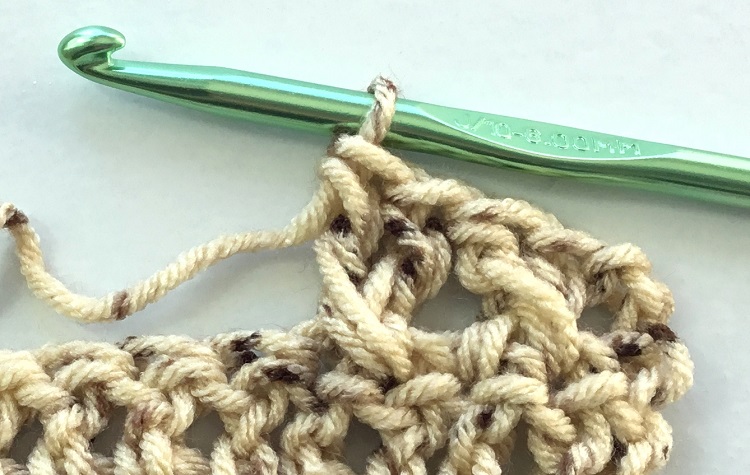
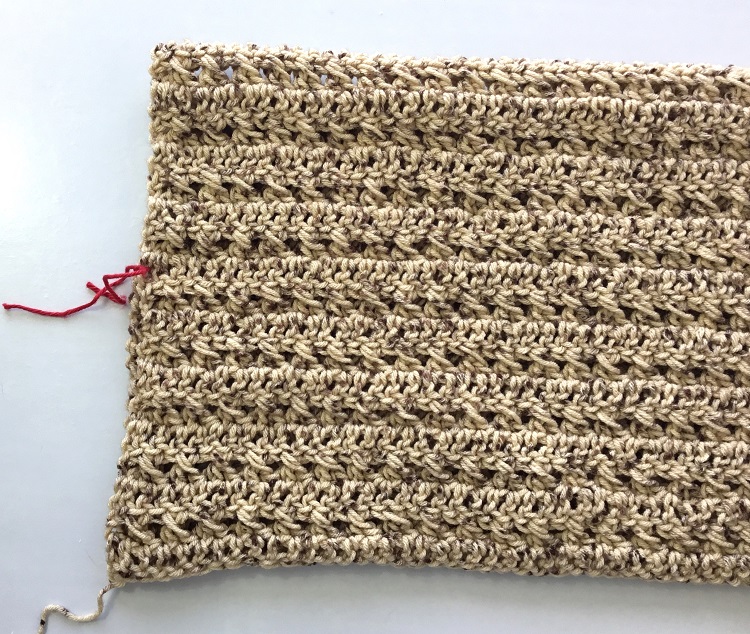
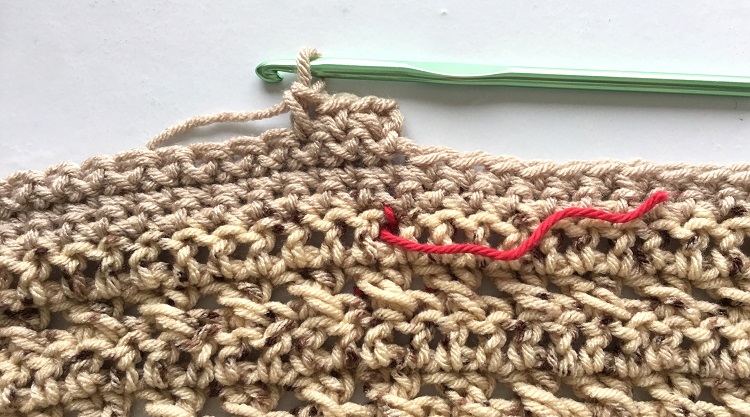
Row 2: (Watch video above for visual instruction of the Crochet Double Crochet stitch.) Sk 1st st; dc in next st; dc in sk’d st pulling up the last loop very tall to create the cross. CDC completed. *Sk the next st; dc in the next st; dc in the sk’d st*. Repeat from * to * to the last remaining sp and turning ch. Enter a DC into the last sp. Do not work into the turning ch. Ch 2. Turn.
Row 3: Dc in 1st sp (under the turning ch) and ea sp across for 100 (??) dc’s. Ch 2. Turn. (Work under the two strand chains that form at the top of the row below.)
Repeat Rows 2 and 3 for a total of 37 (37, 41, 47, 47) rows ending with a dc row. Cut off yarn.
SEAM
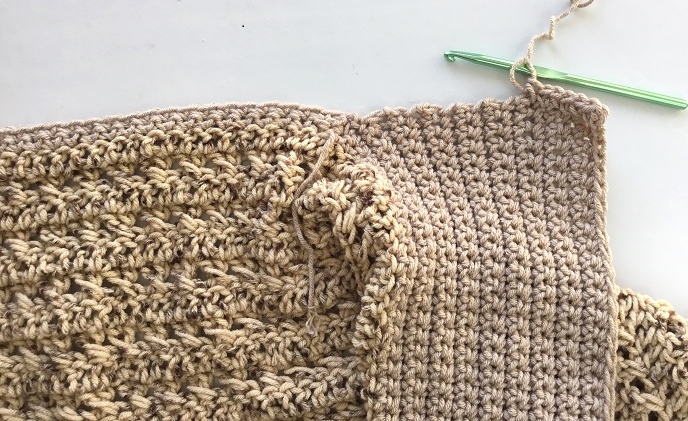
With right side facing up, fold the panel from top to bottom meeting the corners together, forming a long rectangle. Wrong side is not facing up.
Use a stitch marker to mark the edge approximately 11 rows from bottom and counting up the rows. This leaves an opening for the wrist. Use a yarn needle and length of yarn to seam the short side edges using a whip stitch.
Turn the panel right side out. Open the panel so the neckline is at the top and sleeves are at the sides.
MAIN BORDER
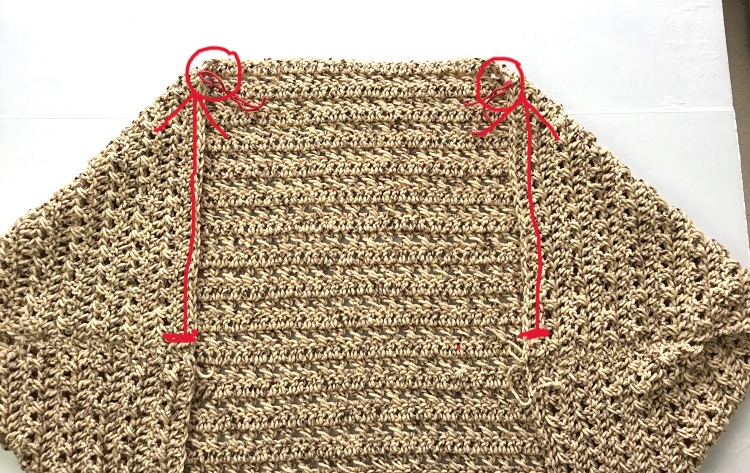
With the right side facing up, place two stitch markers at the neckline. Counting from the sleeve seam up the edge, count approximately 30 dc’s up to the neckline. Place st marker between the 30th and 31st dc. Repeat for the opposite side. The sp’s between the st markers will form the back neck.
Row 1: Turn panel so the back of the neck is facing you (right side facing you). With the 2nd color, attach yarn with a ch at the st marker on the left. Sc in the same sp. Sc in ea sp around the entire perimeter until you return to the st where you started the row. Sl st into that first sc. Ch 1. Turn.
Row 2: Sc in 1st sp and ea sp to the end of the row. Sl st in 1st sc of the row. This takes you to the first st marker. Ch 1. Turn.
NOTE: The back neckline will only have two sc rows at this point. You will continue to work sc rows for the front and bottom, leaving the neckline unworked.
Row 3: Sc in 1st sp and ea sp around the front and bottom and other front ending the row at the st marker. Ch 1. Turn (Do not work the back neckline.)
Rows 4 – 17: Sc in 1st sp and ea sp to the end of the row. Ch 1. Turn
At end of last row do NOT cut off yarn. Ch 1. Do NOT turn.
Turn the panel slightly so the edge of the wide border and the back neckline are facing you.
Sc in the first sp of the short (border) edge; sc in ea sp of the edge and along the back neckline and across the opposite border edge. Cut off yarn.
This cleans up the short panel edges (that will sit across the front neckline) and adds 1 additional sc row to the back neckline.
SLEEVE BORDER
With right side facing you, using the 2nd color, attach yarn at the sleeve seam with a ch.
Row 1: Sc in the same sp and in ea sp around the perimeter of the sleeve opening. Sl st into the 1st sc of the row. Ch 1. Turn.
Row 2 – 10 (10, 12, 14, 14): Sc in 1st sp and ea sp to the end of the row. Sl st into the 1st sc. Ch 1. Turn
At end of last row, cut off yarn.
Repeat for opposite sleeve.
TOGGLE
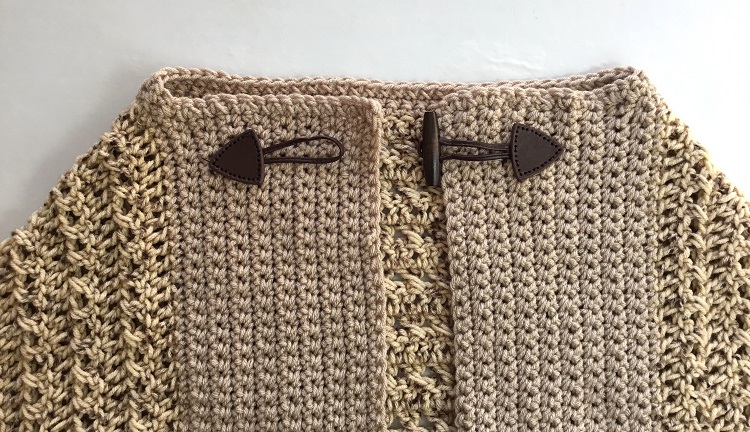
With right side facing up, attach the toggle pieces using a sewing needle and thread. Mark where you want the toggles to be sewn. As shown in the main photo on page 1, one piece was sewn 4.5 inches from the edge (measuring from the furthest point of the toggle to the edge of the front border and about 5 st’s from the top edge. The second piece was sewn 3 inches from from the edge (measuring from the furthest point of the toggle piece to the border edge).
Copyright © 2022 Sylvia Talo You may sell items made from my patterns. Please include a link or reference to my shop CrazyCoolCrochetUS.etsy.com. Pattern and photos are copyright protected; they may not be reproduced, redistributed, or displayed publicly in any way.
You May Also Like


