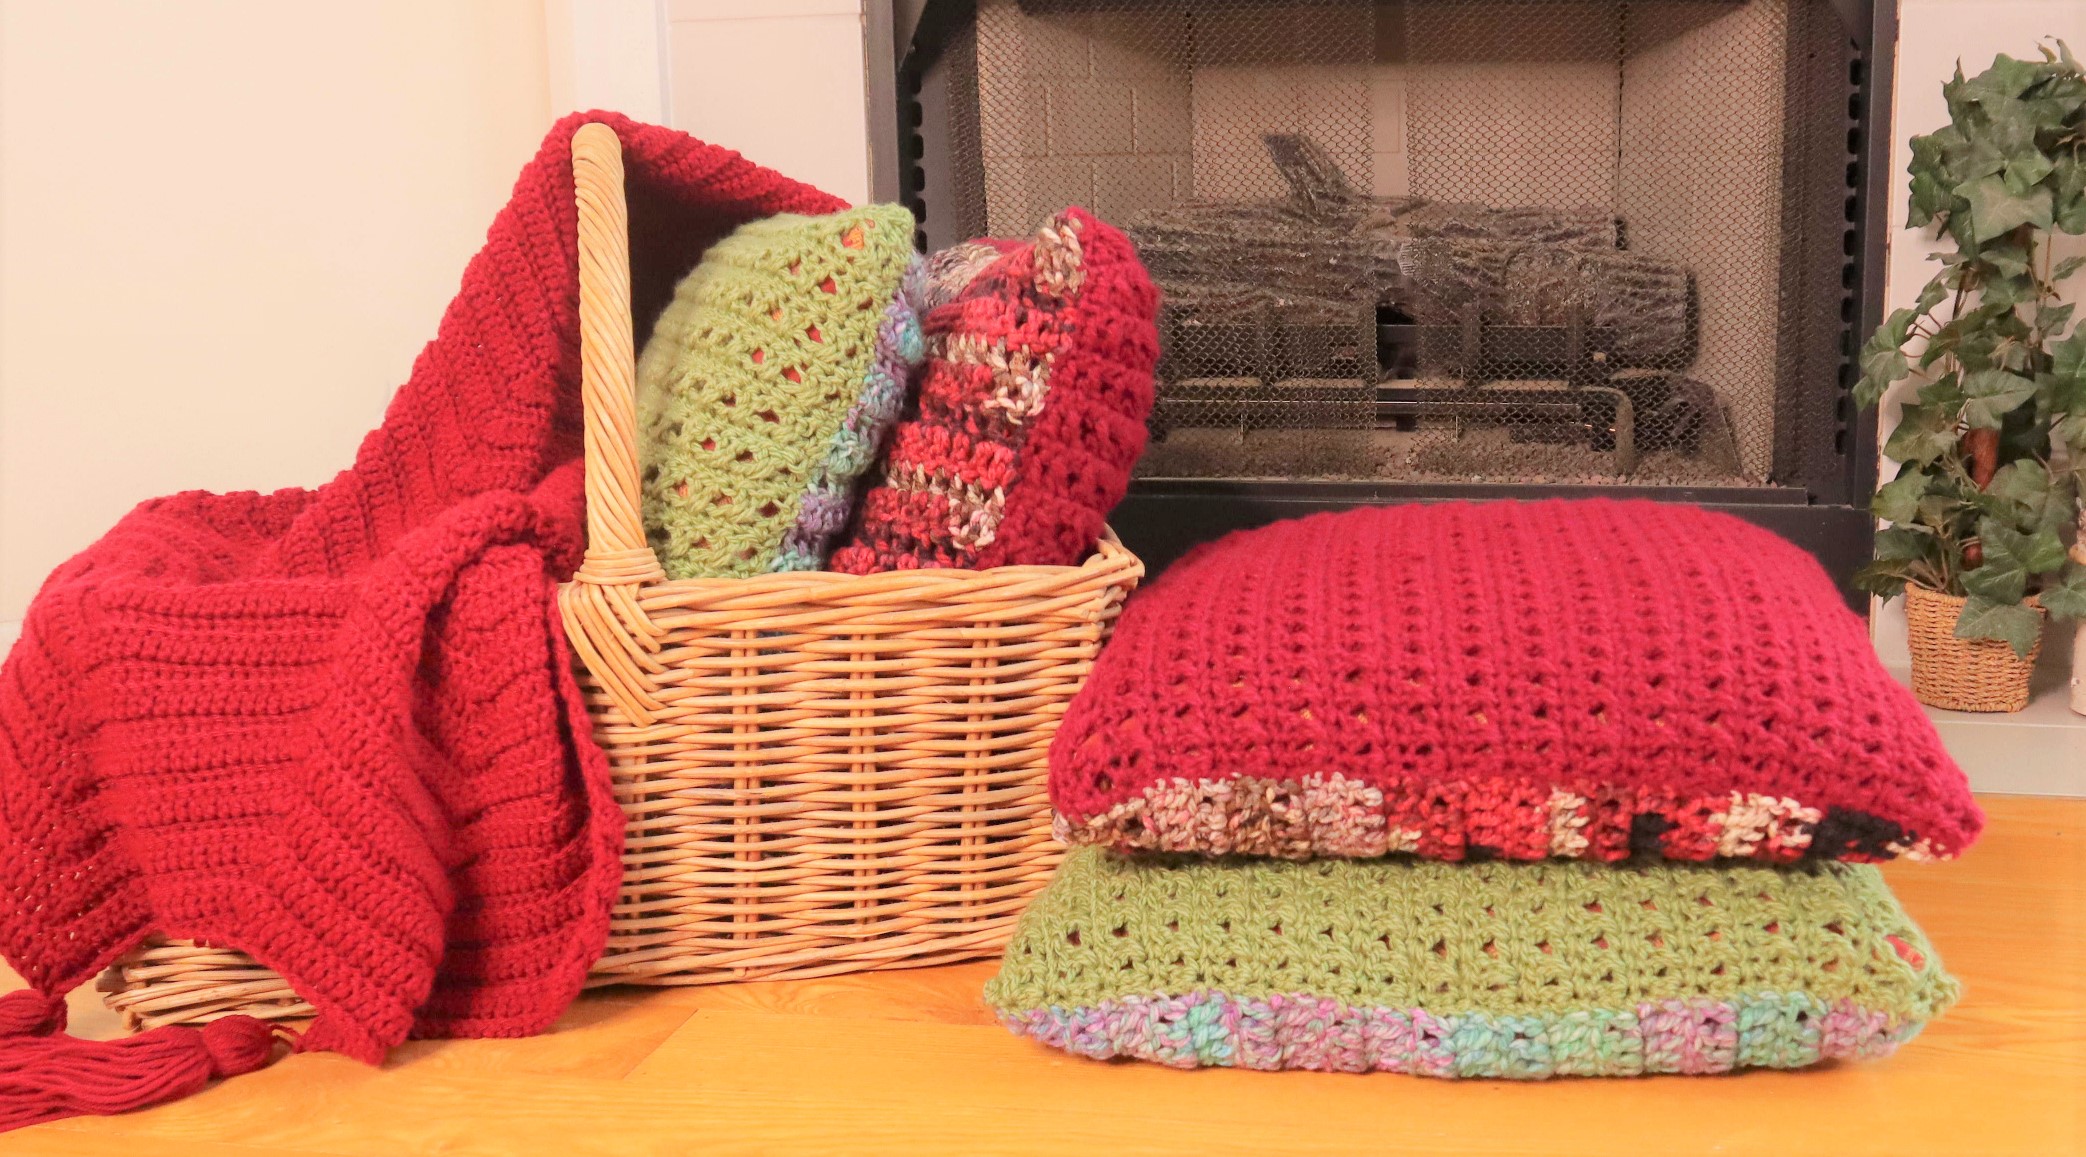
Crochet EXTRA SEATING with this Crochet Floor Pillow free pattern. Attach four crochet pillows to create a Crochet Lounge Chair! How cool is that?! Use sturdy bulky weight yarn and the fast, easy Crossed Double Crochet stitch.
Crochet Floor Pillow Lounger
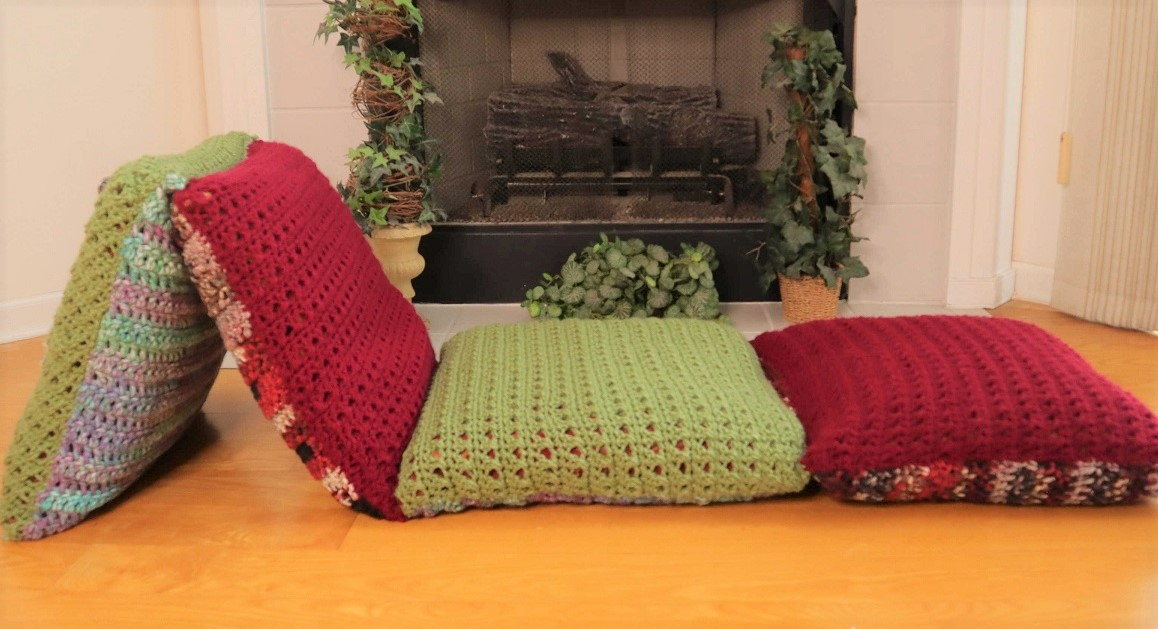
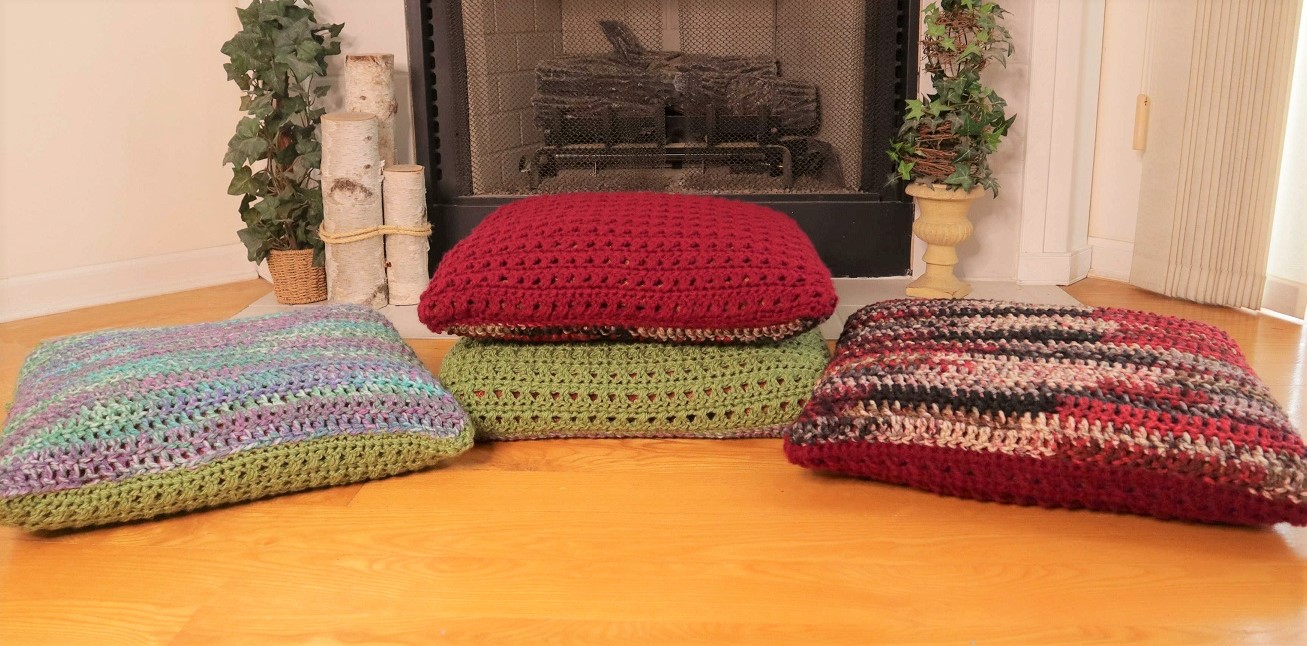
How fun and how cool is this idea for a Crochet Floor Pillow Lounger? This is perfect for a kid’s room or game room! If you have hard wood or tile floors this pillow lounge chair will be much appreciated!
Simply take four of the crochet floor pillows, attach and viola! An awesome crochet pillow lounger!
Add a Zipper to Crochet
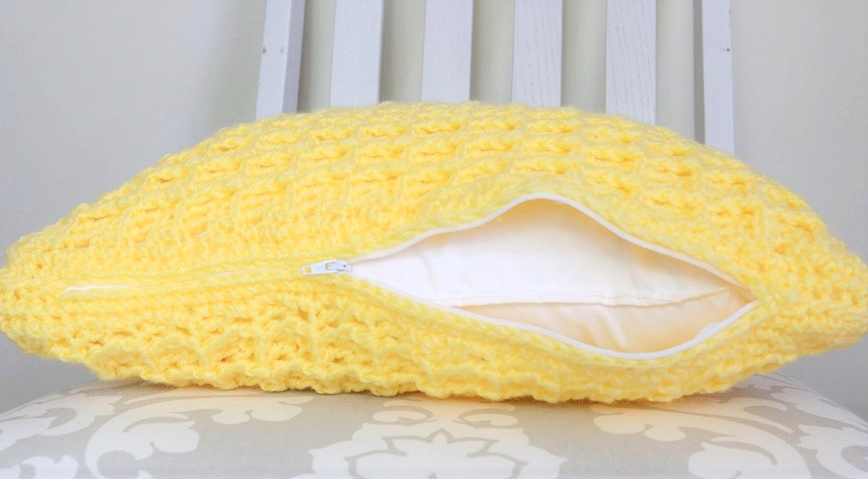
Video tutorial is included below to ADD A ZIPPER for easy washing! Yes, you can add a zipper to your crochet pillows. It is actually quite easy and allows for removal of the pillow insert.
Crochet Floor Pillow Video Tutorial
As always (or usually) I have included the video tutorial for the crochet floor pillow pattern. This is provided for your convenience and to help you visualize the pattern. These videos take quite a LOT of work to produce and your support of this work is so much appreciated! How can you support my work so I can keep cranking out crochet tutorials? Well I’m so glad you asked! LOL! At this time, the best way to help me out is to watch the video on YouTube (not just here on the blog), subscribe, comment and give a thumbs up. Please know that subscribing will not send unwanted communications (no emails!) from YouTube or me!
This pattern may be used to create separate floor pillows or attach 4 floor pillows to create a Crochet Floor Pillow Lounger.
SIZING
This pattern uses a multiple of 2 plus 1.
Instructions are for a 20 inch x 20 inch pillow.
Instructions for smaller sizes 18×18 and 16×16) are in parentheses (X; X).
Results will vary according to yarn and tension used. Sizing should be considered “suggestions”. Adjust as needed.
Materials
Yarn: use any bulky weight #5 yarn.
Used here for the back panels: I Love This Chunky/ 25 ounces/800 yards
Front panels: Yarn Bee Tender Touch/ 25 ounces/ 1215 yards
Crochet Hook L / 8mm
Yarn needle
Scissors
Gauge: 4 CDC = 4 inches , 7 rows (cdc and sc) = 4 inches
Abbreviations:
Ch = chain
Dc = double crochet
CDC = crossed double crochet
Sc = single crochet
Sk = skip
Sp = space
St = stitch
YO= yarn over
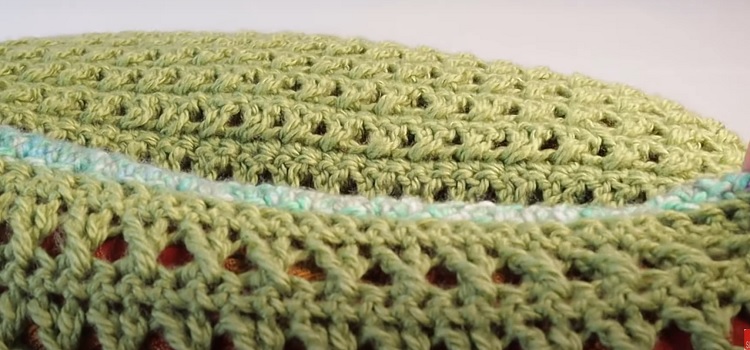
NOTE: Photos are shown above corresponding rows.
FRONT PANEL
Ch 51 (20×20) ; ch 45 (18×18); ch 39 (16×16)
Row 1: Sc in 2nd ch from hook and in ea ch across. 50 (44, 38) total sc’s. Ch 1. Turn
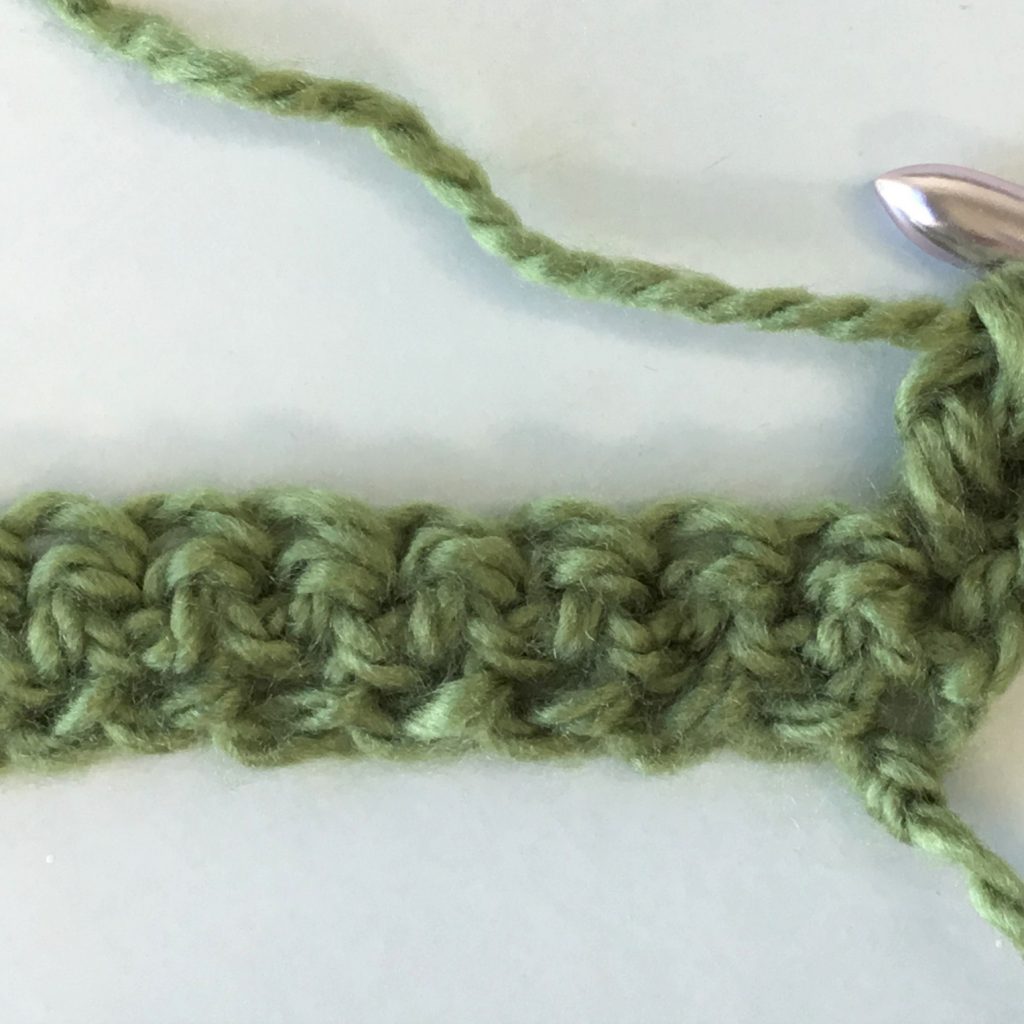
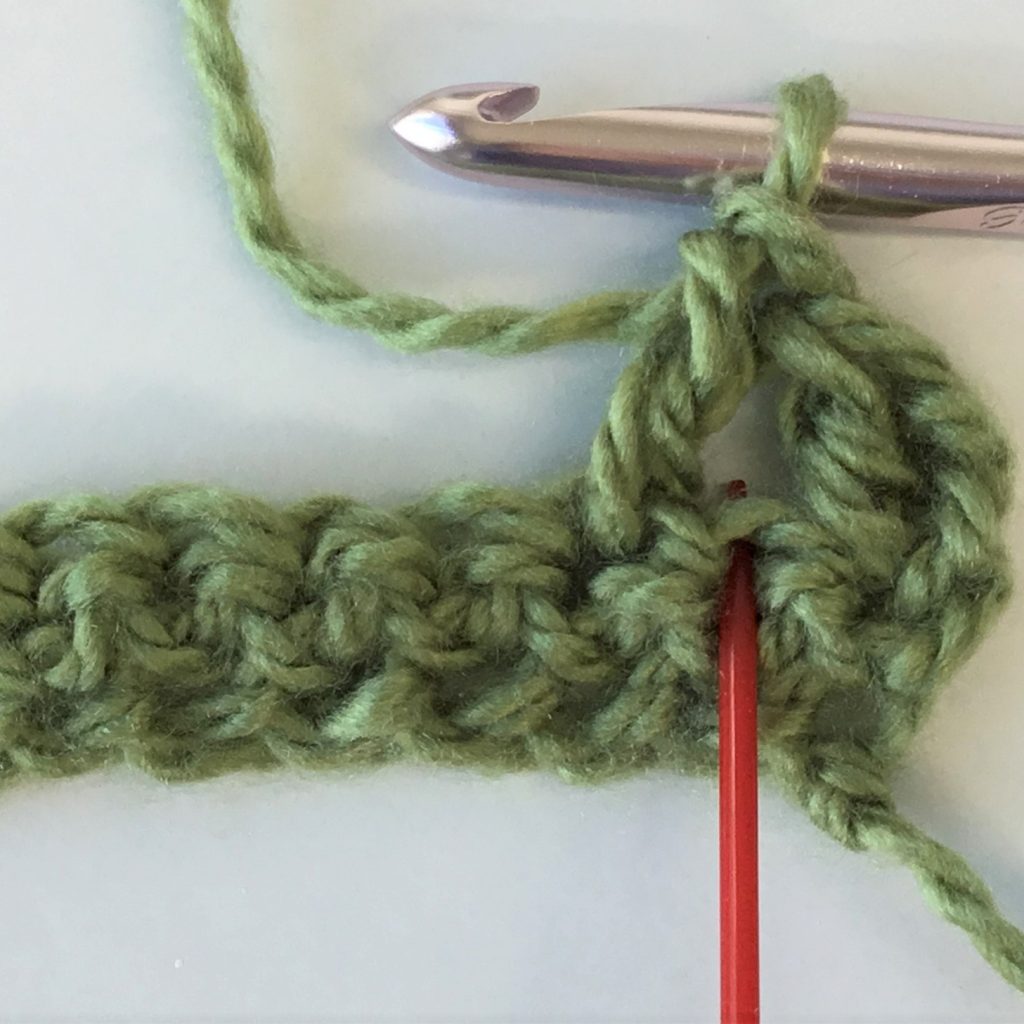
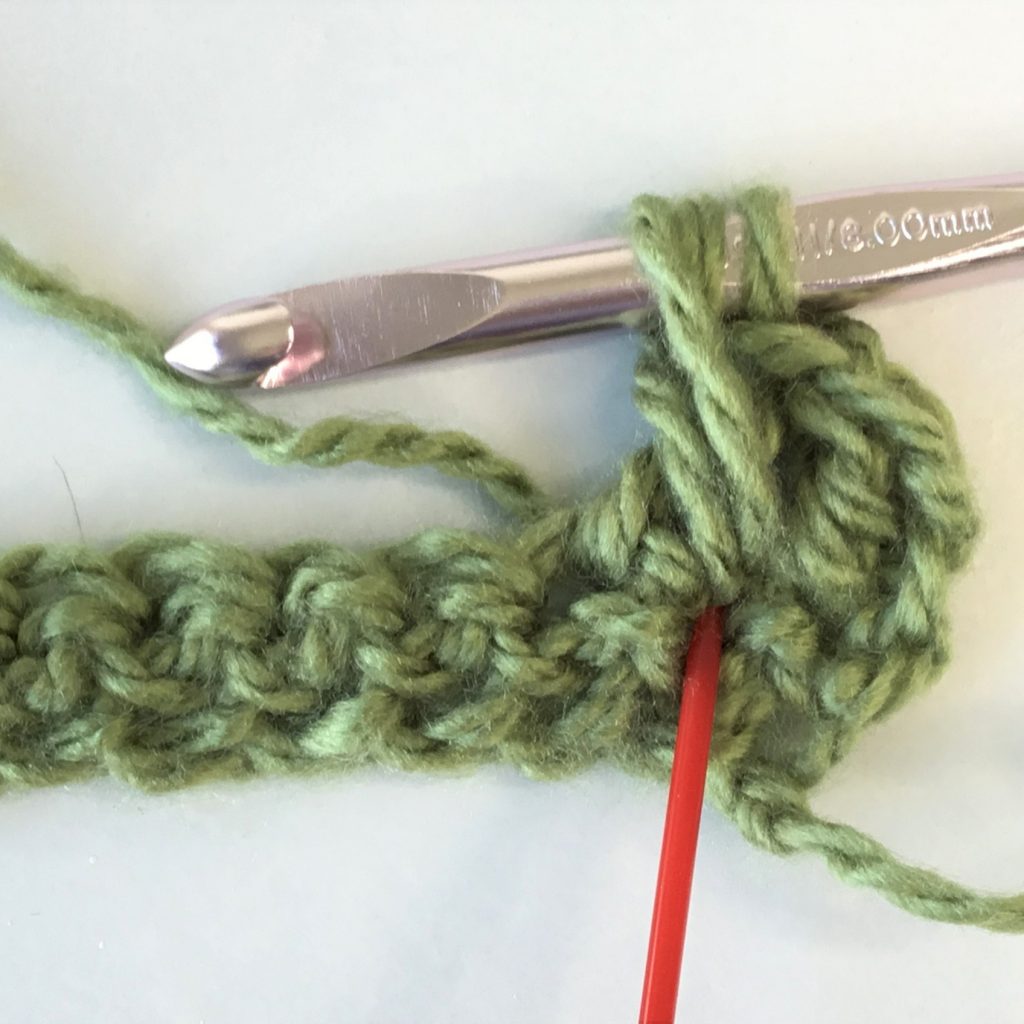
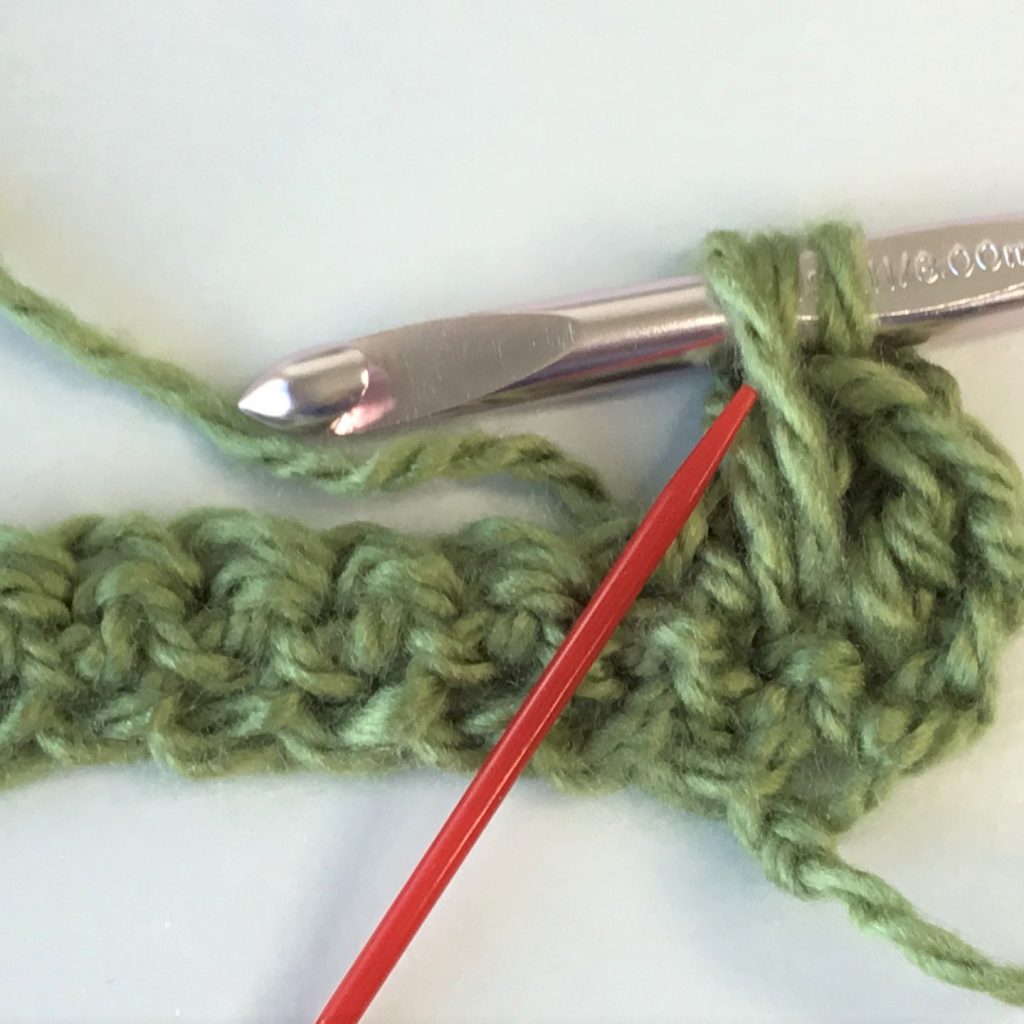
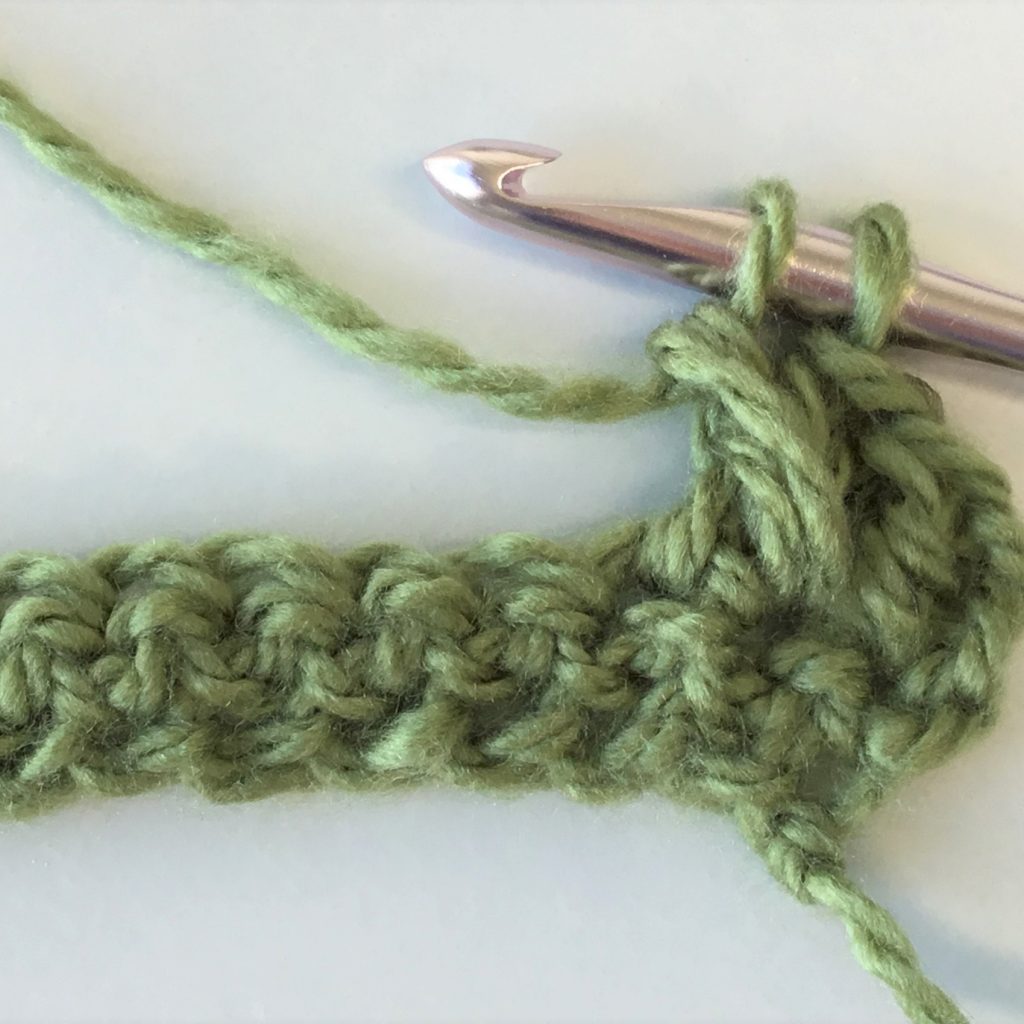
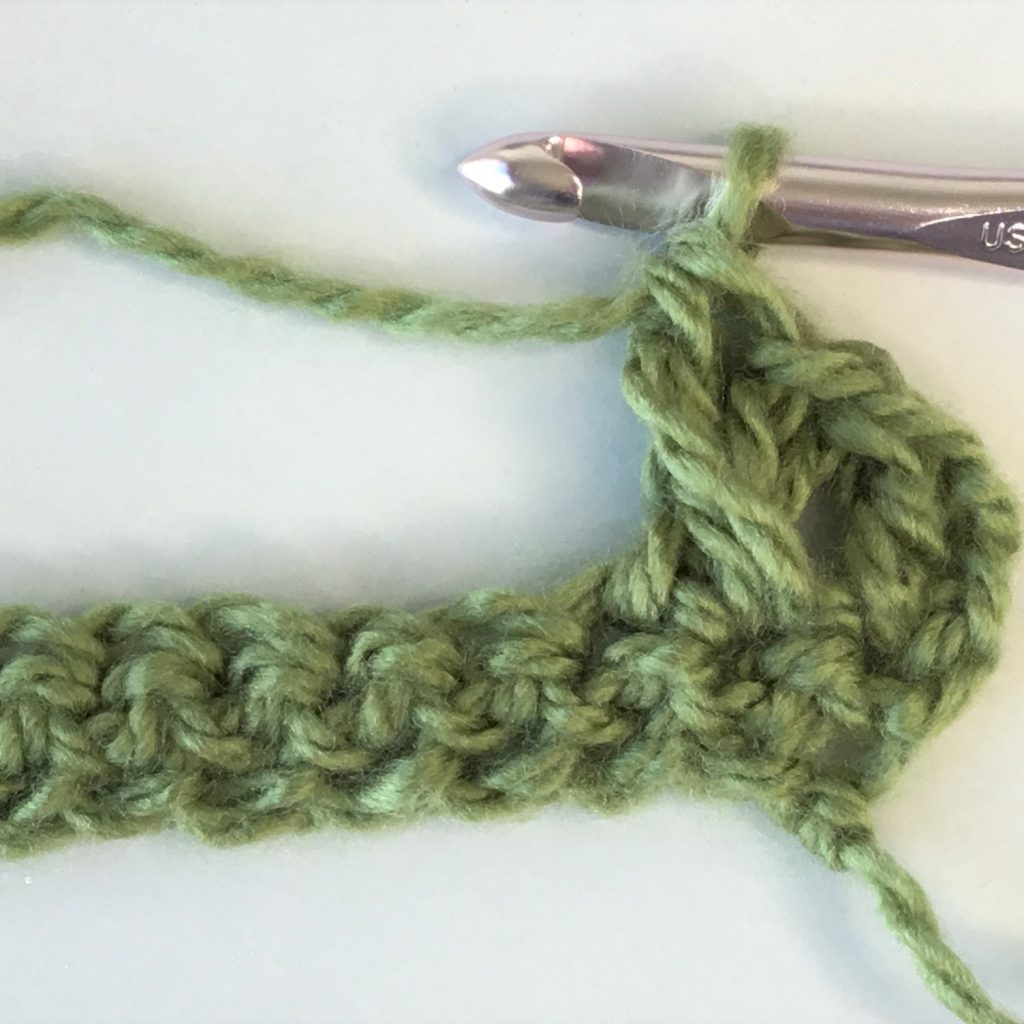
Row 2: Dc in 1st sp; *sk next sp; dc in next sp; yo for a dc, enter dc into the skipped sp* (pull up that last loop very tall; this creates the cross); CDC completed. Repeat from * to * to the last remaining sp. Enter a DC into the last sp. 24 (21, 18) cdc’s plus the first and last dc at beginning and end of row. Ch 1. Turn.
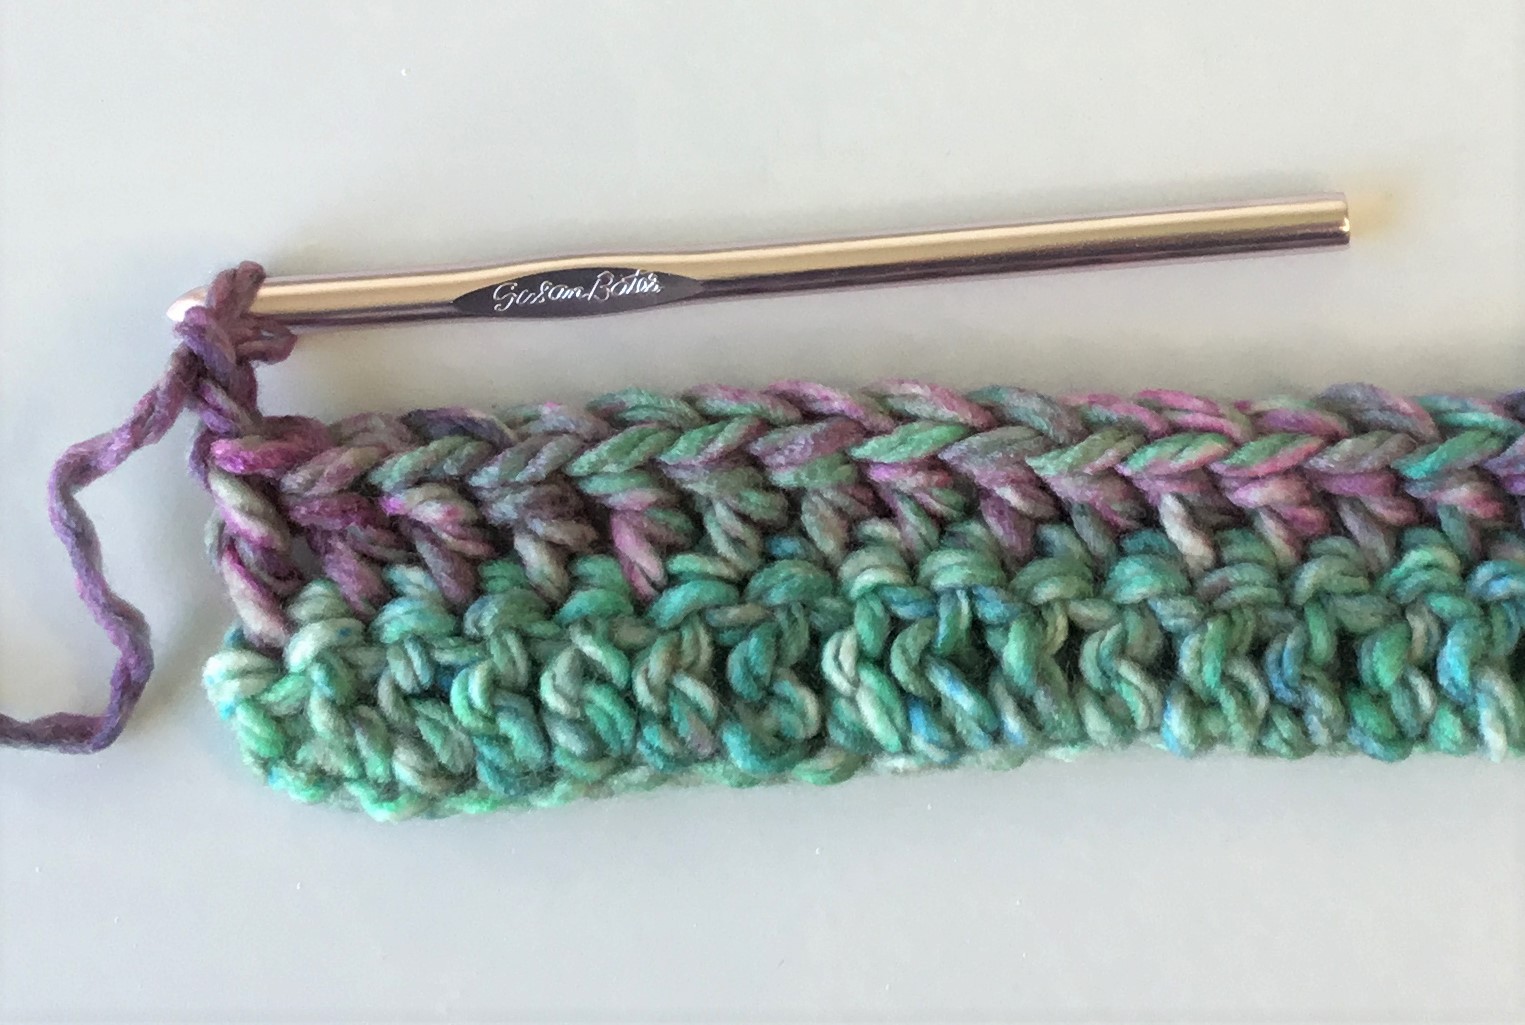
Row 3: Sc in 1st sp and ea sp across for 50 (44, 38) sc’s. Ch 1. Turn. (Work under the two strand chains that form at the top of the row below.)
Repeat Rows 2 and 3 for a total of 37 (33, 29) rows ending with a sc row. Cut off yarn.
BACK PANEL
NOTE: This pattern used two different brands of yarn. The yarn for the back panel was thicker than the yarn for the front panel. If you use the same thickness of yarns for the front and back, you may need to adjust the beginning chain for the back panel to fit the front panel.
Example: You used the beginning ch of 51 for the front panel. You may use 52 chains for the foundation ch for the back panel. This allows for skipping the first two chains and ending up with 50 dc’s.
CH 47 (20×20) ; ch 42 (18×18); ch 37 (16×16)
Row 1: DC in the 3rd ch from the hook (do not count the loop on the hook) and in ea ch across. 45 (40, 35) dc’s. Ch 2. Turn.
Row 2 – 22: (20, 18) DC in 1st sp and ea sp across. 45 (40, 35) dc’s. Ch 2. Turn (Work under the two strand ch that forms at the top of the row below; do not work into the large sp’s.) Cut off yarn at end of last row.
ATTACH FRONT AND BACK PANELS
NOTE: If you choose to add a zipper to allow for removal of the pillow insert, please go to my YouTube channel, Crazy Cool Crochet, and view the video tutorial: How to Add a Zipper to Crochet: https://www.youtube.com/watch?v=_nfrzYOk8Rg
With wrong sides facing you, place front and back panels together.
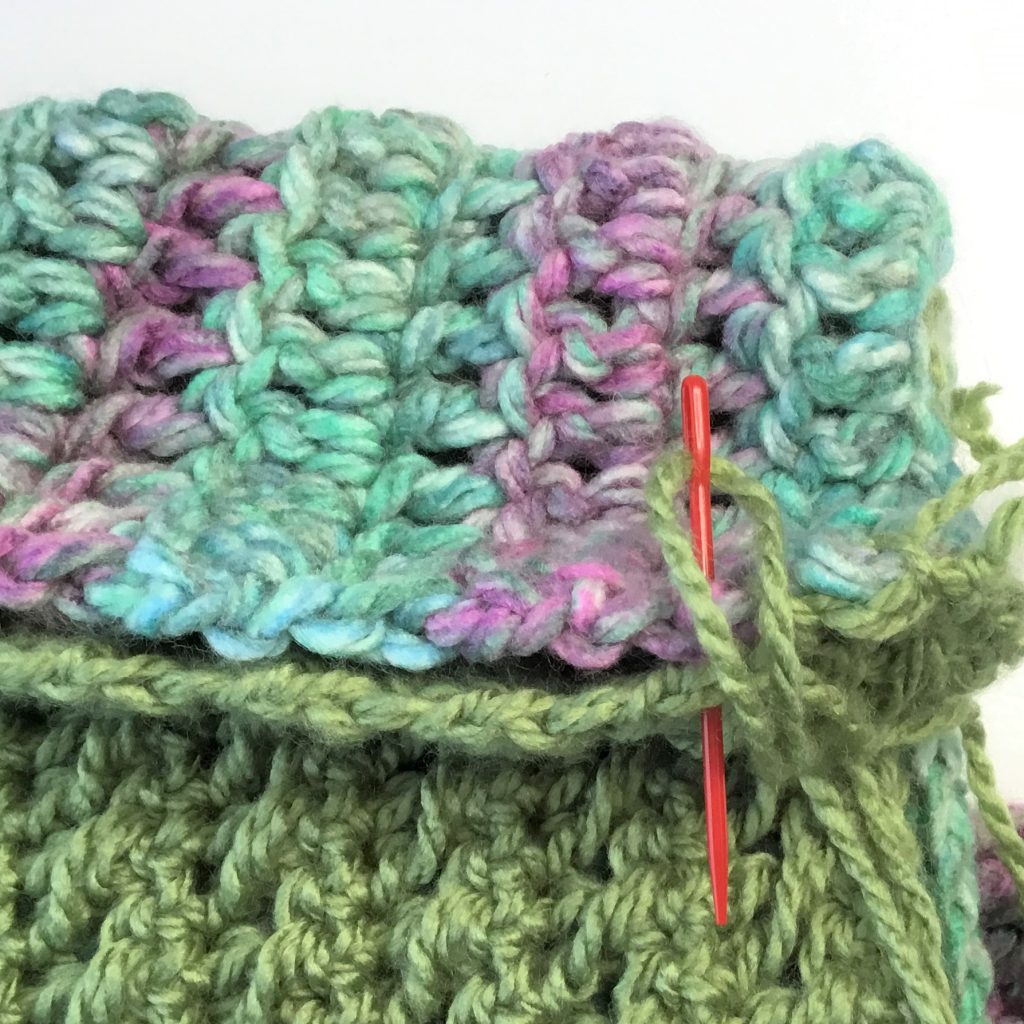
Using yarn needle and length of yarn, seam 3 sides using a whip stitch. Turn pillow cover right side facing out, insert pillow. Seam the remaining side using the same method. OR add the zipper.
FLOOR PILLOW LOUNGER
Attach 4 floor pillows to create the floor pillow lounger.
Attach two pillows at a time with right sides facing you. Use double strand of yarn and yarn needle to whip stitch at the seam of each pillow.
Copyright © 2021 Sylvia Talo You may sell items made from my patterns. Please include a link or reference to my shop CrazyCoolCrochetUS.etsy.com. Pattern and photos are copyright protected; they may not be reproduced, redistributed, or displayed publicly in any way.
You might also enjoy these Crochet Pillow Patterns. Click on photo!
You May Also Like


[…] The crossed double crochet stitch is super EASY and produces a beautiful combination crochet stitch. You will want to use this stitch again and again. I used it for this crazy cool crochet Floor Pillow/Crochet Lounger. This is a must see: Floor Pillow/Crochet Lounger […]