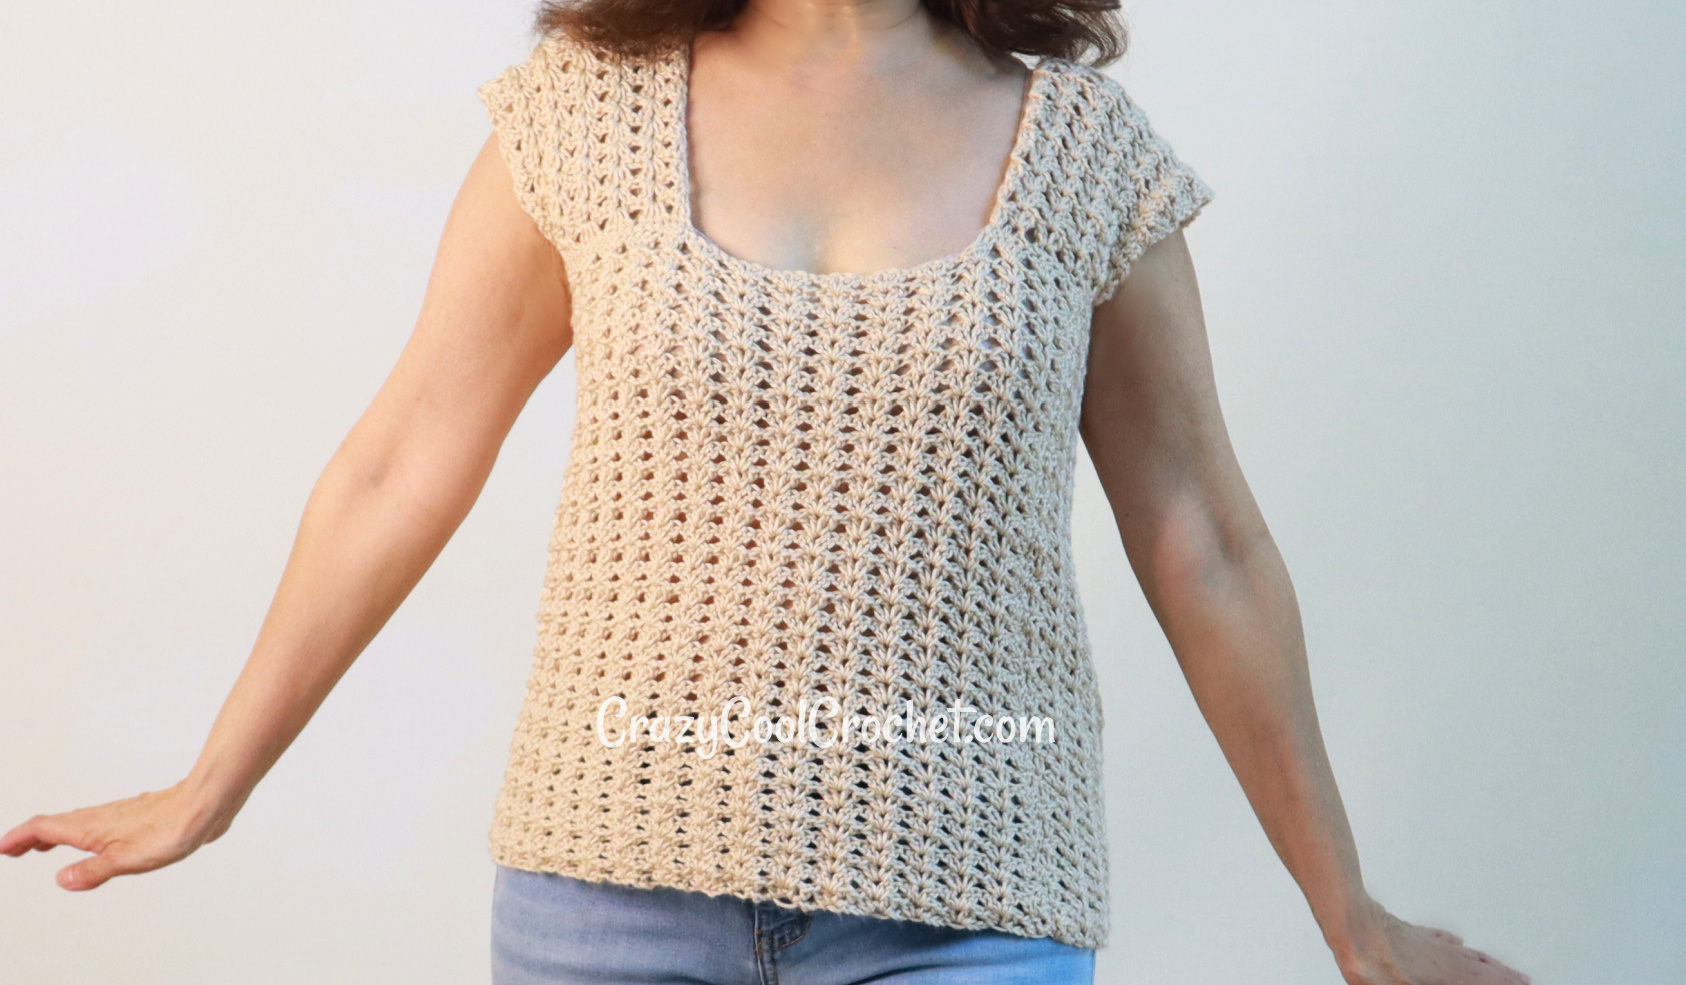
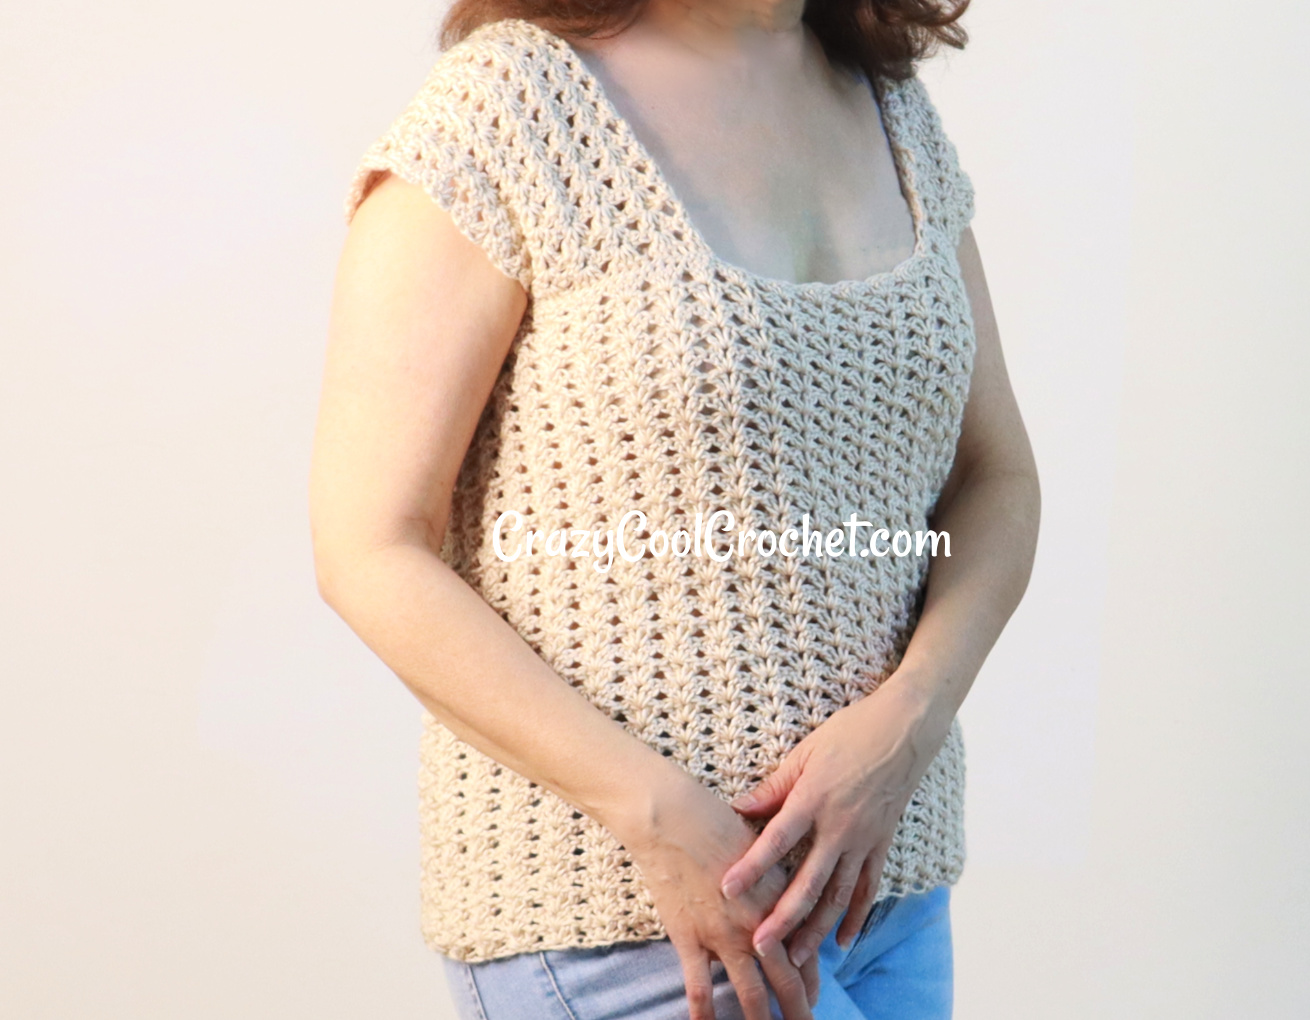
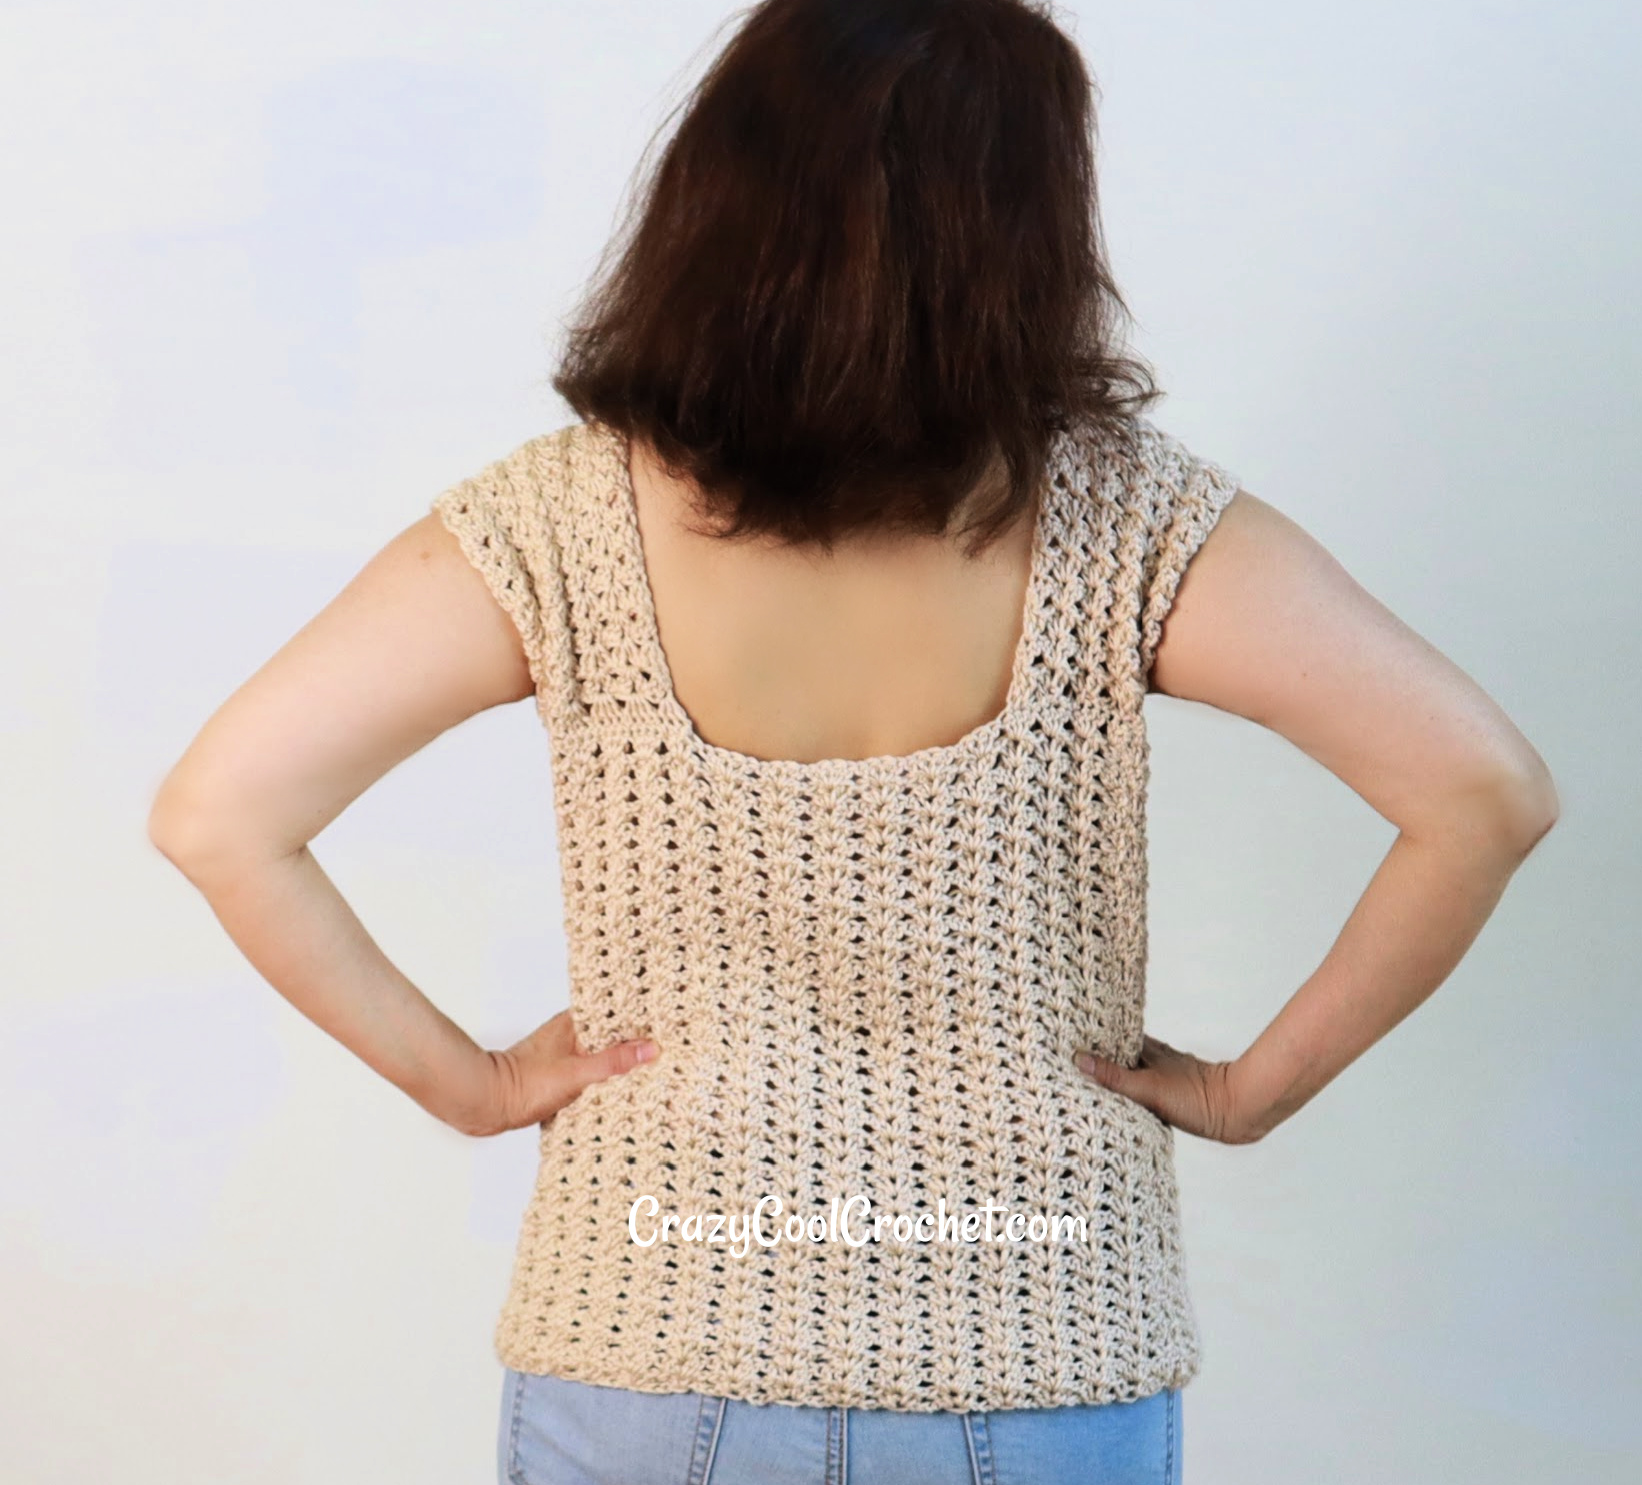
This is sure to become your favorite crochet summer top! This pattern uses the easiest crochet shell stitch EVER. This is a perfect shell stitch for crochet beginners. The FREE PATTERN is below the video tutorial for this crochet summer top shell stitch.
Use the suggested yarn (or equivalent) for a super lightweight crochet summer tank top. The cap sleeve straps add fun interest.
Video Tutorial for Crochet Summer Top Shell Stitch
Please be sure to watch the video on the YouTube platform (click the button on the bottom of the video) so you can comment, leave a thumbs up and subscribe. Don’t forget…YouTube now allows viewers to support their favorite channels by offering a special THANKS. Click the Heart icon if you would like to contribute a little something to my YouTube “tip jar”. I will love you forever. LOL!
Printable Etsy Pattern
Head over to my Etsy shop for the printable version of this pattern: CrazyCoolCrochetUS.etsy.com
Size Small
Instructions for sizes Medium, Large, XL, 1X, 2X and 3X are in parenthesis (X).
Personal tension and yarn used will affect the final results. Sizing is to be considered a suggestion only.
OR use multiple of 4 + 3
This post contains affiliate links which means I may earn a small commission for purchases made from these links at no additional cost to you.
Materials:
Yarn used:
Yarn Bee Yarntopia #2, fine weight / Color Ivory / 9 ounces / approximately 700 yards
Purchase comparable yarn here:
Crochet hook F / 3.75 mm
Yarn Needle
Measuring tape
Scissors
Dimensions:
Body only: 18 inches wide; 14 inches long
Body with should straps: 20 inches long
Gauge:
10 rows = 4 inches
5 shell stitch clusters = 4 inches
NOTE: Photos appear above corresponding rows.
MAIN PANEL (make 2)
Sizes are Small (Med, L, XL, 1X, 2X, 3X)
Ch 83 (95, 107, 91, 103, 115,127)
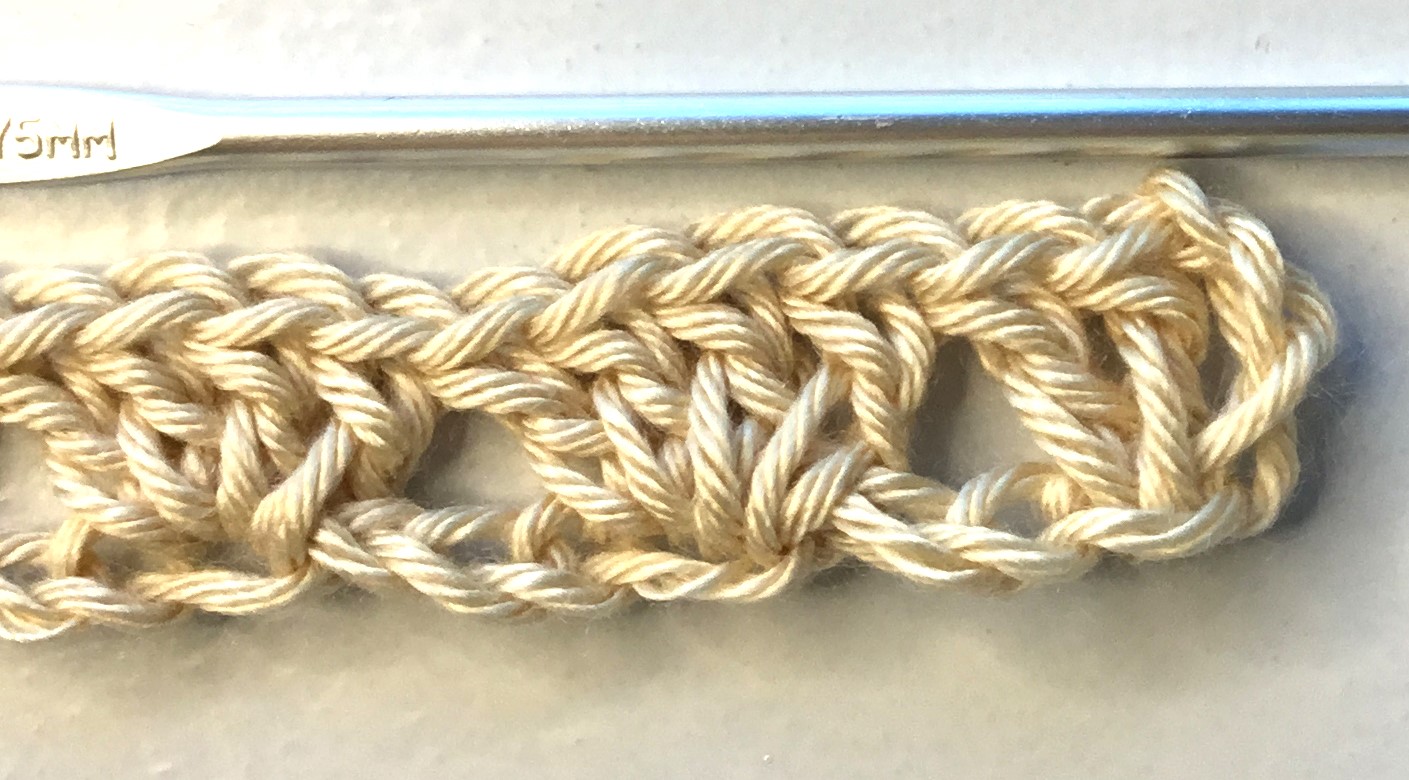
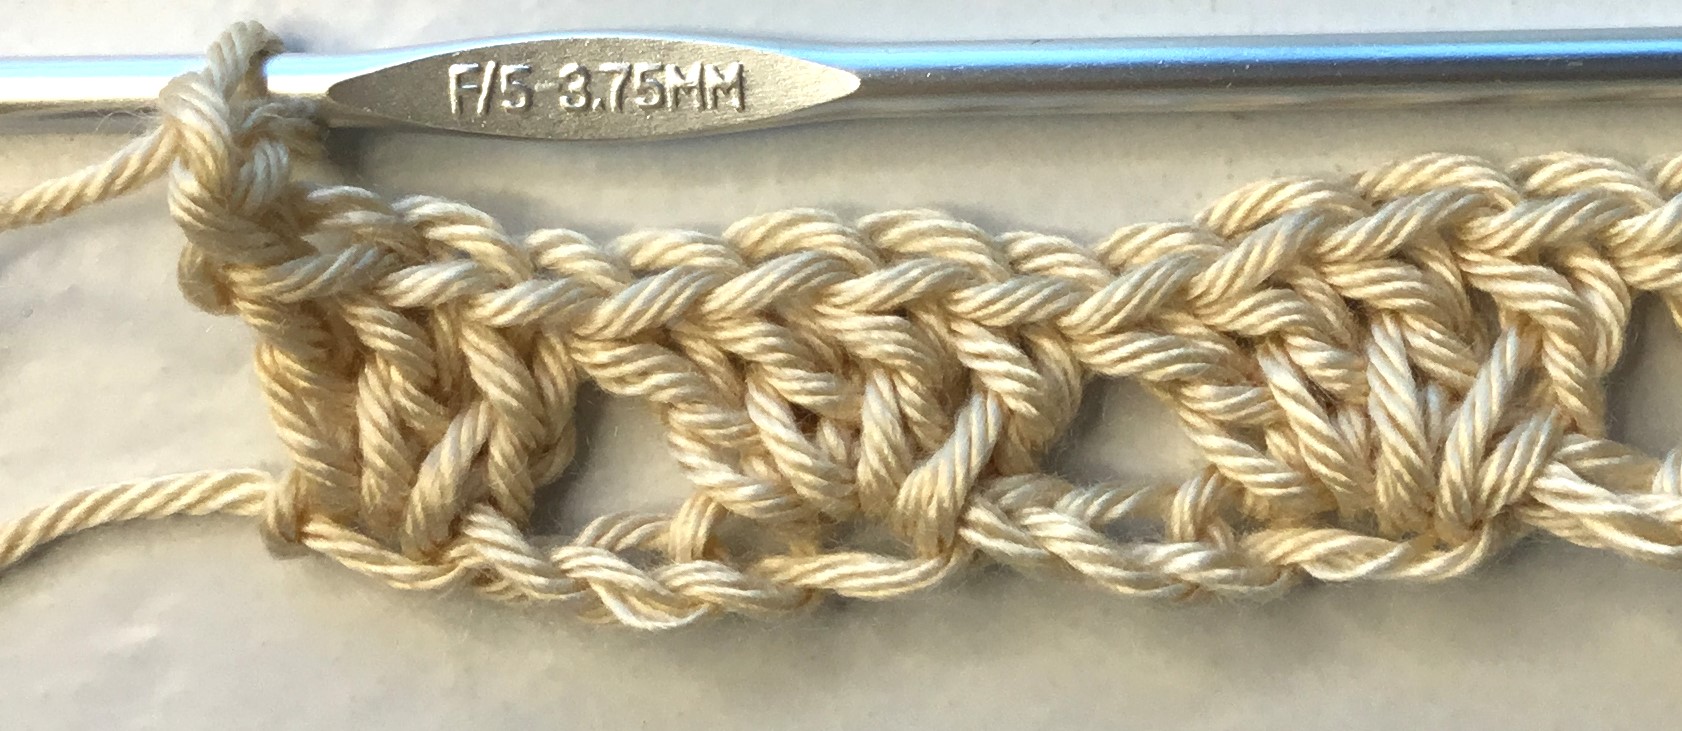
Row 1: 2 dc in 4th ch from the hook; *sk the next 3 ch’s; 4 dc in next ch*. Rpt from * to * to last 3 ch. 3dc in last ch. Ch 2. Turn
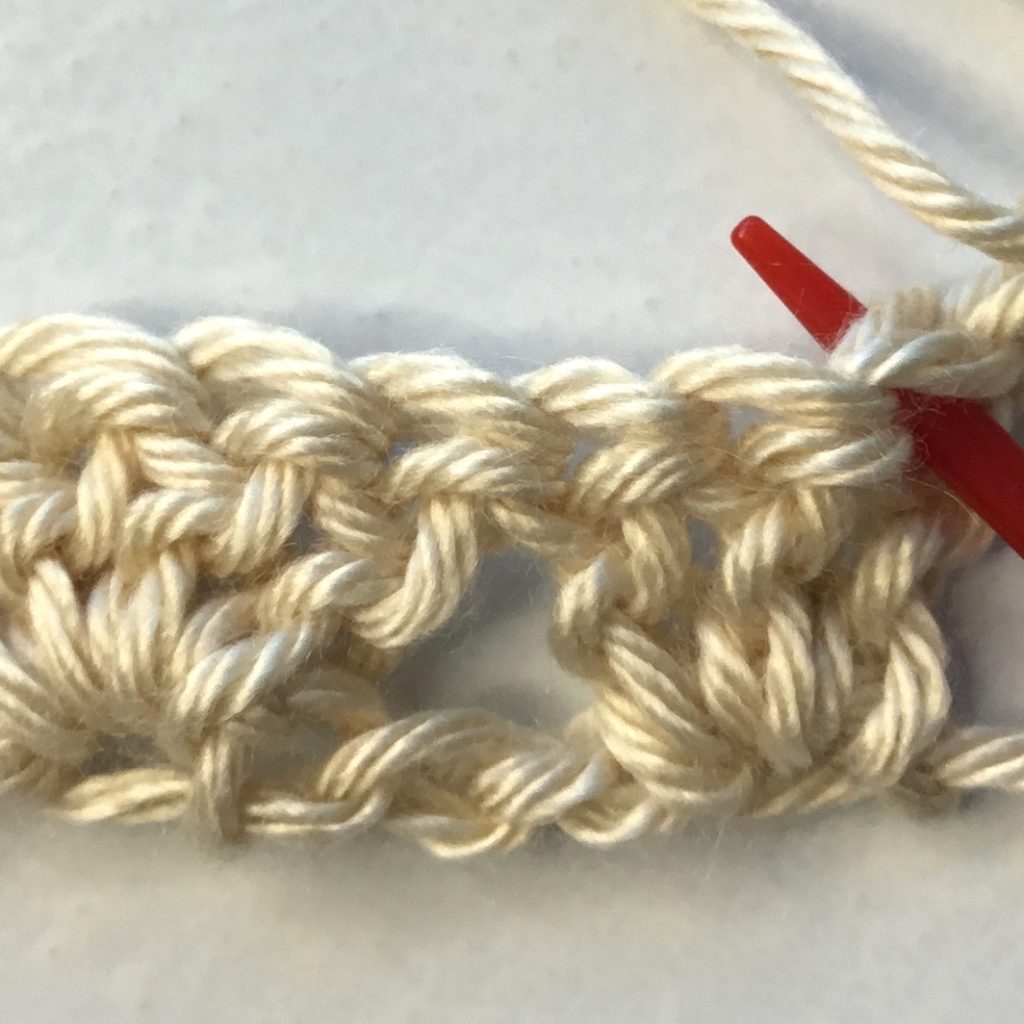
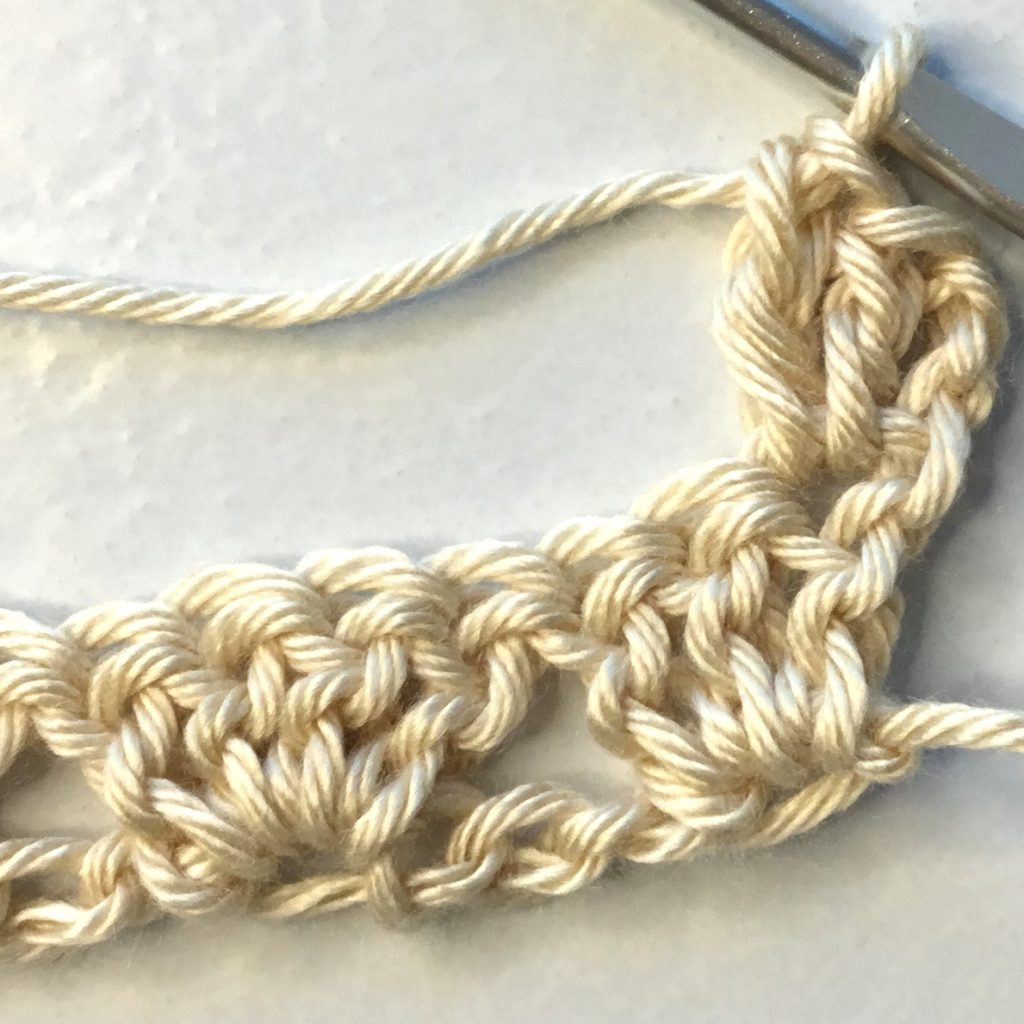
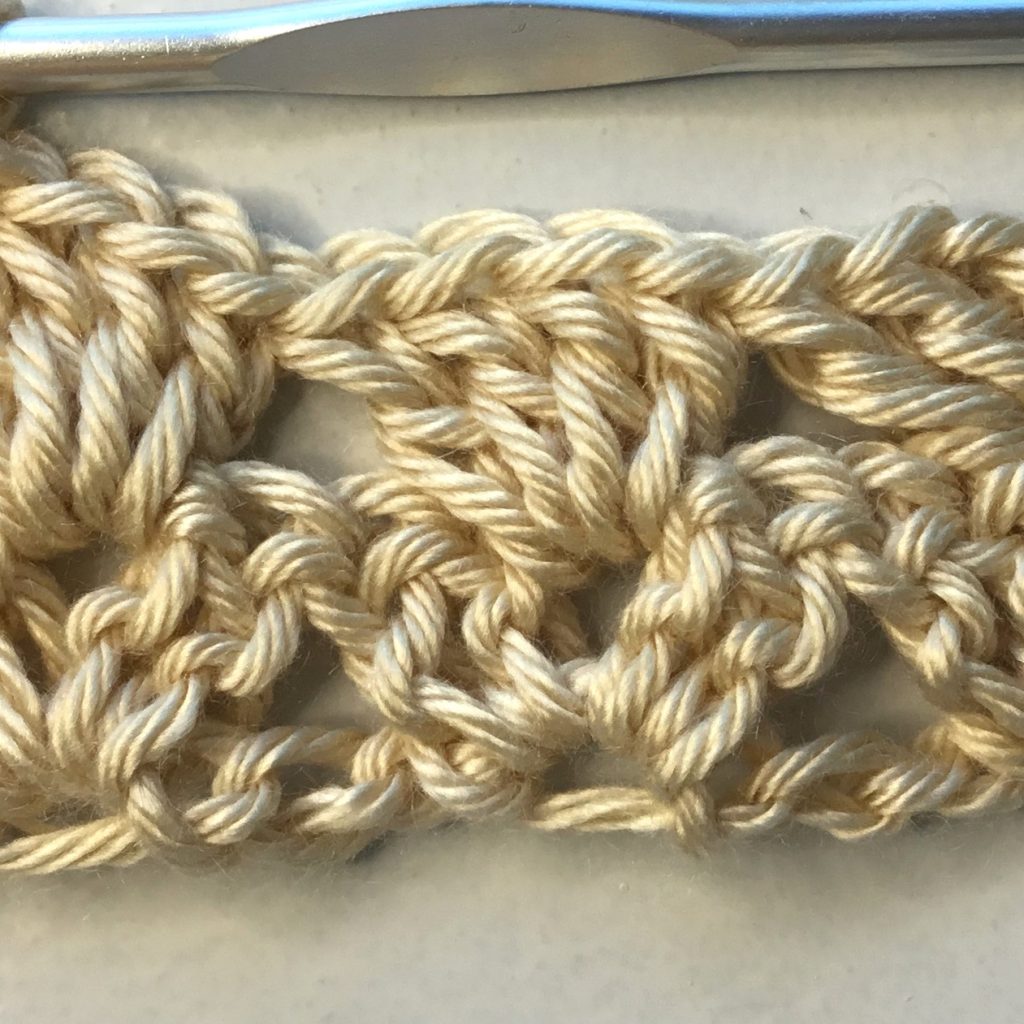
Row 2: 2 dc in 1st st (under the turning ch); *4 dc in center sp between the next shell cluster*. Rpt from * to * to end of row.
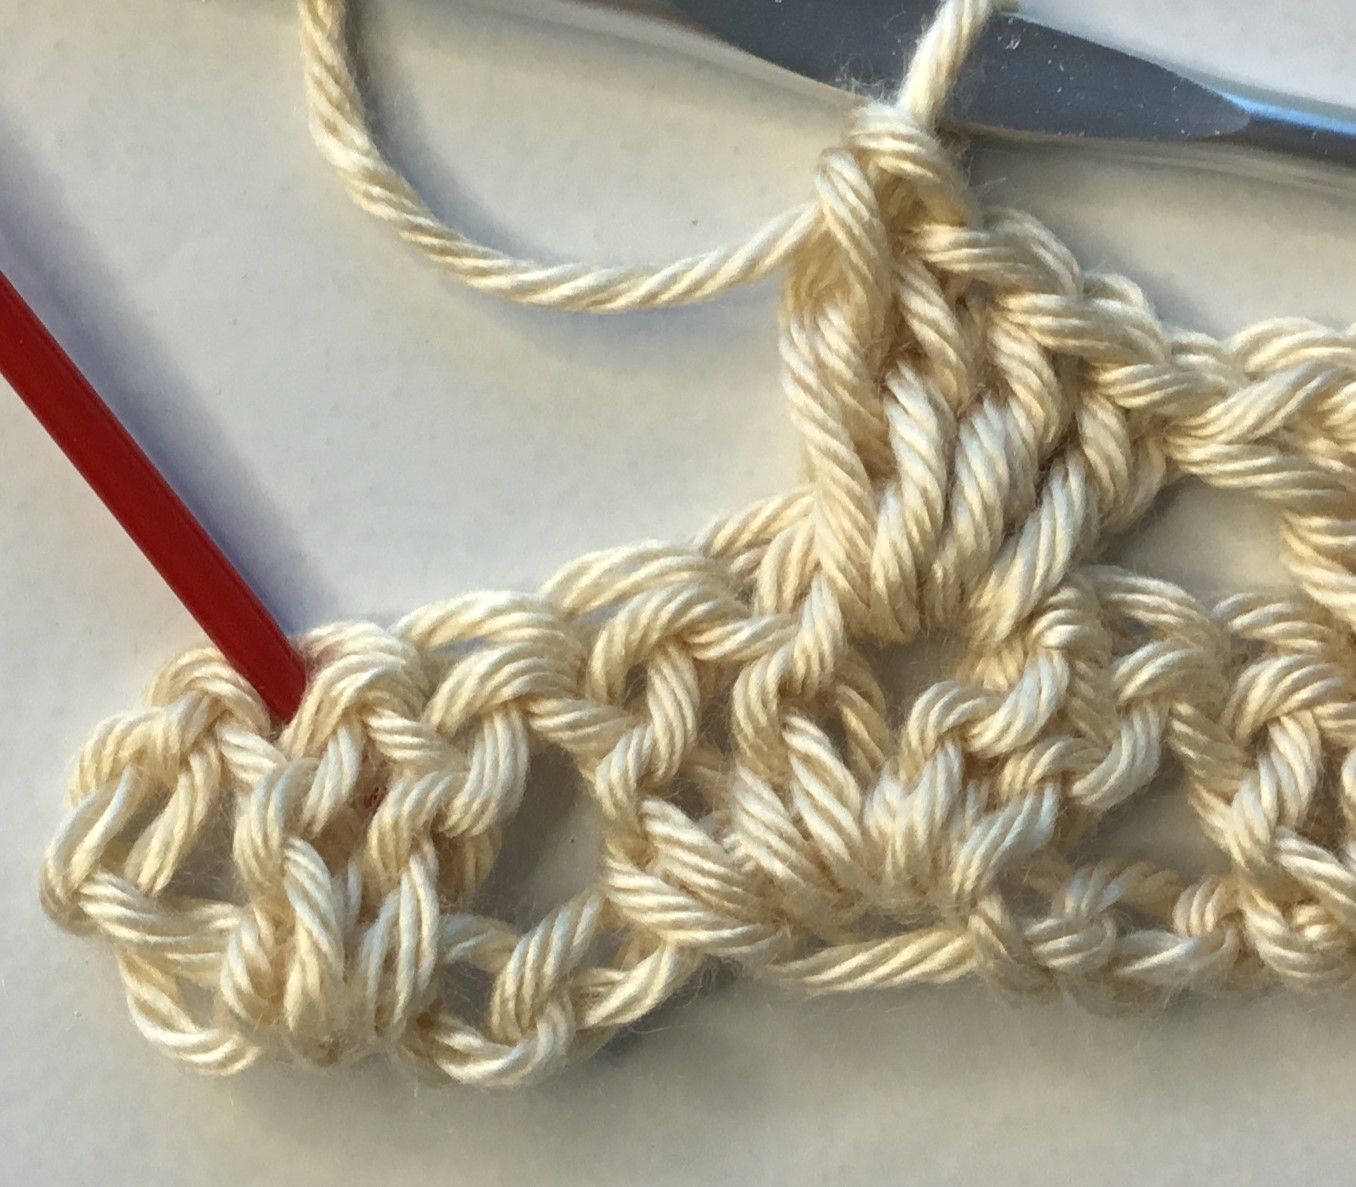
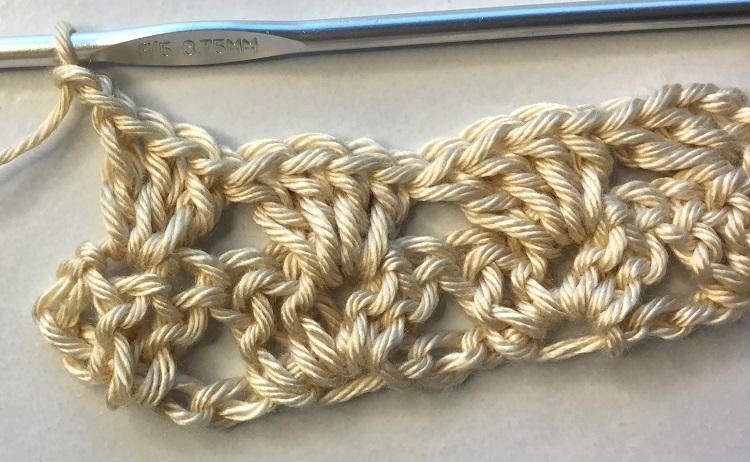
Work 3 dc into the top of the 2nd dc of the 3 dc cluster at end of row. Ch 2. Turn
Row 3 – 34 (39, 39, 44, 49, 54): Rpt Row 2. Tie off yarn at end of row.
SEAM PANELS
With wrong sides of panels facing up, using a yarn needle and length of yarn, use whip stitch to seam at sides, from bottom to underarm. Tie off yarn.
STRAP (make 2)
Ch 27 (27, 31, 31, 35, 39, 39)
Follow pattern as for the main panel. Work for 27rows.
Adjust length as needed by adding or subtracting rows.
ATTACH STRAP TO PANEL
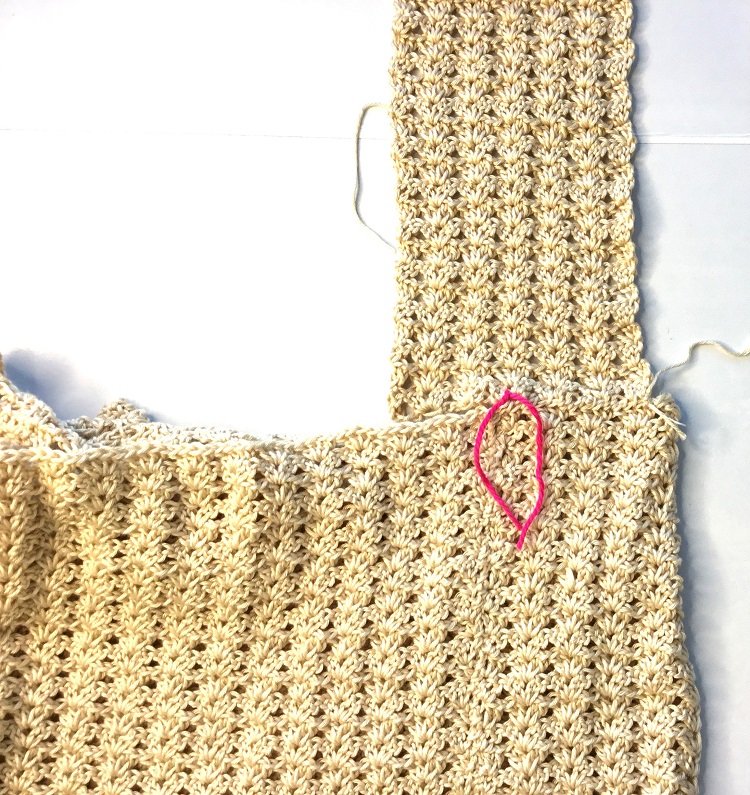
With wrong side of garment facing up and wrong side of strap facing up, position bottom edge of strap by centering it with the garment side seam (see pink st marker in photo). Use whip st to seam.
Please watch the video tutorial above for a better visual of this next step.
Fold the strap so the bottom corner edge of strap meets the bottom corner of the strap that is seamed to the garment. Seam to the top of garment.
Weave in tails.
Copyright © 2022 Sylvia Talo You may sell items made from my patterns. Please include a link or reference to my website CrazyCoolCrochet.com and/or to my Etsy shop CrazyCoolCrochetUS.etsy.com . Pattern and photos are copyright protected; they may not be reproduced, redistributed, or displayed publicly in any way.
You May Also Like