Here are a few tips to help you know how to prepare for a craft show, fair or market. That should read…successful craft fair, show or market!
(I have also created a printable cheat sheet that you can keep handy to remind yourself of these processes. That will be at the bottom of this post.)
These Basics are CRUCIAL
At first glance, you might think, “Well, duh. Of course I know these tips.” But especially for craft fair beginners, it’s the basics that are often overlooked while focusing on the individual items to be crafted and sold. And these basics are absolutely crucial to a successful ($$$) show!
But first, let’s get one question out of the way.
How Much Inventory?
The question I hear most often from newbie craft fair sellers is “How much inventory should I bring?”
Obviously that’s an important consideration. You don’t want to be caught short-handed. Being able to say you sold out of everything is a beautiful thing…but that just means you could have sold more!
To prepare for a craft show you must start creating months in advance to build up your inventory. It is better to have too much than too little. Some might disagree with that believing that having too much leftover inventory means you are stuck with unsold product. Your cost of goods NOT sold will feel like a wasted expense.
Some believe that if you sell out (not necessarily because you had huge crowds; but because you didn’t bring enough product), you can always take orders or pass out business cards and direct disappointed customers to your online shop. Yes, you can do that, but you can bet most of those customers will forget all about your lovely hats and scarves as soon as they leave the venue.
As long as your creations are evergreen (always relevant), you can sell at your next craft fair, or your online shop.
One caveat to this inventory advice is that you not overcrowd your space with so much merchandise that it becomes overwhelming and messy. Keep the extra merchandise in bins that you can retrieve from as needed. If you lack the extra space for storage, have a helper with you who can return to your vehicle for more product as needed.
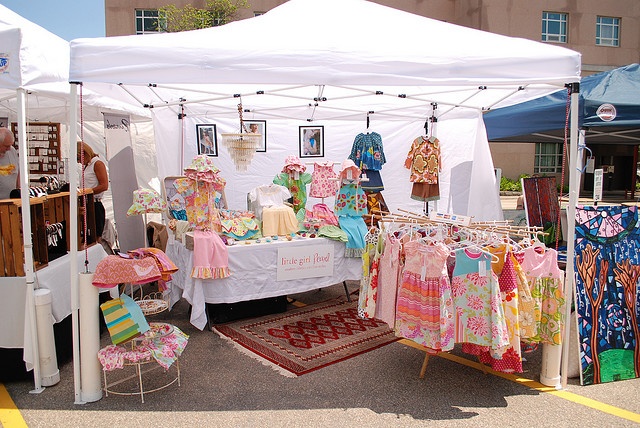
Bright Booth
This post contains affiliate links which means I may earn a small commission for purchases made through these links at no additional cost to you. Thank you for your support!
As much as you are able, create a bright, welcoming space. Use a lot of white. White tables. White table coverings. White tent. White lights. White platforms (more on that below). White shelving.
When you prepare for a craft show, stay away from dark, dreary looking props, shelving, fabric, etc.

I recently attended a craft fair where one of the booths used black as an attempt at something sophisticated and elegant for their jewelry displays. Pretty much everything that I listed above (tables, tent, table coverings, etc.) they had in black. At first glance it did attract attention. It stood out. But, I actually stood outside the tent and never bothered to go in. I couldn’t see very well. At all. I didn’t want to be squinting or trying to hold the items out of the tent to the light. They had tiny twinkle lights strung around the perimeter of the tent, inside. But that was purely decorative and did nothing to light up the merchandise. It looked like I wasn’t the only one hesitating to enter. Their traffic was sparse.
Tents available here: Canopy Tent
White also happens to be the current hot trend in decorating. People are drawn to a bright, white environment. It’s so crisp and clean and refreshing. So, white it is!
Use Platforms to Merchandise
One of the worst things craft fair vendors can do is to display their items all on a flat surface. This is just plain boring. It is not at all inviting. Your eye has nothing to focus on.

Purchase here: Stackable Storage Cube
Using small, stackable platforms such as small, white boxes will elevate your items. You will have items featured on these boxes, as well as items on the table. It creates amazing interest to the otherwise blah, flat table.
For even more interest and variety, or if you don’t have access to nice, white boxes, you can use plain crates or plain boxes and drape them with a nice white fabric.
And make sure you use different heights of platforms! You’re right back where you started if they are all the same level.
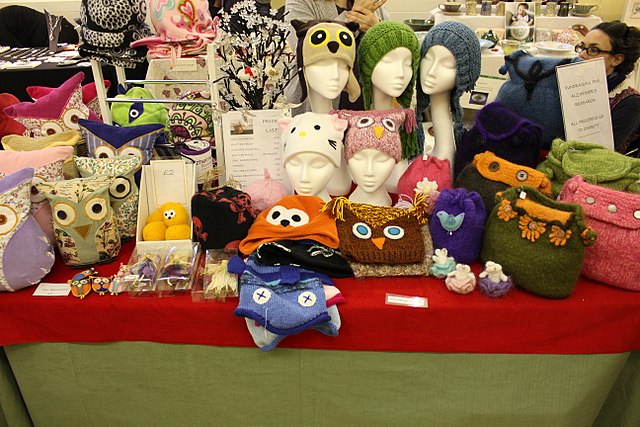
Kid Stuff

Purchase here: Kids Table and Chair Set
Kids are drawn to colorful displays and anything kid-related. Even if you don’t sell crochet items specific to children, you’ll want to have baskets with little giveaways that draw kids to your booth or table. Even better, if possible and room permitting, have a child table and a couple of kiddie chairs. Have some coloring pages and crayons to keep them occupied while mom shops your booth. [Be careful with the crayons though. You don’t want little ones swallowing or choking. That helper would come in handy here too!]
Accepting Credit Cards
You absolutely must be set up to accept credit cards. With mobile phones this is super simple!
Being able to pay with credit cards can be a deal maker or breaker with a lot of customers. Especially these days with mobile credit card readers so readily available.
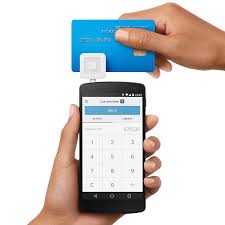
I recommend (and have used) Square. It is super easy to set up an account. You submit your bank information (totally secured). They send you a little square reader that you attach to your mobile phone. You swipe the credit card through the slot in the reader. A window on your phone allows the customer to “sign” for the transaction. A receipt is emailed to the customer. The cash is transferred to your bank account within a couple of days. Ta da! You have tremendously increased your sales potential!
Get your free credit card reader here: Square Free Credit Card Reader
Put Down your Phone!
Aside from using your cell phone for credit card transactions, stay off your phone! There is nothing more irritating than seeing a vendor yakking on their phone and ignoring their customers. This is the height of rudeness.
Engage with the customers without being in their faces. Make yourself accessible and available to answer questions or engage in light conversation. Don’t become so wrapped up in one customer that you don’t notice the one trying to get your attention.
As mentioned at the start, I have created a printable cheat sheet with the steps detailed in the post. This colorful PDF is accessible in the Resource Library that is password protected for my select readers (YOU!). Get the password by entering your name and email below. The password will be found in the Welcome email you will receive upon signing up. Enjoy!
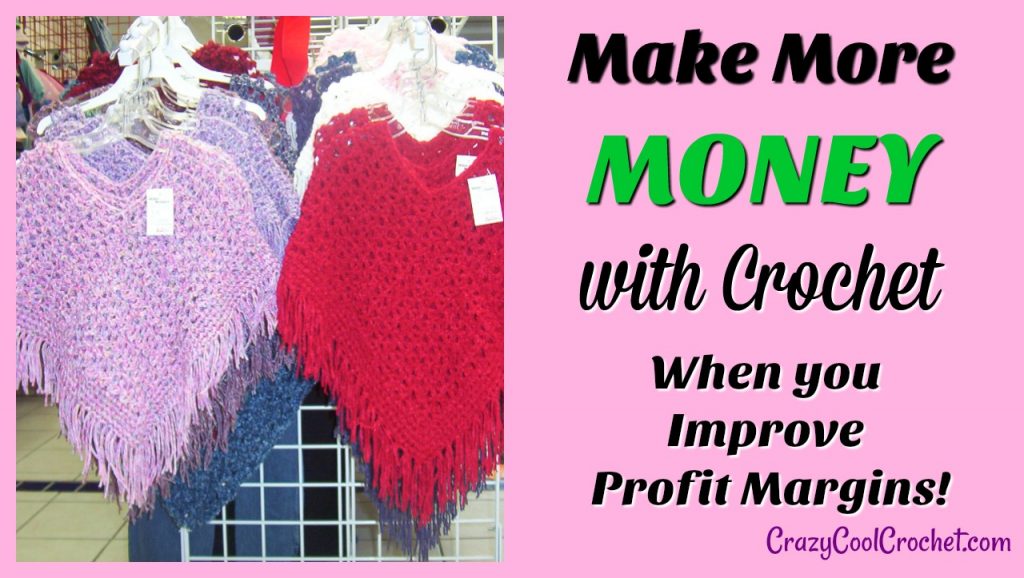
Learn how to improve your profit margins to make more money!
You May Also Like

[…] crochet pillow cover is absolutely perfect for those of you who sell at craft fairs! The envelope flap opening allows for fast, easy removal of the pillow insert. This means you need […]
Thank you so much for your information. It has been quite helpful. I am presently doing a lot of crocheting and knitting for a fair that has been scheduled for November here in NC. The info you provided on how to make your booth more appealing was quite helpful. Also, I like the easy pillow patterns that are quick to make and I believe will be a great profit item. How do you price your products?
Hi Denise,
I”m so glad this was helpful!
Pricing is probably the most difficult question to answer. There are so many variables and so many different ways that people price their product. Here is an excerpt from a post on improving profit margins:
“You also need to consider your labor hours and overhead (utilities, taxes, rent, etc). If you are treating your crochet sales as a business and not just a hobby…you need to incorporate your cost of doing business into the price.
After taking all that into consideration, add on a markup for profit.”
Here is the link to that post where you can learn more: https://crazycoolcrochet.com/improve-profit-margins-to-make-more-money/
I hope this helps and good luck with your craft fair!
Sylvia
CrazyCoolCrochet.com
[…] is the best season for craft fairs and craft shows people are very much in the mood to fill their homes with fall colors and decor. […]
Love all of your tips. Especially the tip on the crafter with the black set. I have attended several craft fairs and the ones that have the darken set up have always had less traffic, now I know why. Thank you for that big tip.
I also want to let you know that the Tips On Successful Craft Fair is downloading as a PDF and not as a document. I had to save it to my photos.
Hi Lola,
I’m so happy you found this post helpful! Thank you so much for taking the time to let me know.
As for the “Tips” PDF, it does say in the post that it is a “colorful PDF”. Hopefully you will still find it handy.
Best,
Sylvia
CrazyCoolCrochet.com